Asides

  • Resolving MHUB-OS “Critical Error”

    IMG_1329

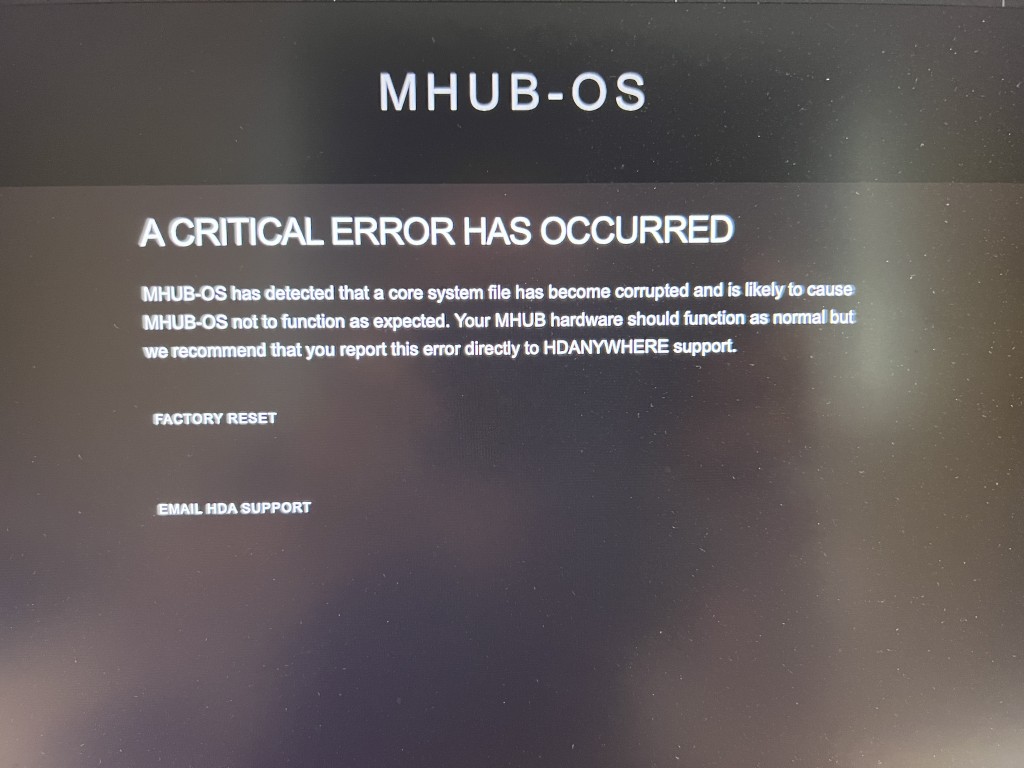
    If you notice that uControl has stopped responding or your control system is no longer controlling your MHUB or HDA device and you see a screen similar to the one above when you visit MHUB-OS’ IP address then it is likely that a core file within MHUB has become corrupted or is missing.

    Generally, this error affects systems that are on very early versions of MHUB-OS, usually versions 7 or lower (at the time of writing 8.15+ is considered stable). On systems that are already on 8+ it is possible to restore the system sucessfully from a backup but earlier ones will need a HDA technician to check your system to identify the damaged system file and repair it.

    If your system is out of warranty then there is a charge of 1 unit for this repair. Please contact HDA first to arrange a technician slot.

  • Updating OS through uControl

    Your HDA device will be supplied with the latest stable software version already installed. To access the latest features or maintain your system, it is recommended that you perform periodic updates to the OS. This process must be done manually as we do not push updates to systems automatically. Ensure that your system has access to a good internet connection and that power to your HDA device is stable during the process.


    In this support article:


    If you are not connected to a device

    1. Open uControl app

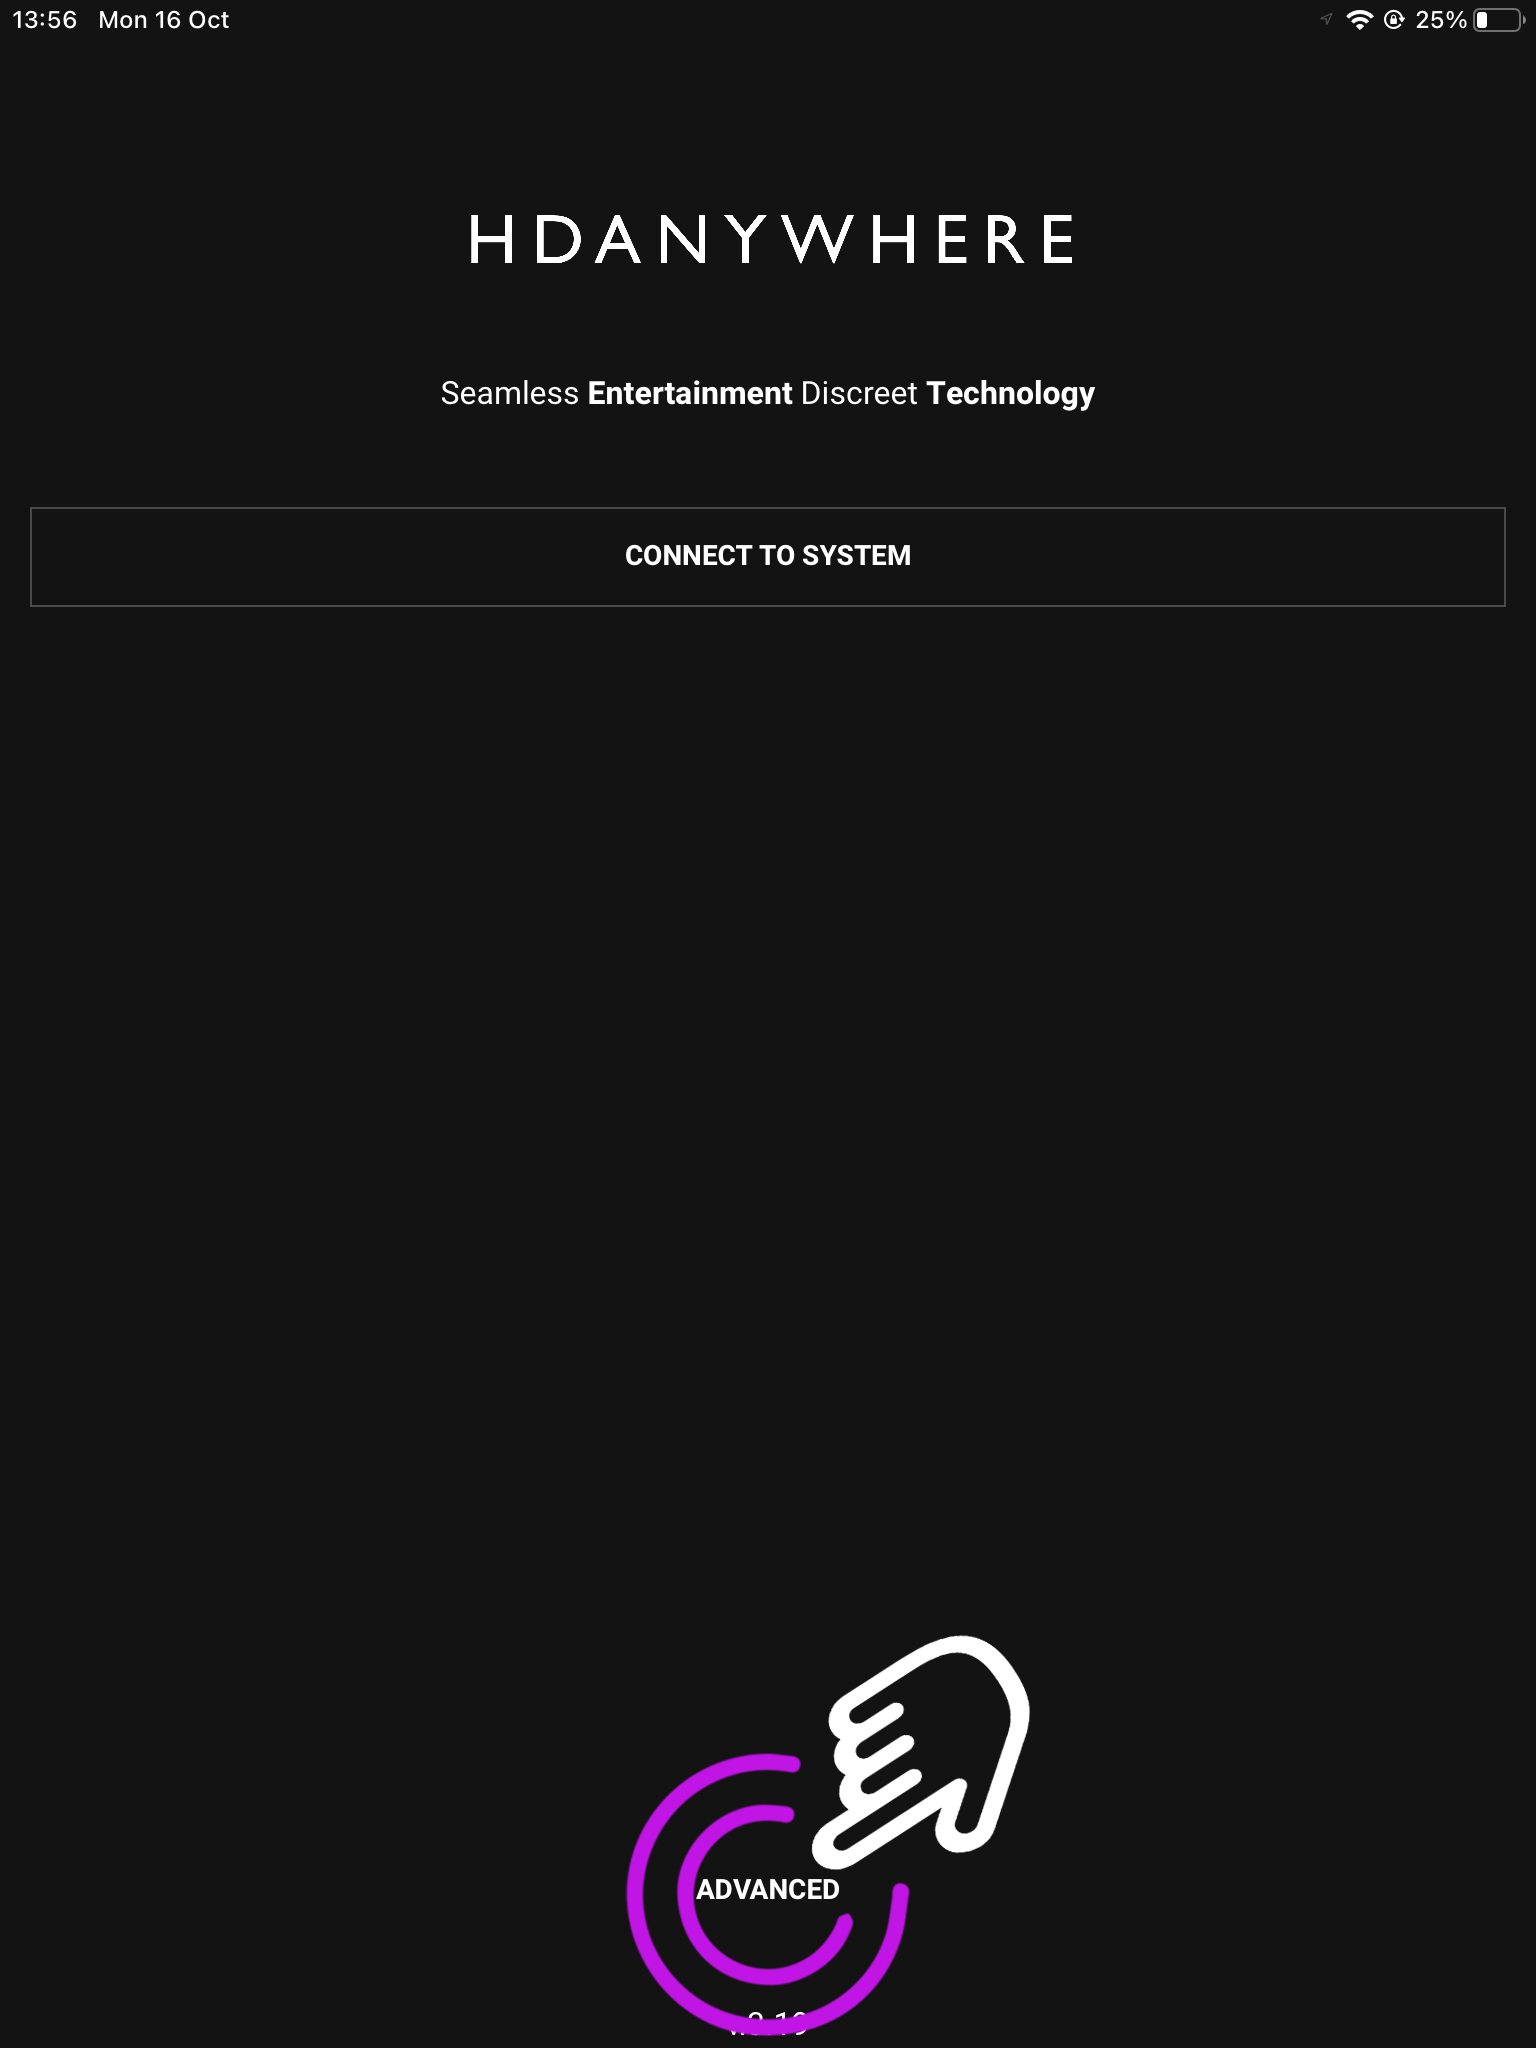
    Launch uControl and you will see the home page.

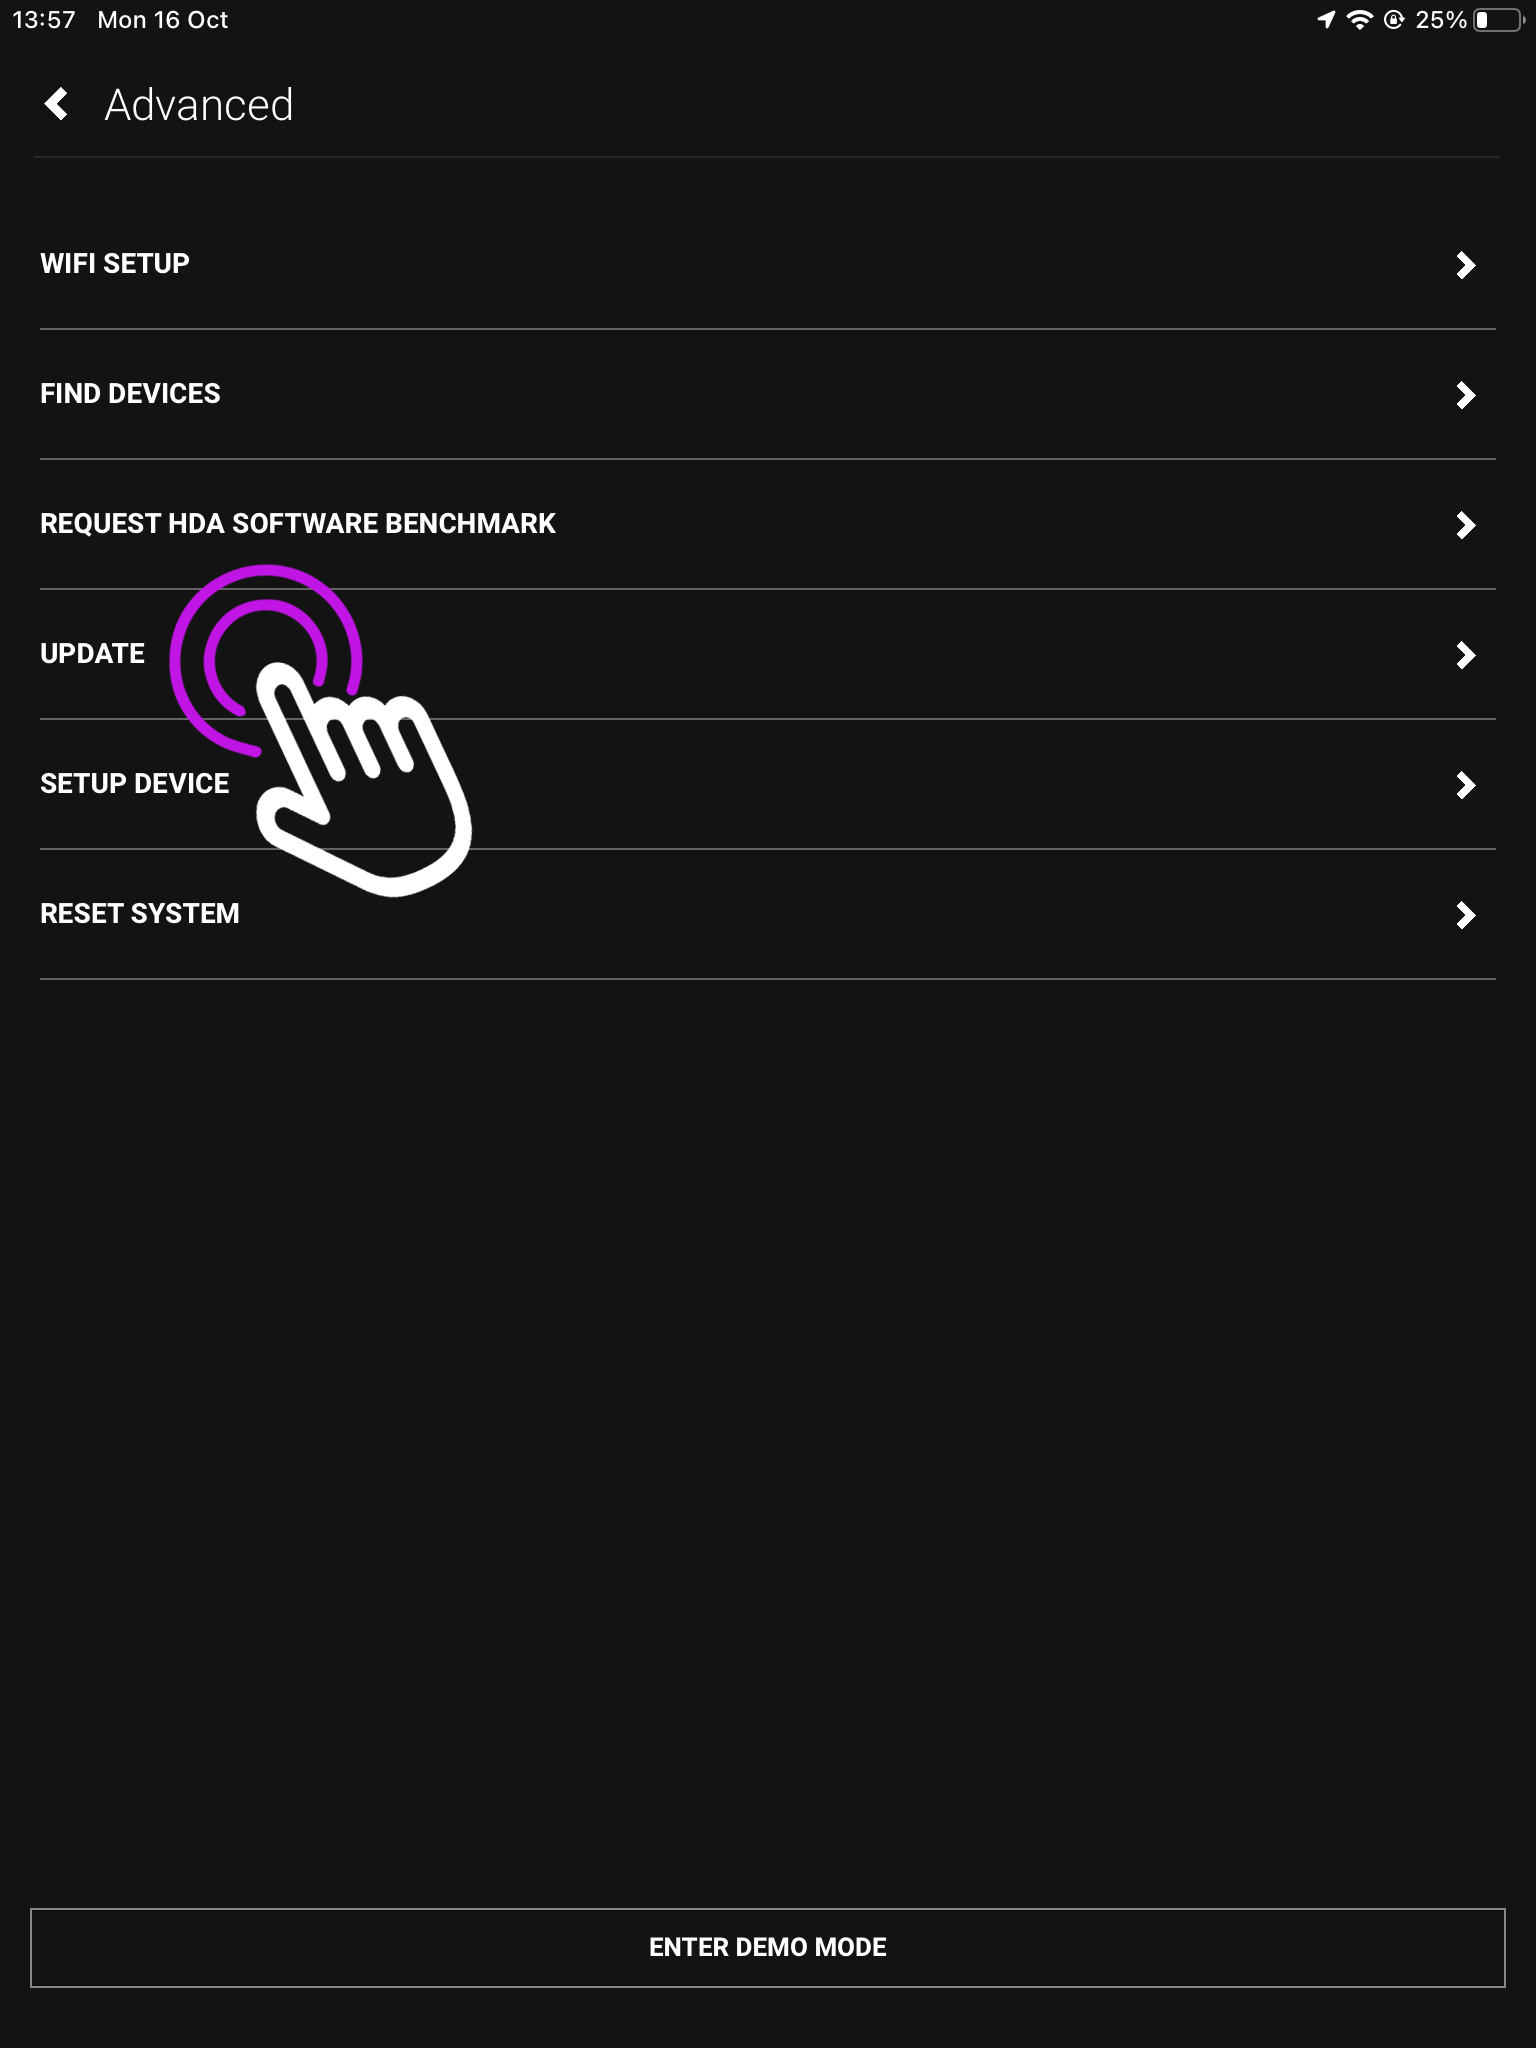
    You now need to press advanced.

    2. Press “Update”

    This is the advanced screen where you can find your devices, connect over WiFi, reset your system and more.

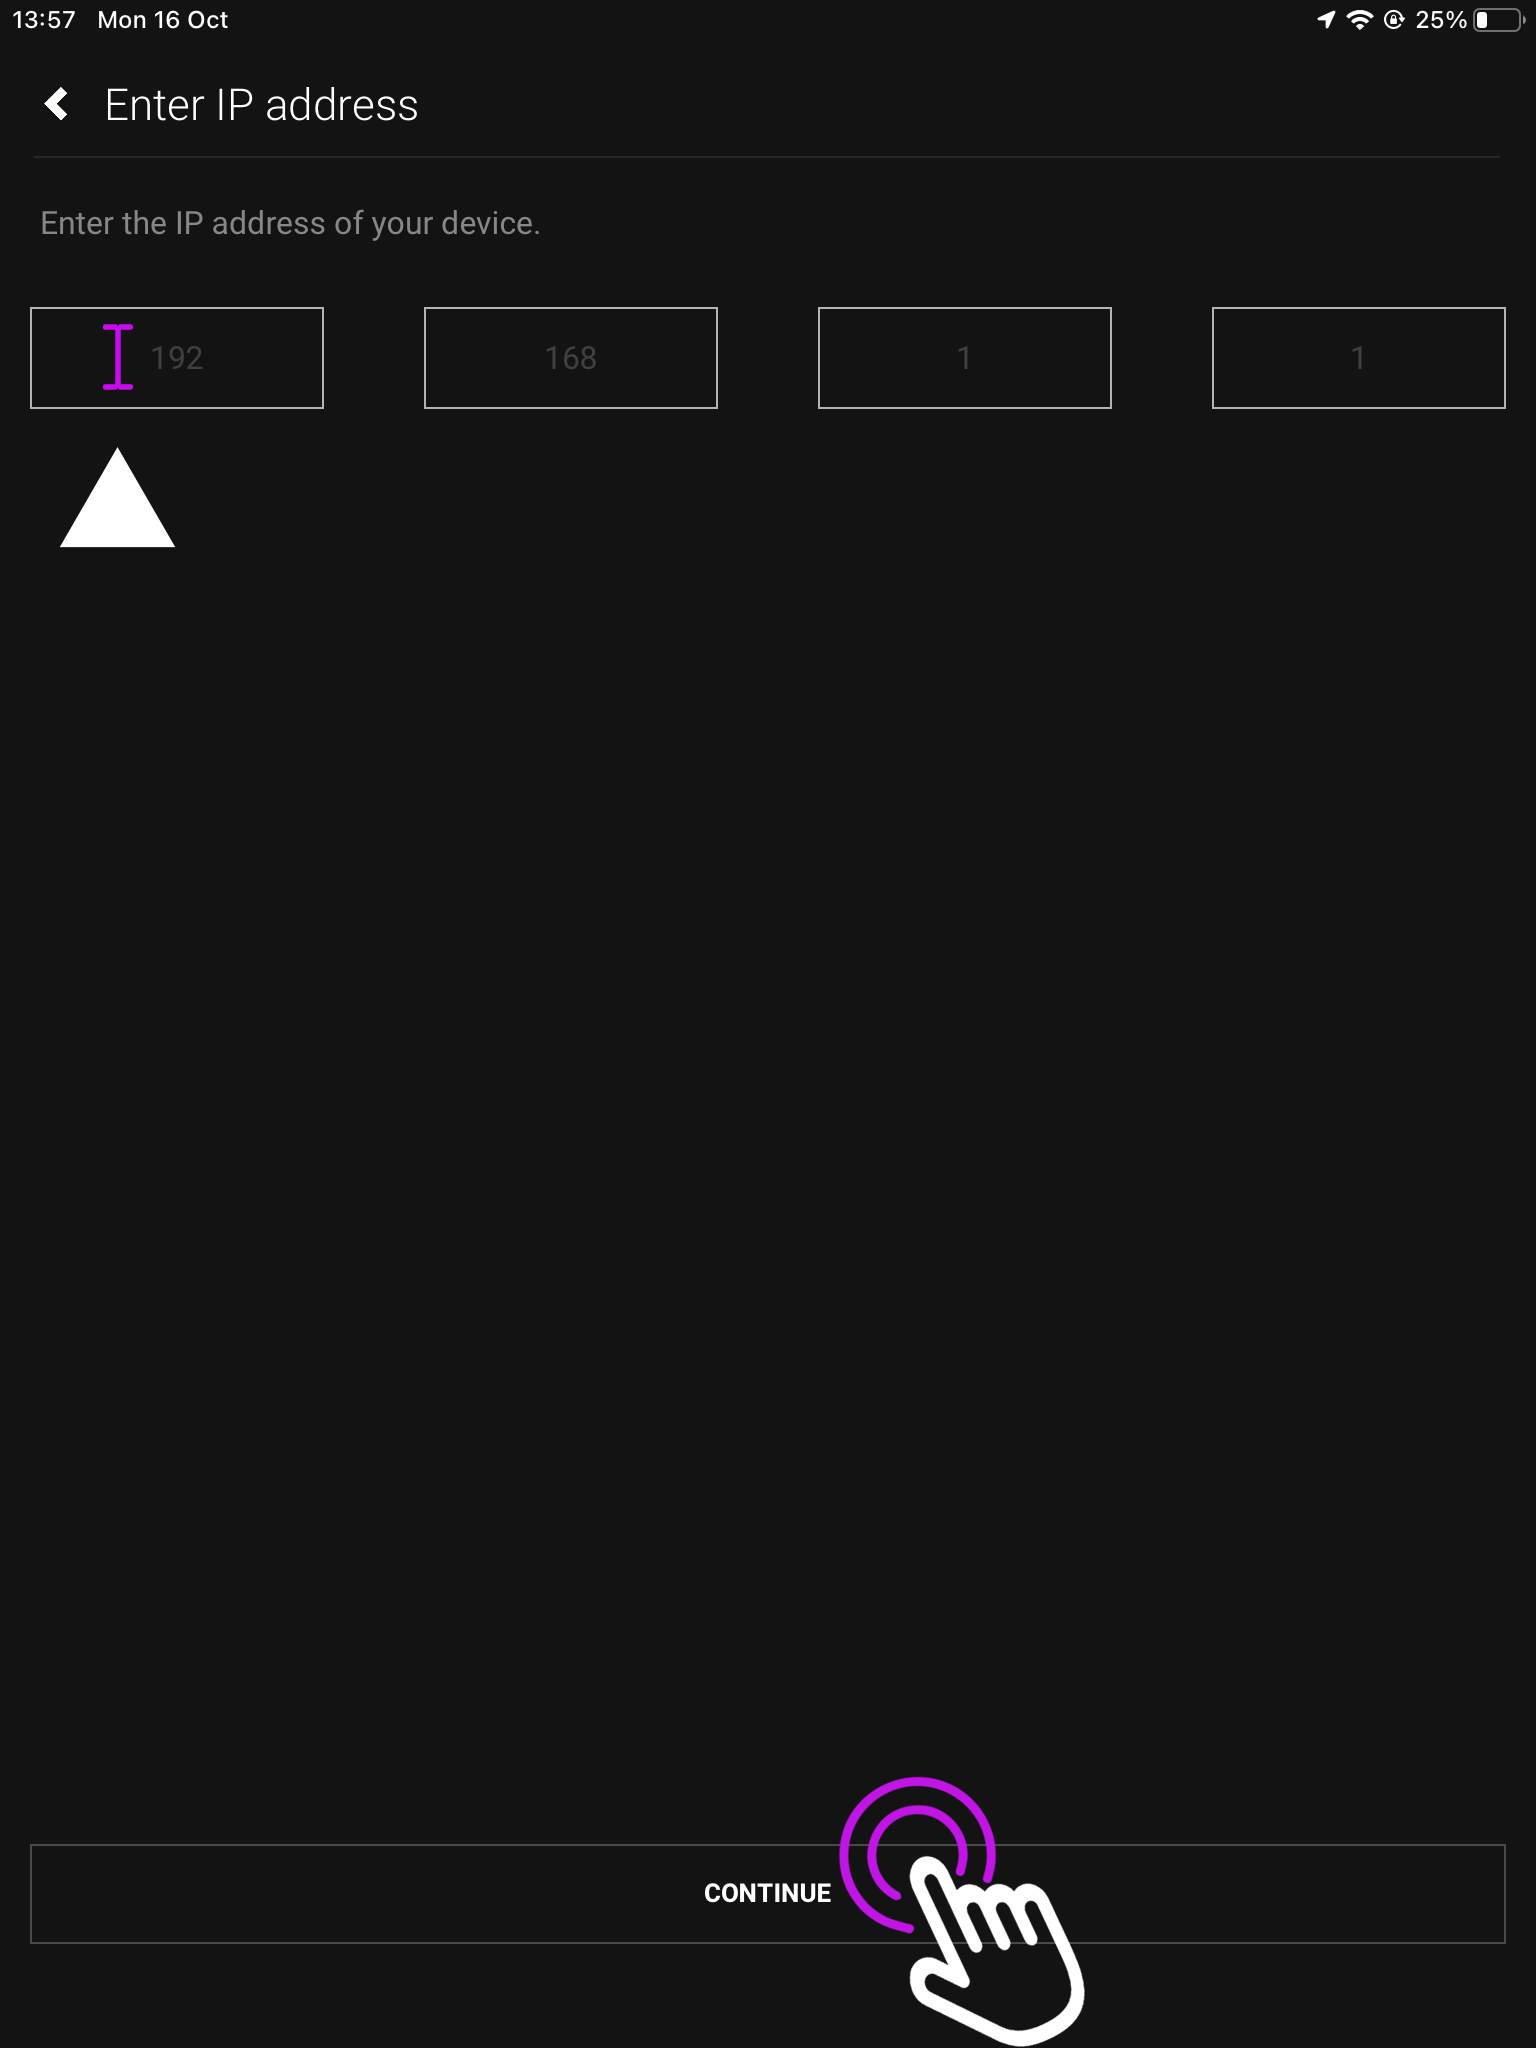
    Your IP address will be needed here so uControl knows which device is looking for an update.

    3. Enter the devices IP address

    If you don’t have this you can get it by finding the IP address of your device.

    Once you have typed in your IP address, press “Continue”.

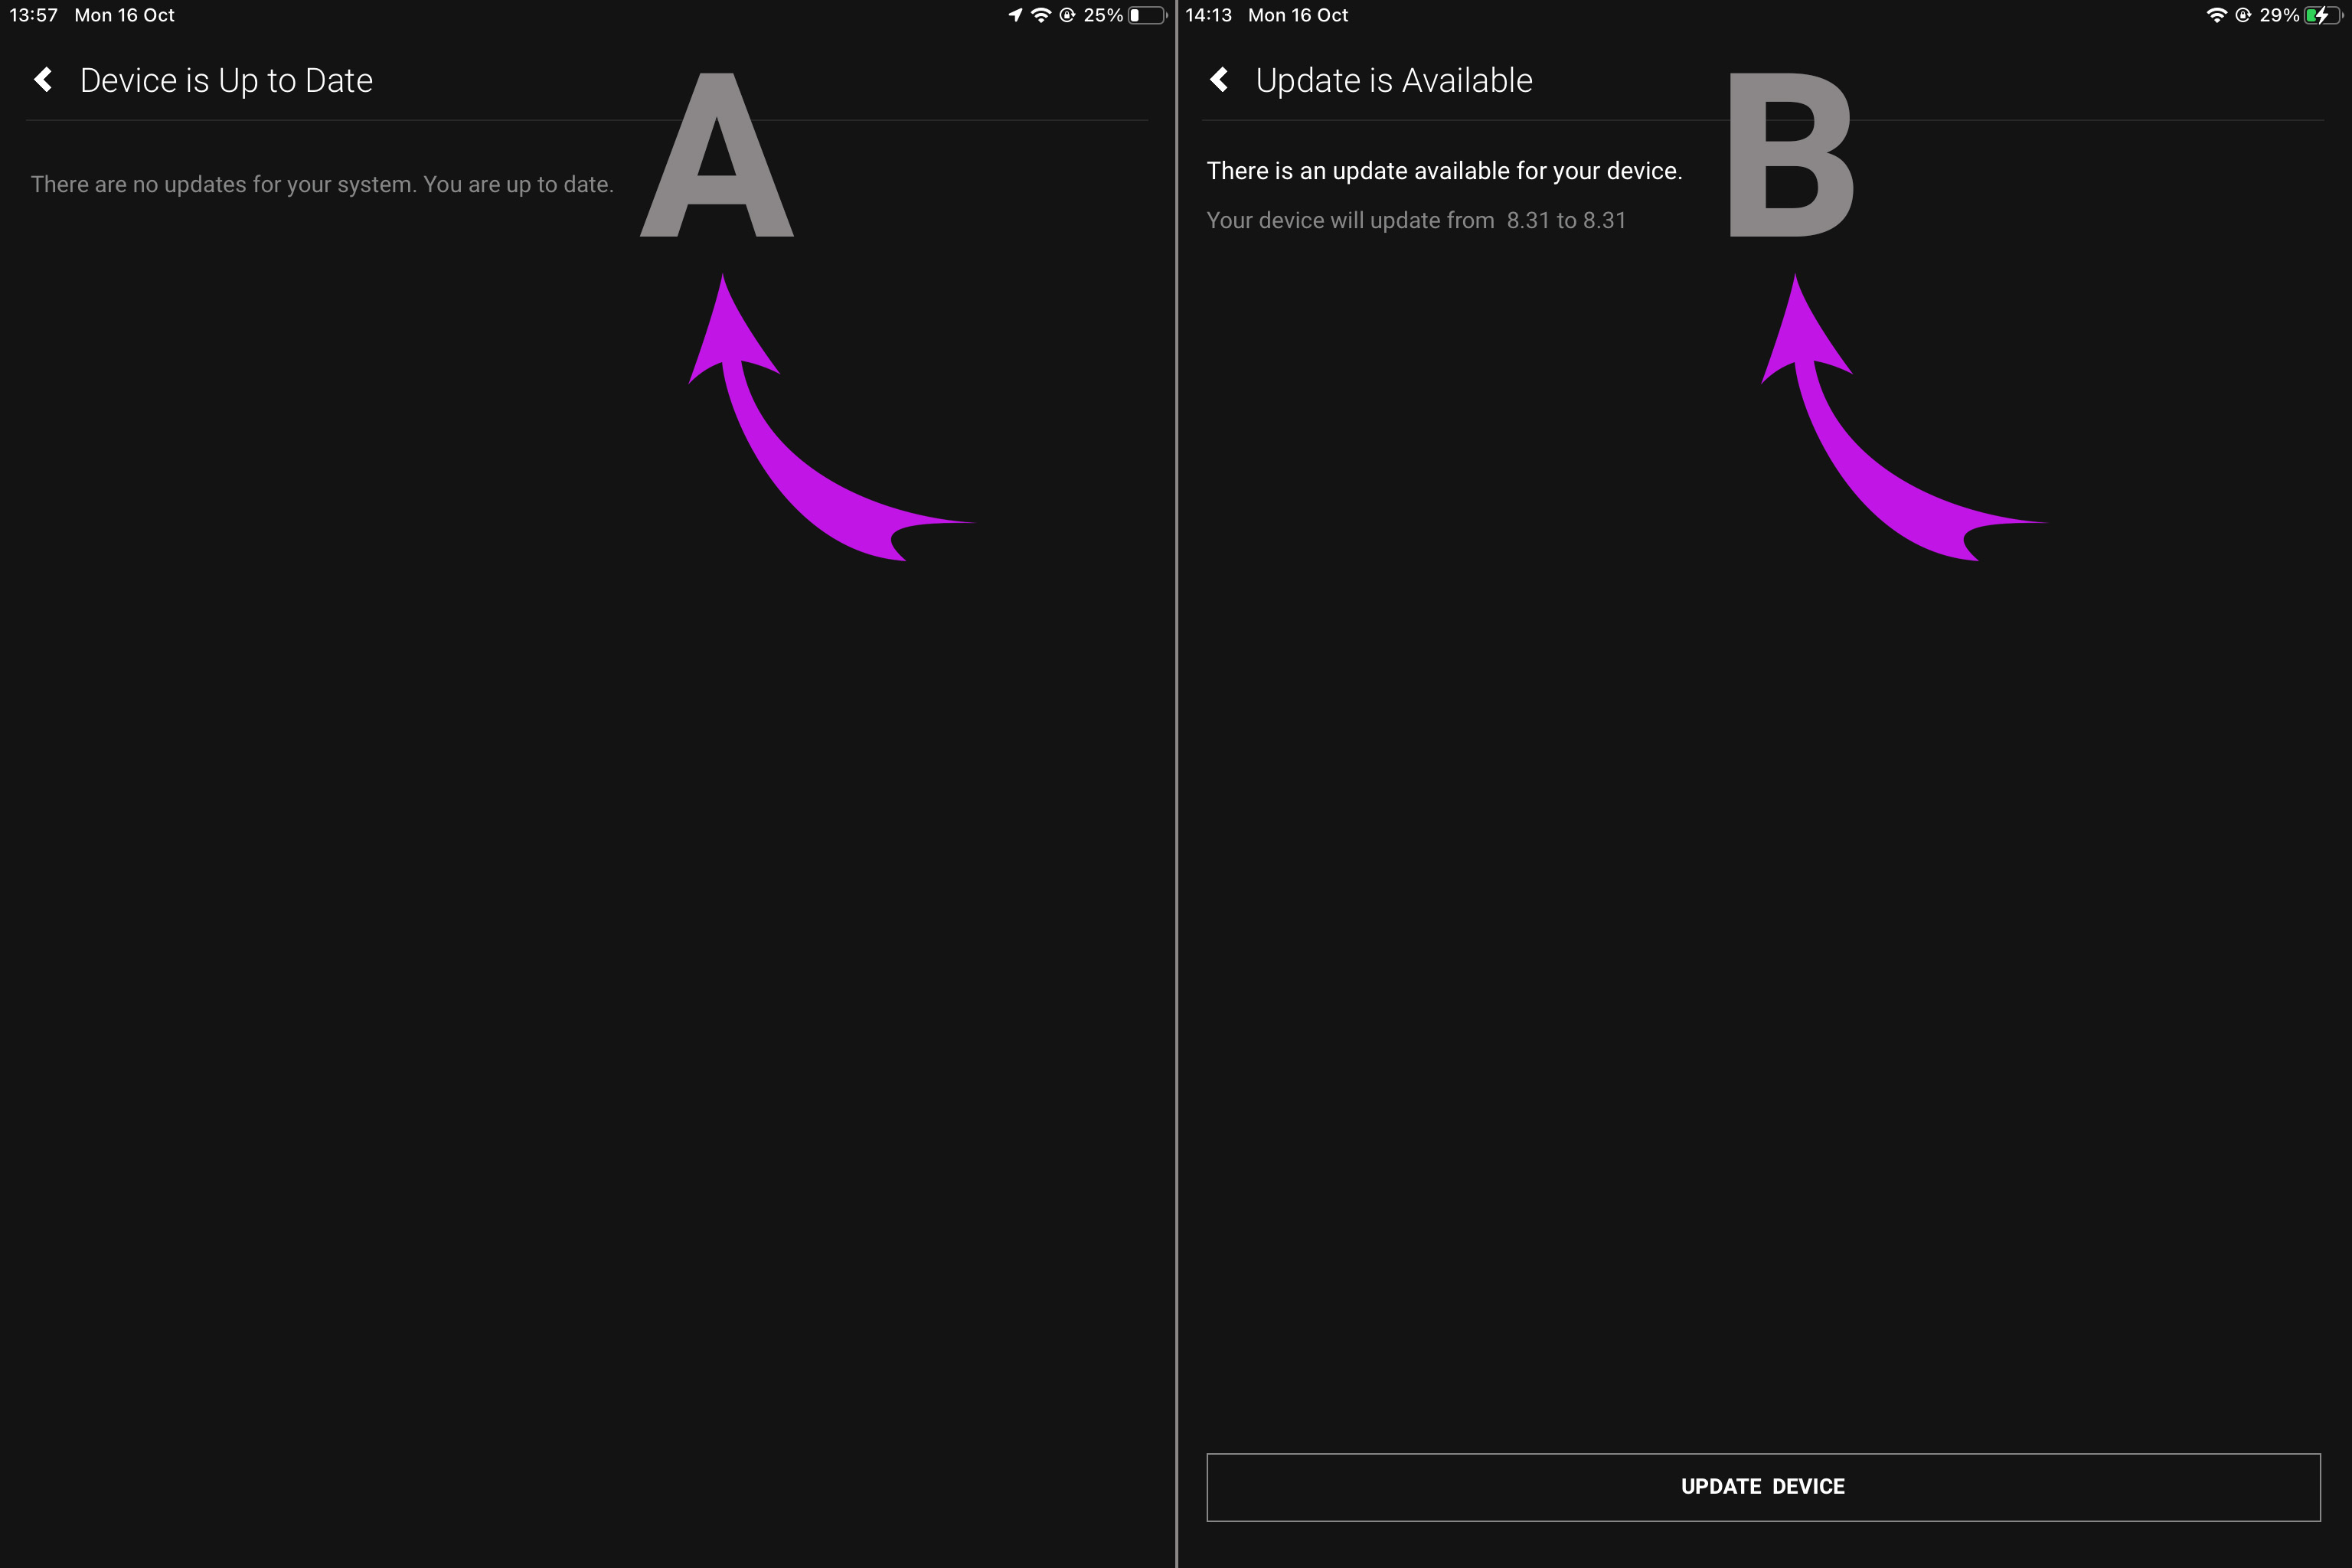
    4. Updating your device

    A. If there is an available update press “Update Device”.
    B. If your device is already up to date, exit this page.

    If your HDA device has an issue that prompted you to update, but it is already up to date please contact support.

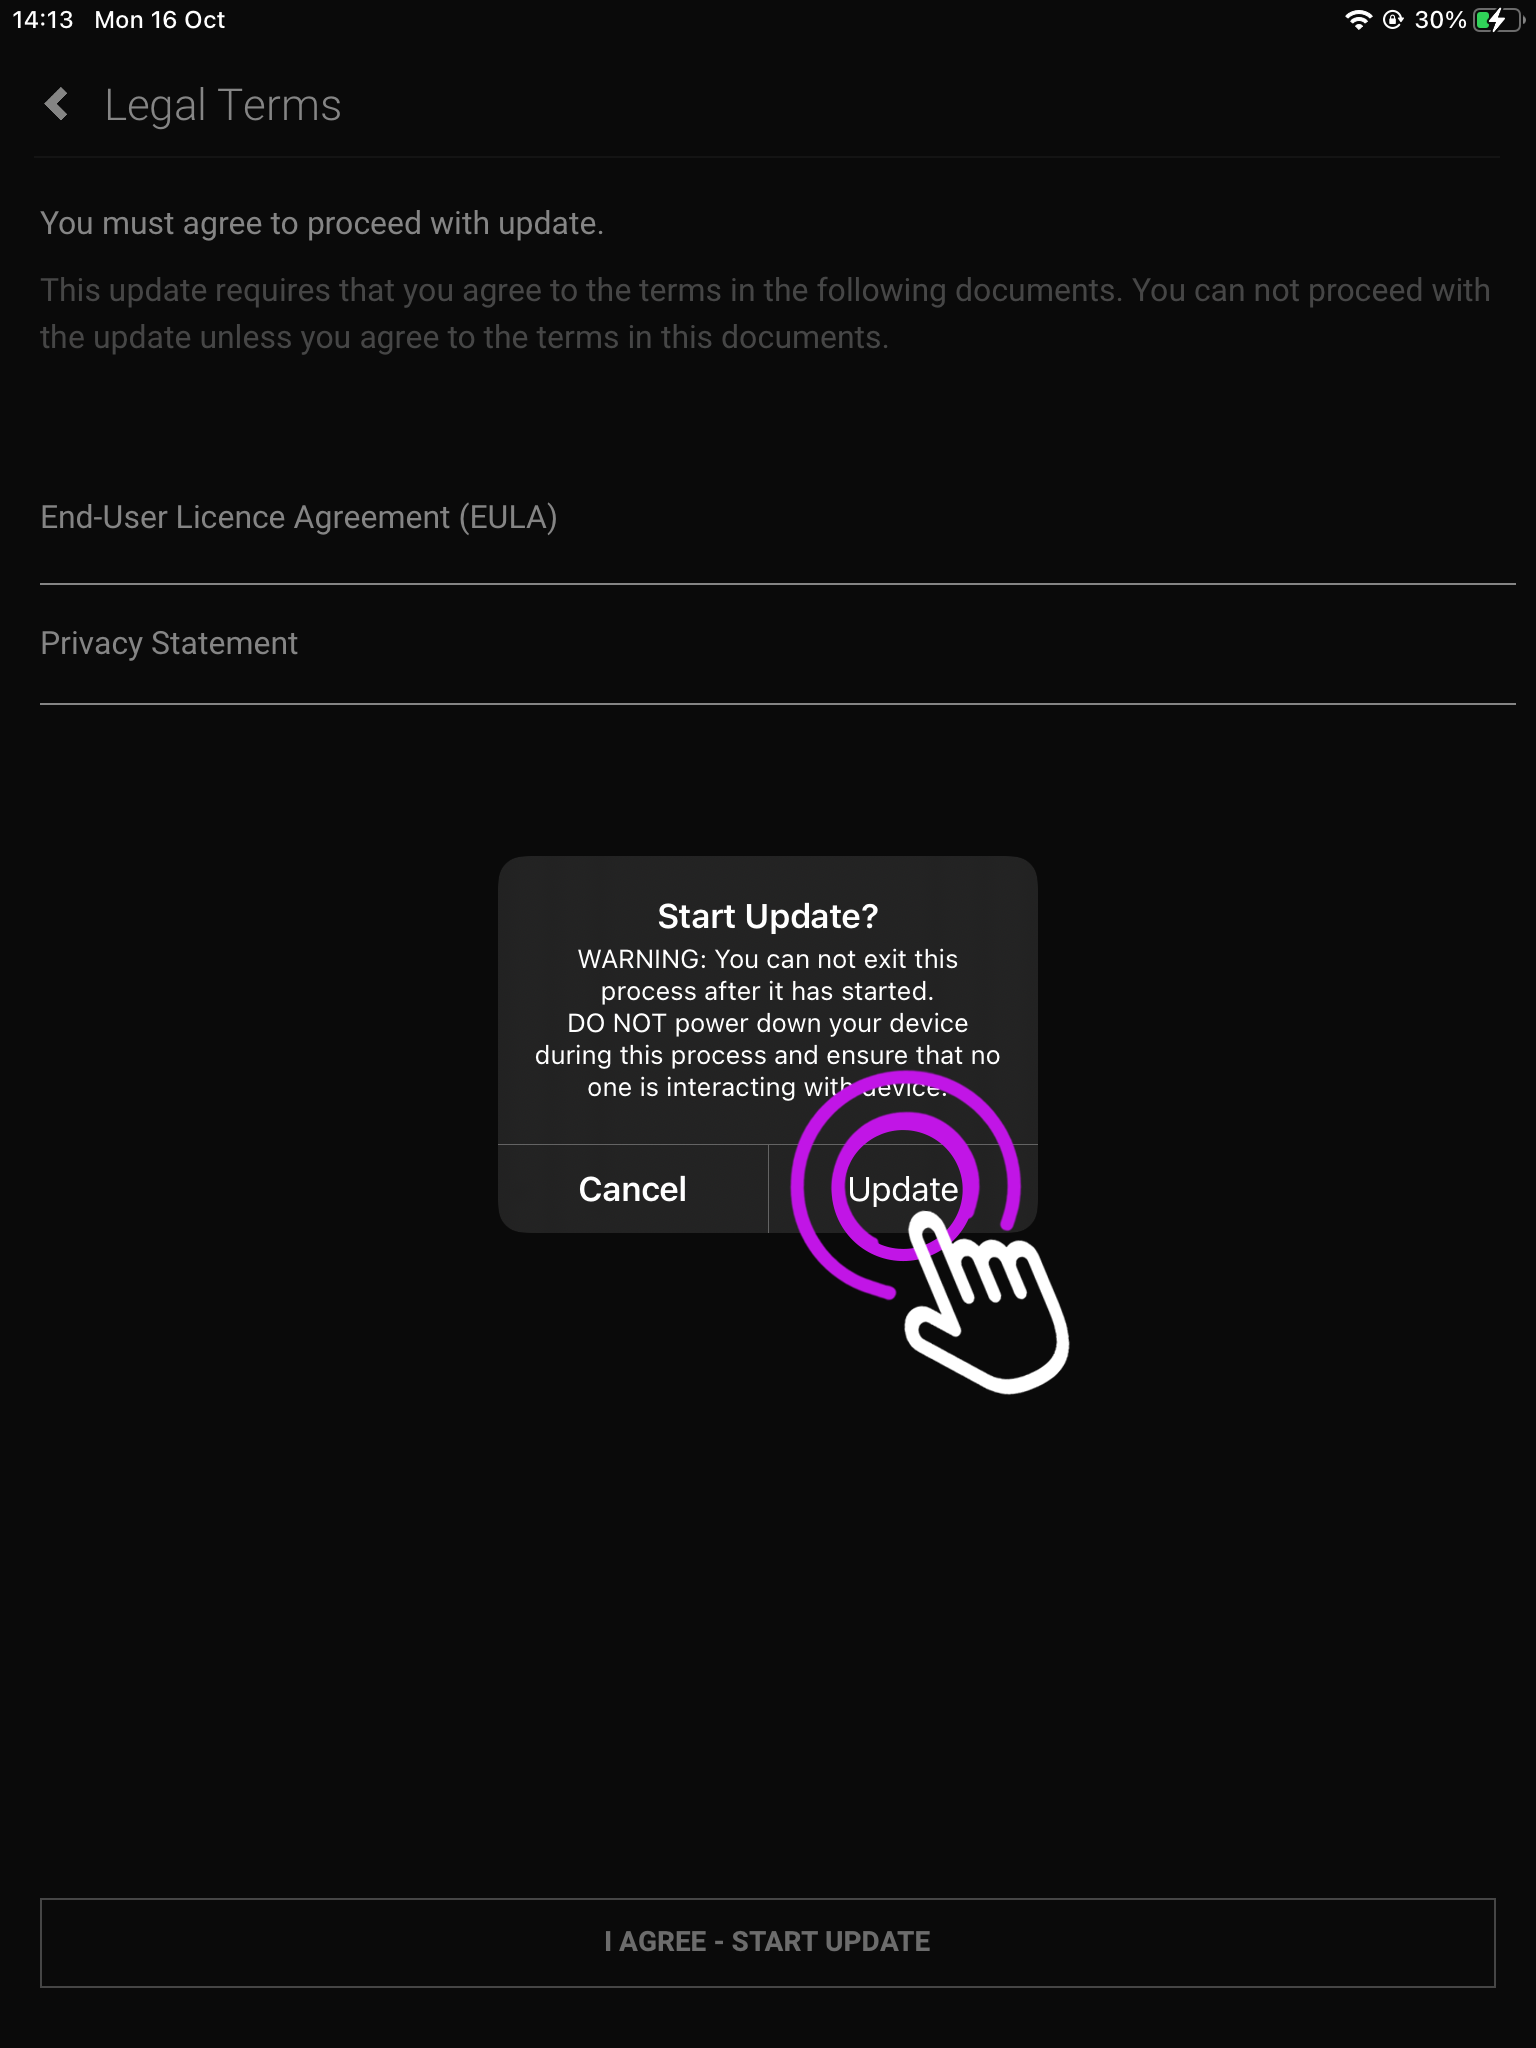
    5. Terms and Conditions

    To proceed accept the End User Licence Agreement (EULA) and Privacy Statement.

    For more information click on the terms.

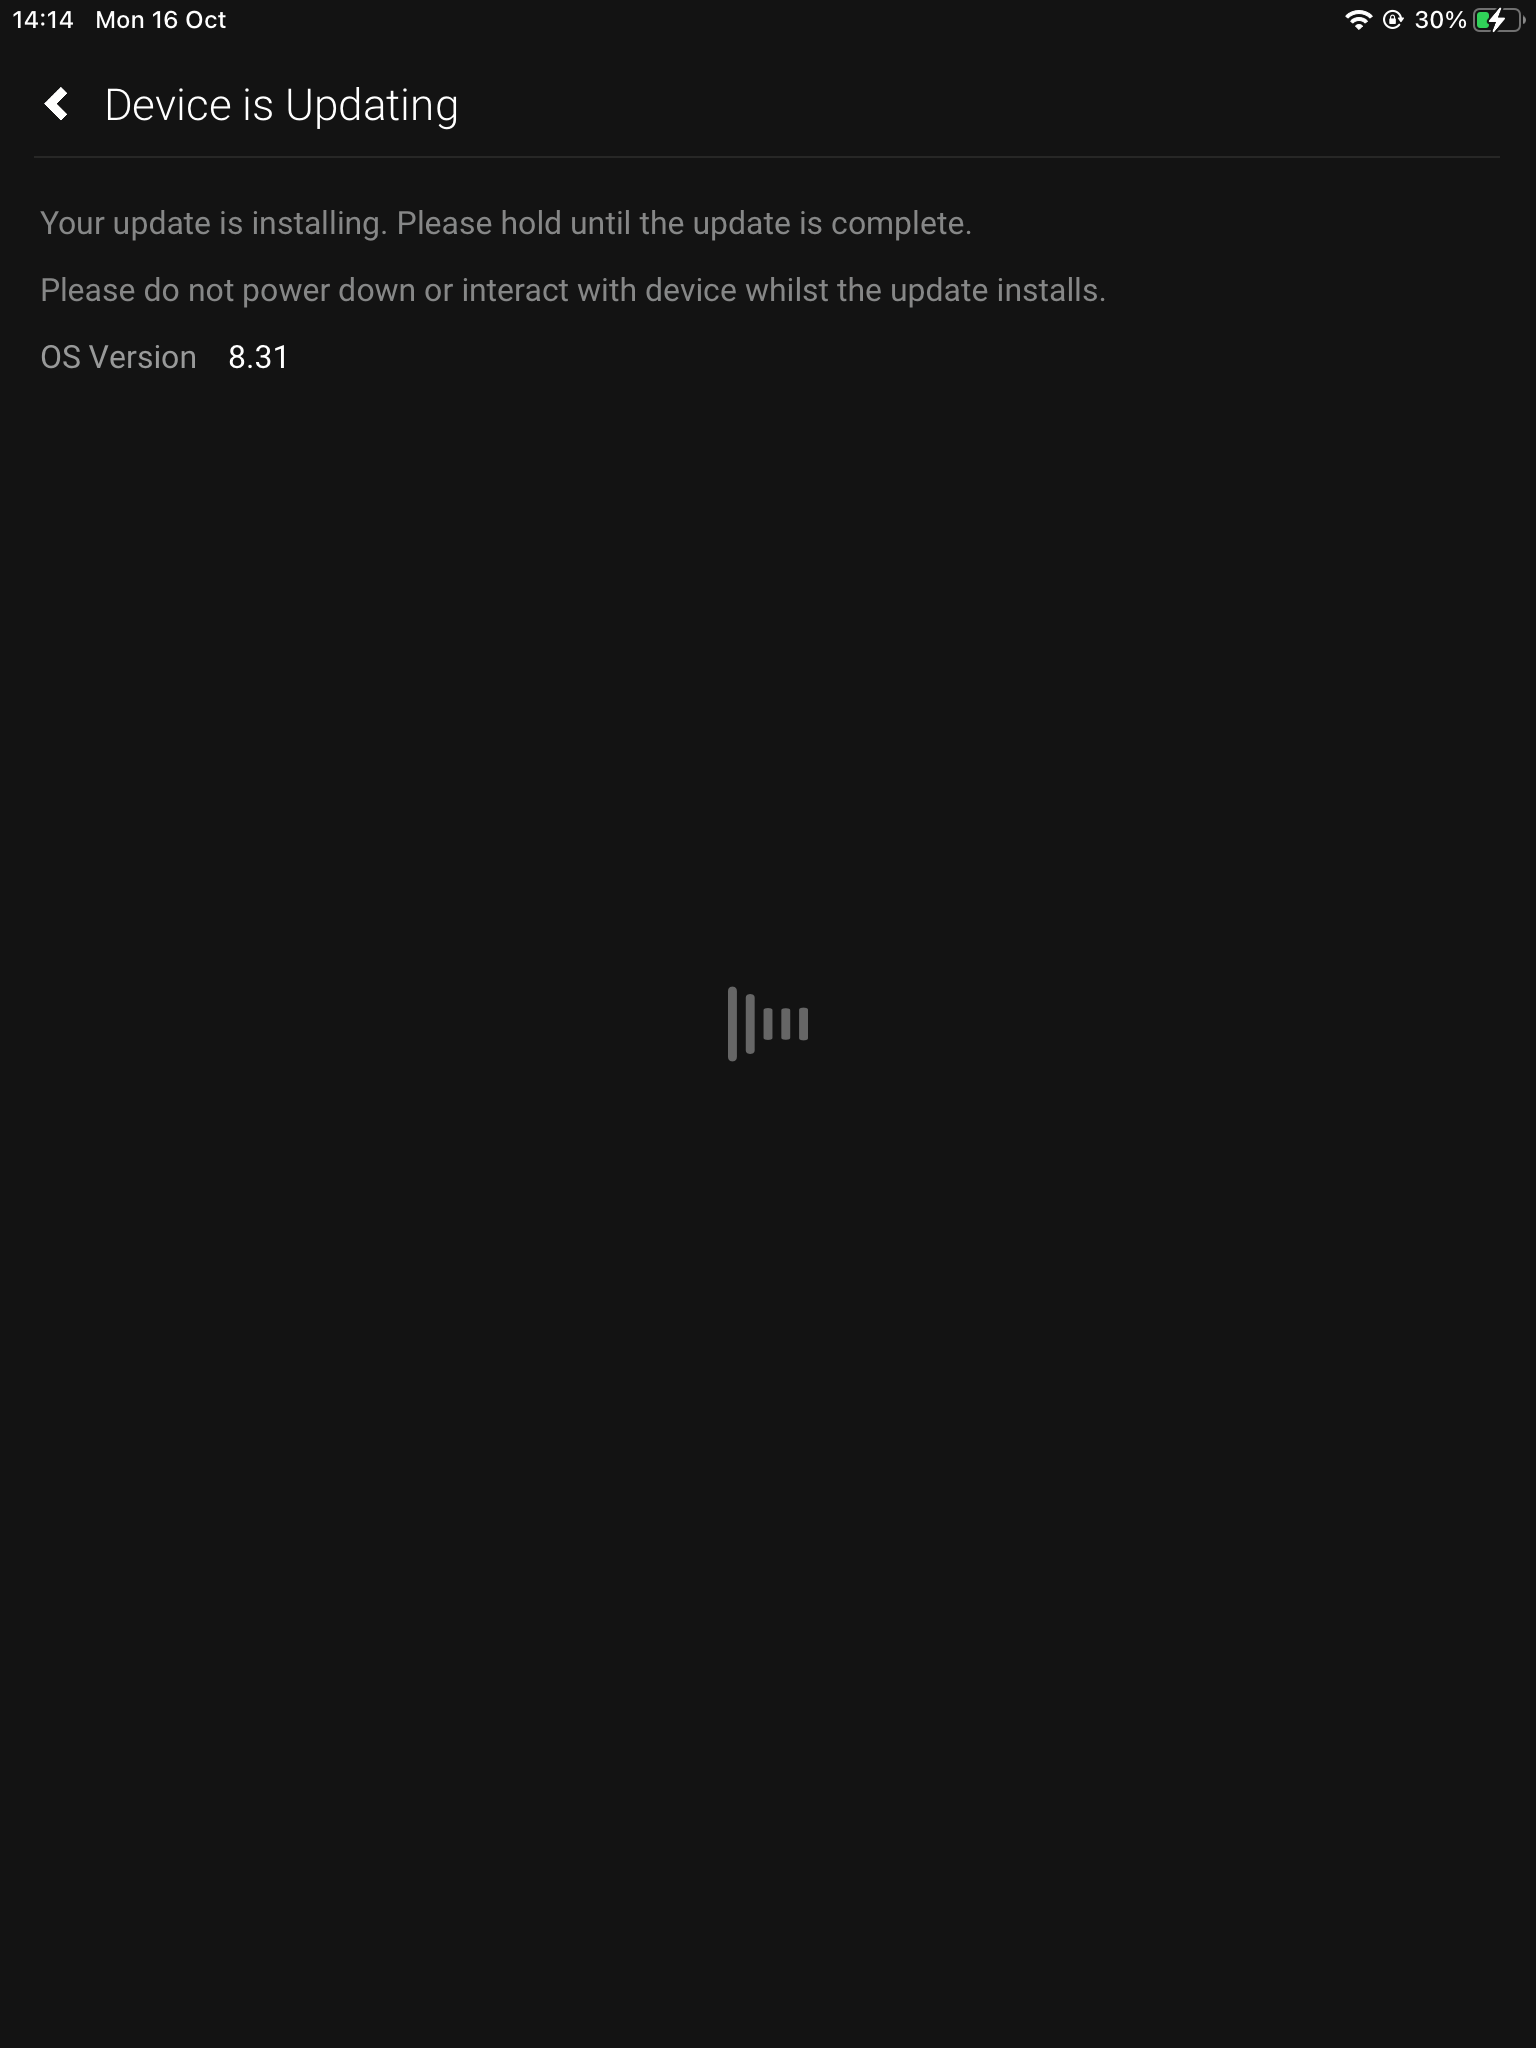
    6. Update begins

    This process can take up to 5 minutes, however, depending on your network it could be longer.

    Please do not switch off your HDA device whilst updating.

    7. Update completed

    uControl will display your OS Version.

    Press “Update Finished”.

    If you are connected to a device

    1. Open up uControl

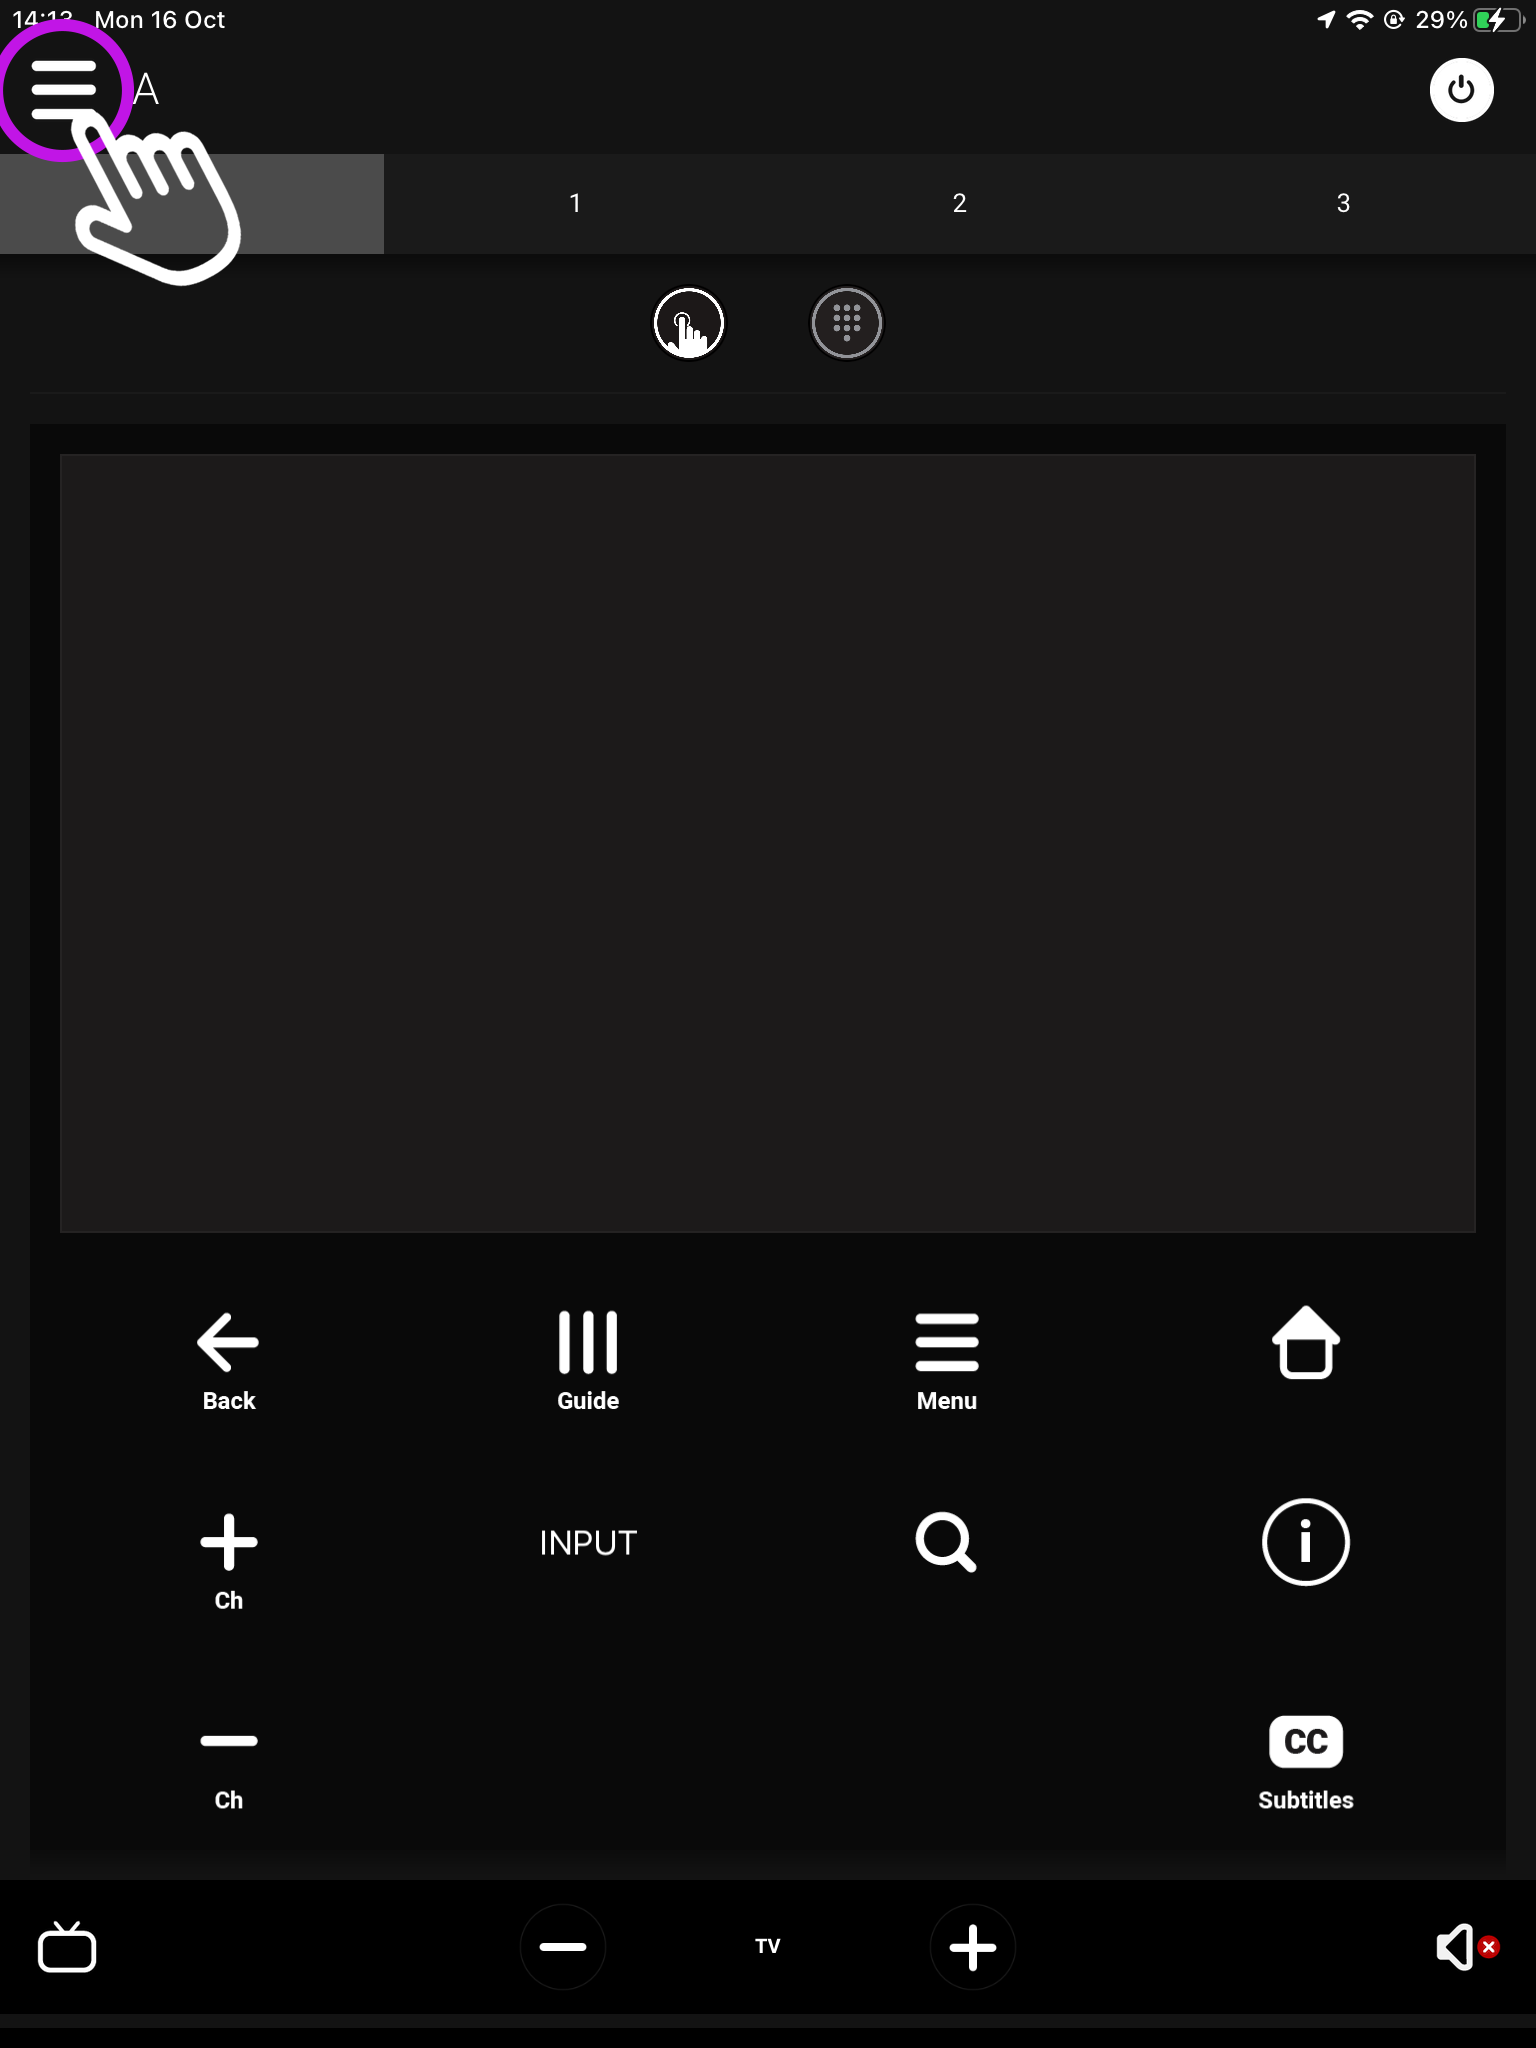
    If you’re already connected to a system then you will need to access uControl’s settings. From the main screen you will see something similar to this (see below). From here, look for a menu icon (three horizontal lines) in the top left corner, press that to reveal the Zone selector and Zone control menu.

    What you see on the main screen may differ, however, the three lined menu bar will still be there.

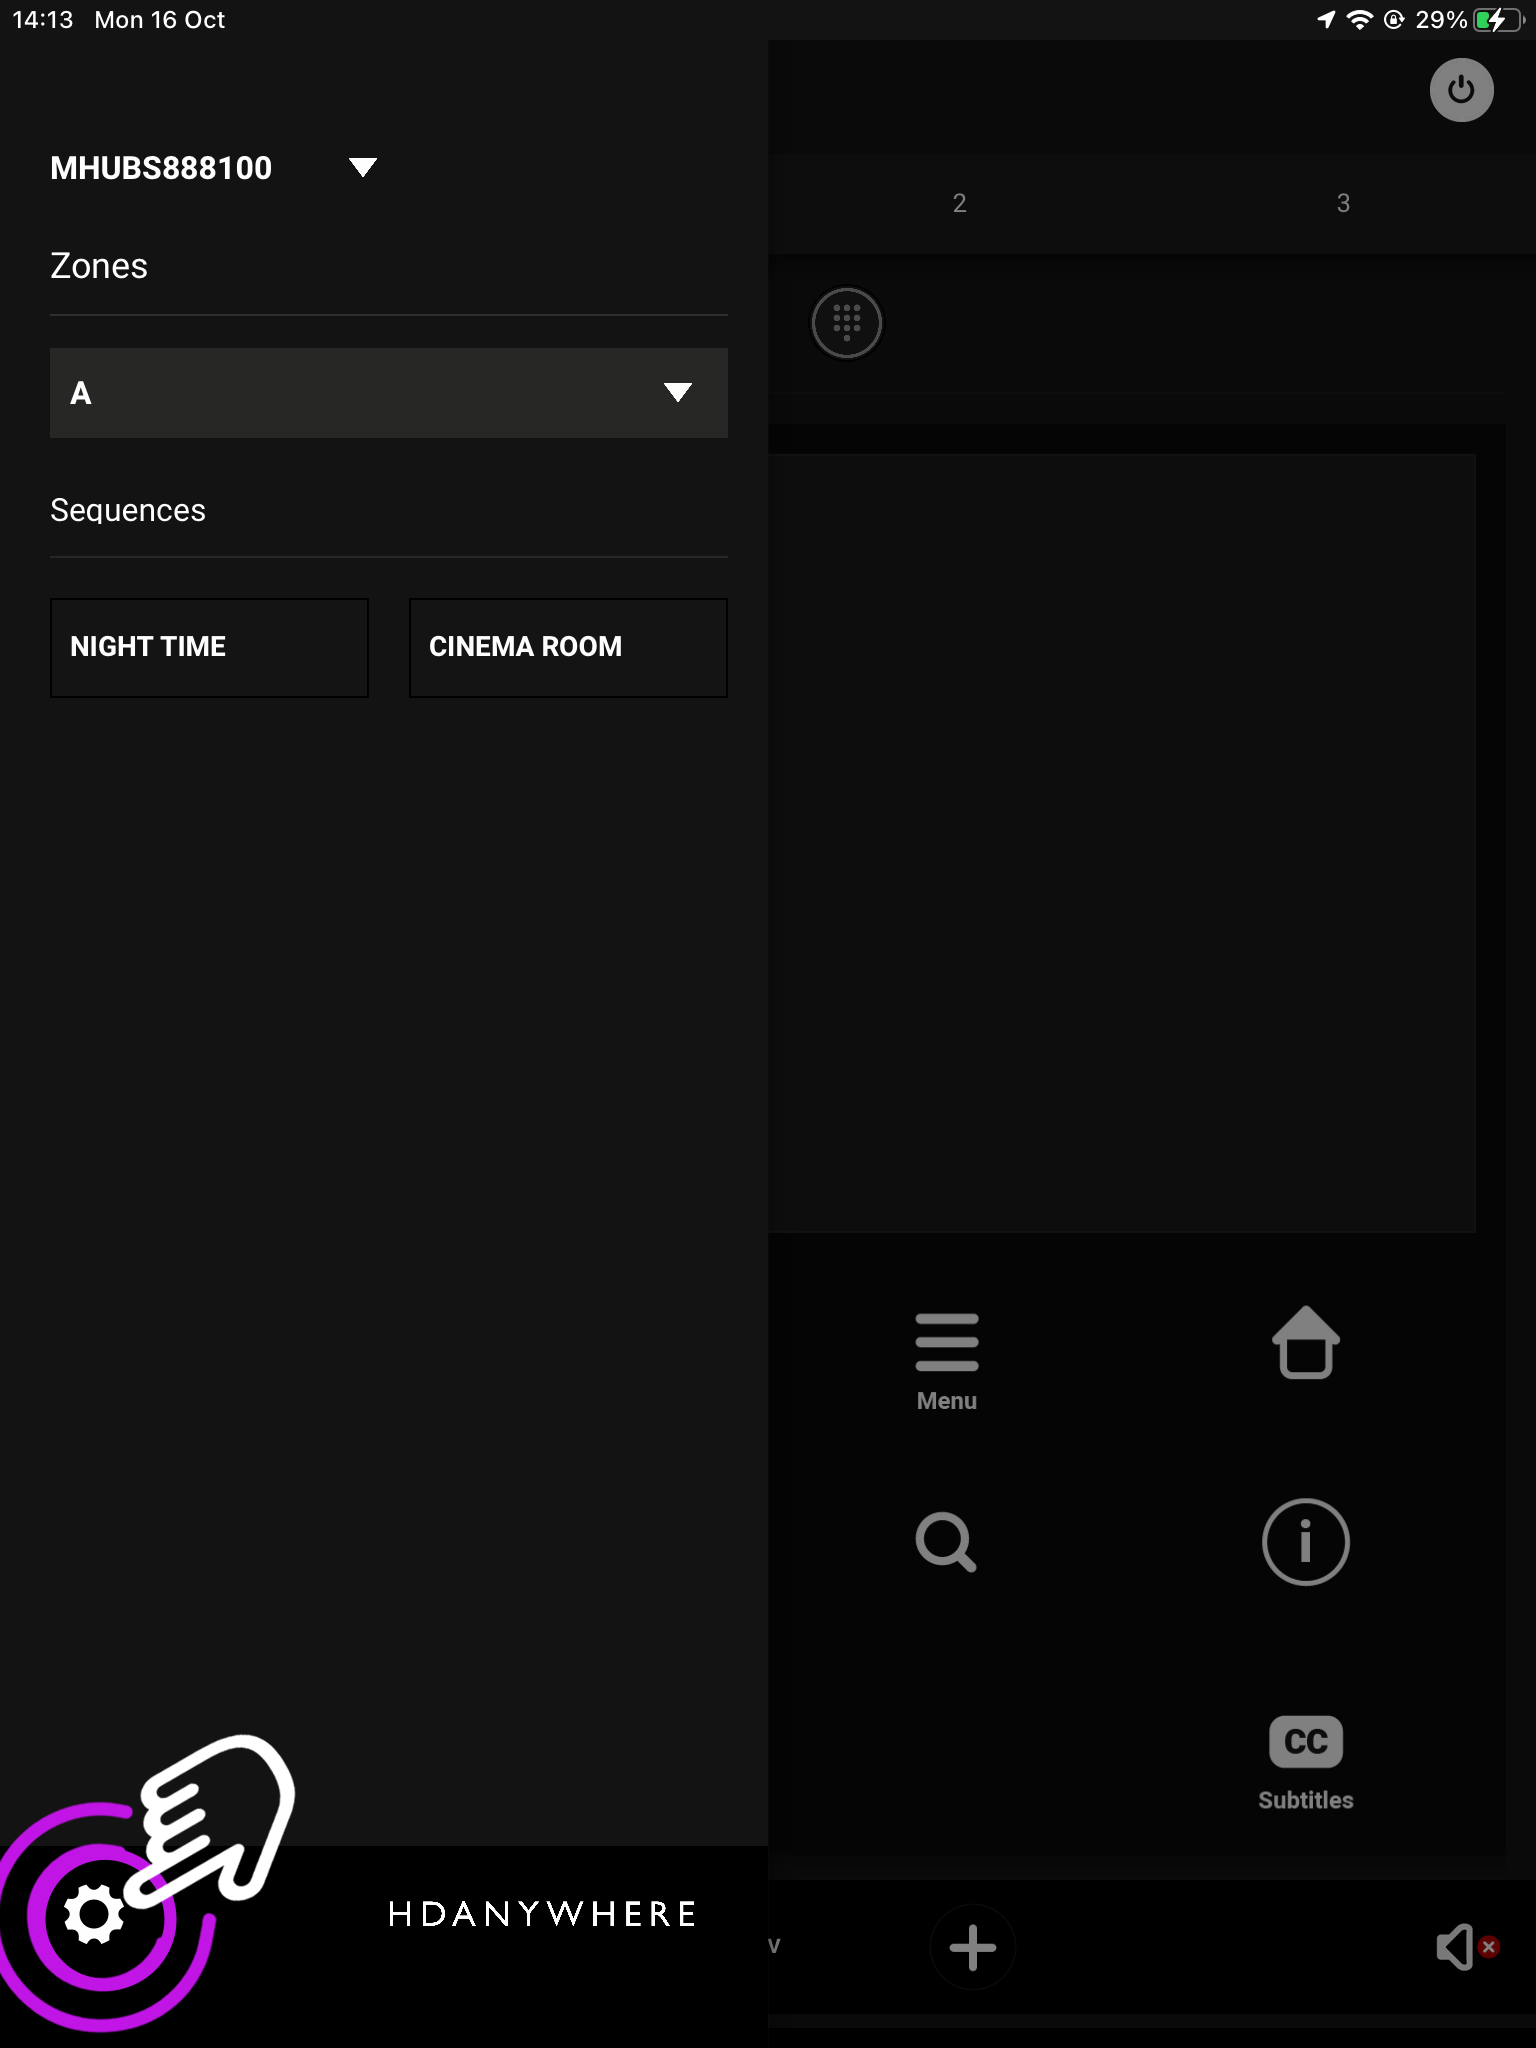
    2. Navigate to your settings

    Look for the settings icon located in the bottom left corner.

    The icon may vary depending on your mobile devices size, however, it will still be in the bottom left corner.

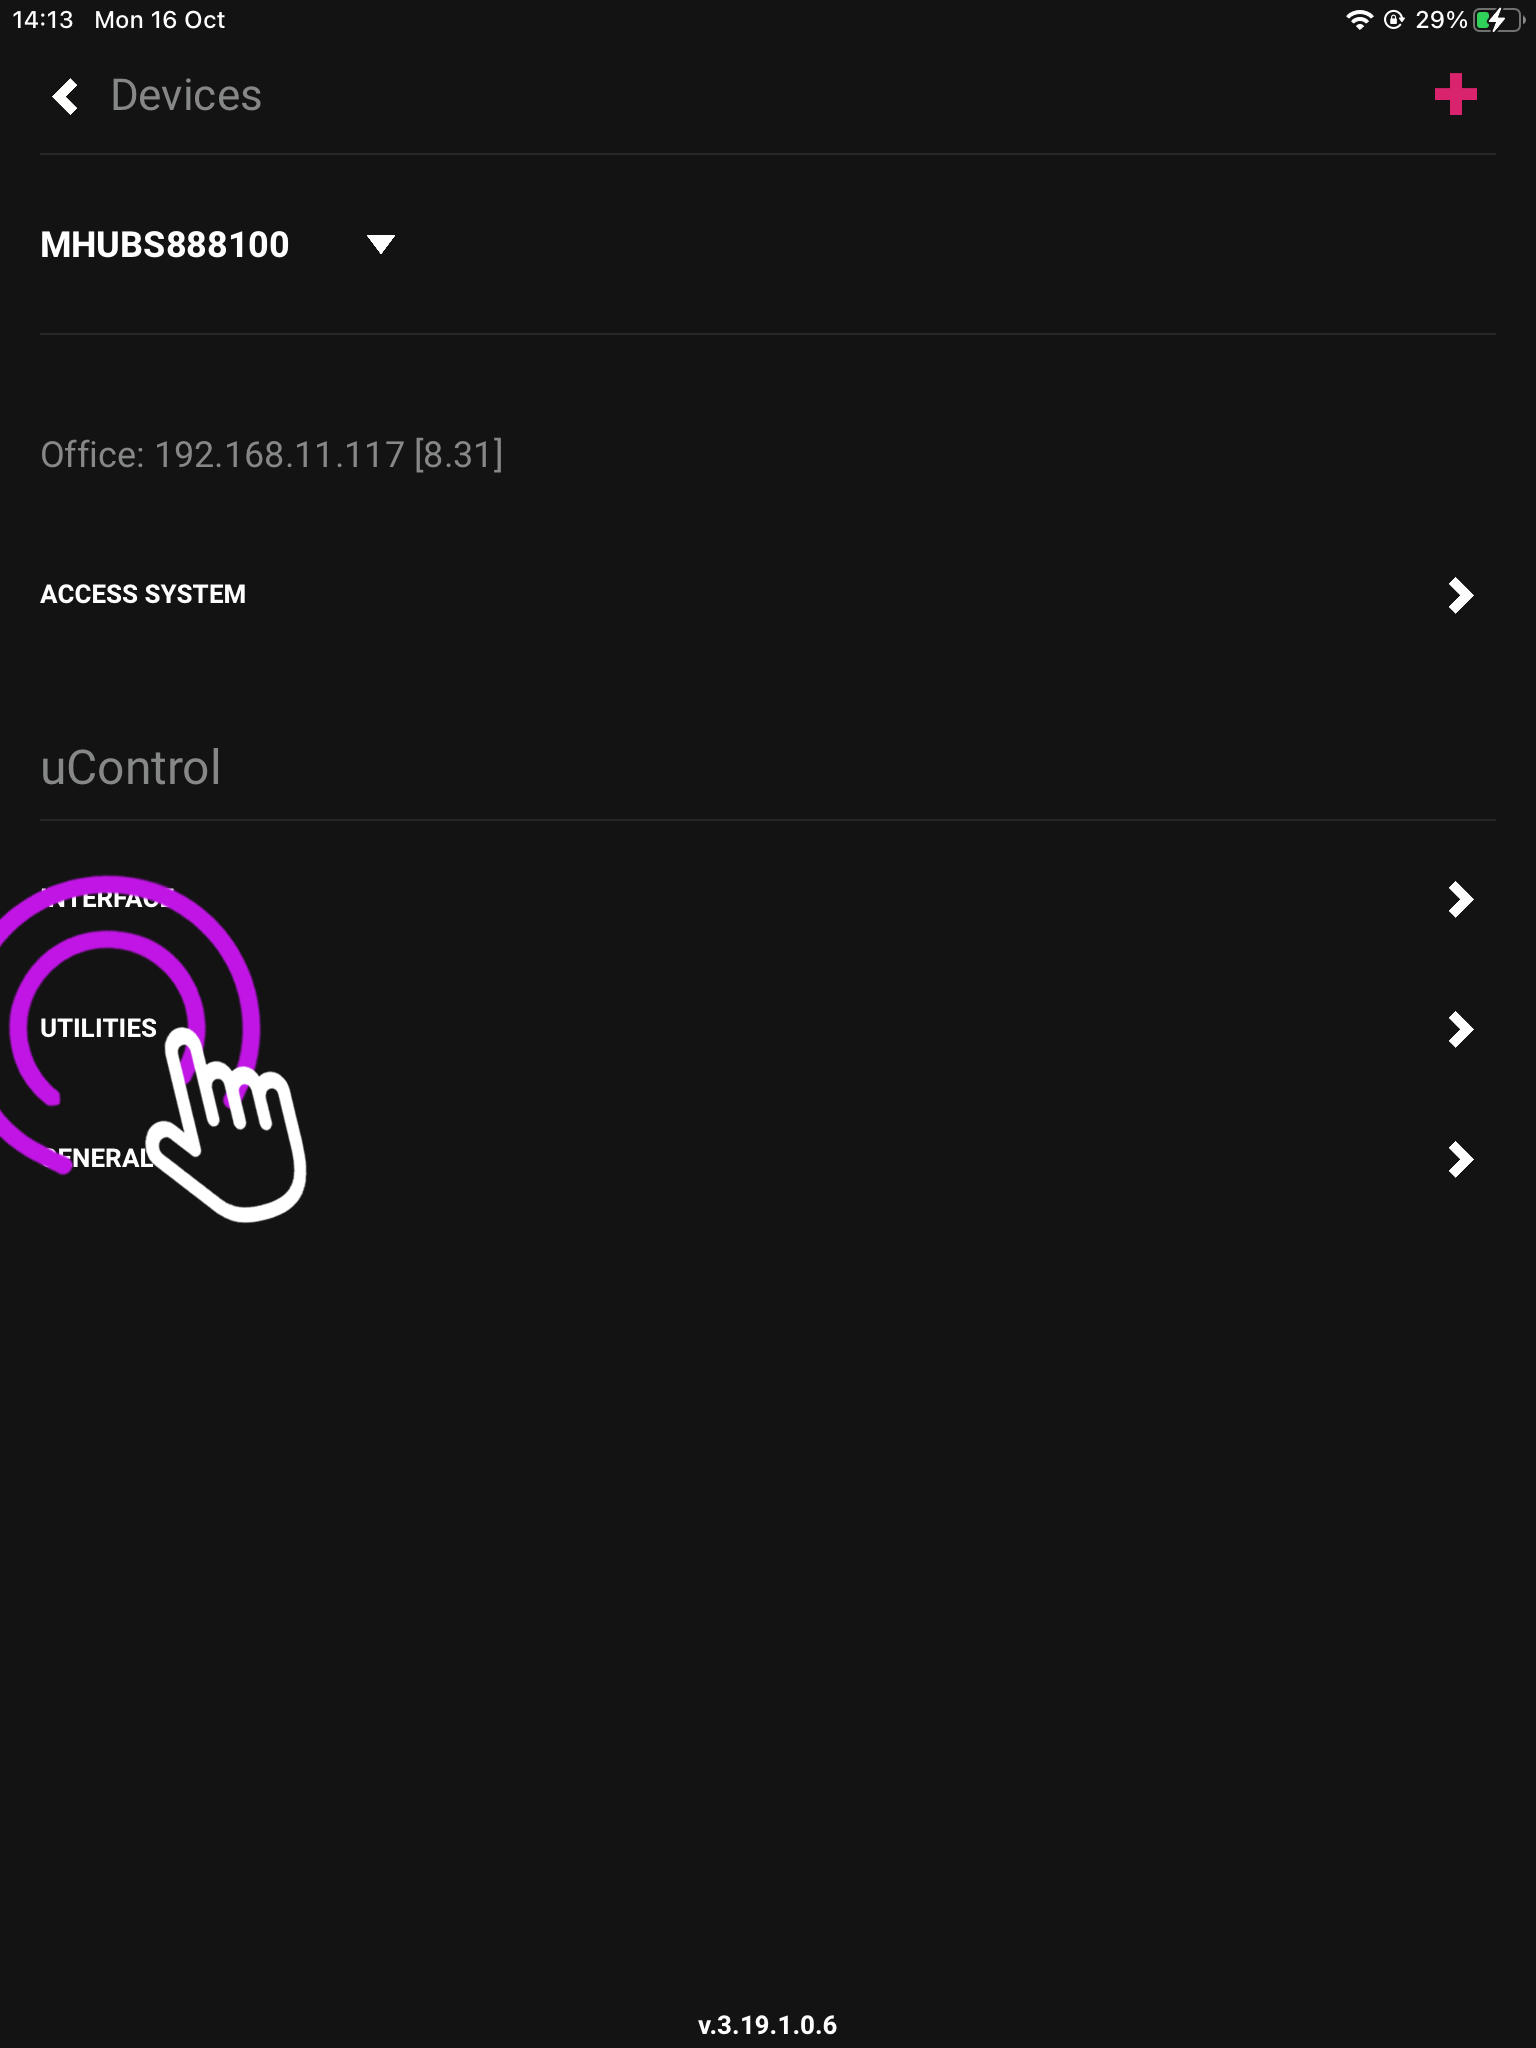
    3. Press “Utilities”

    This will take you to your devices service page.

    From here you can also see your connected devices IP address(s).

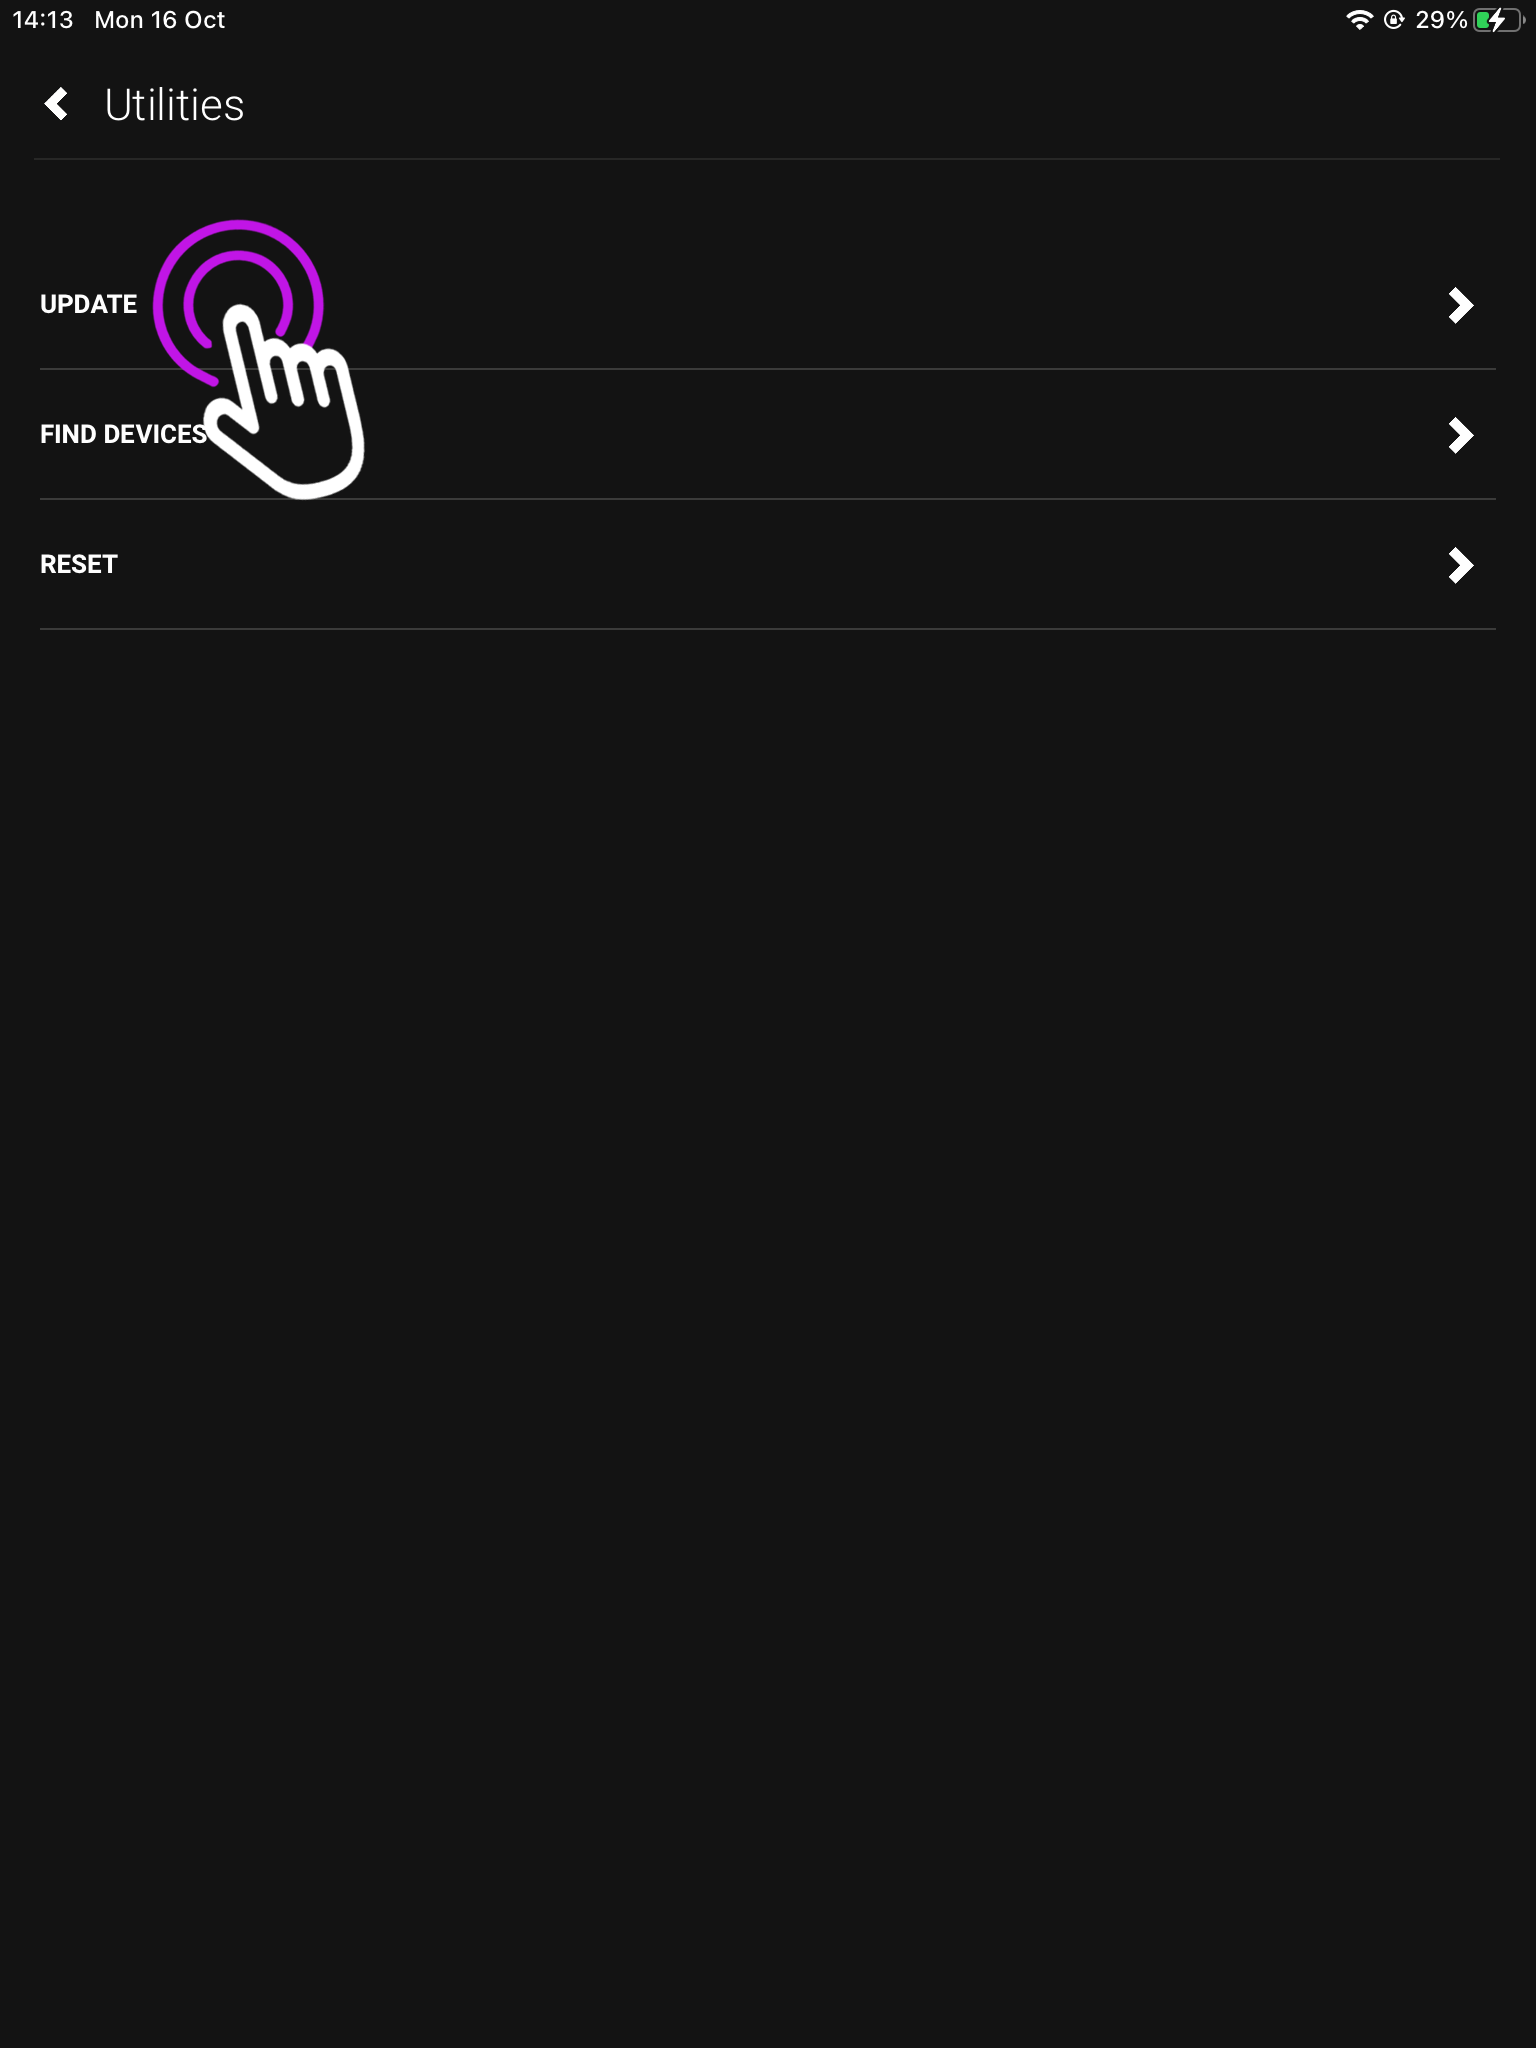
    4. Press “Update”

    From this page you can also find your devices, and reset one. To find out more check out our uOS Utilities page.

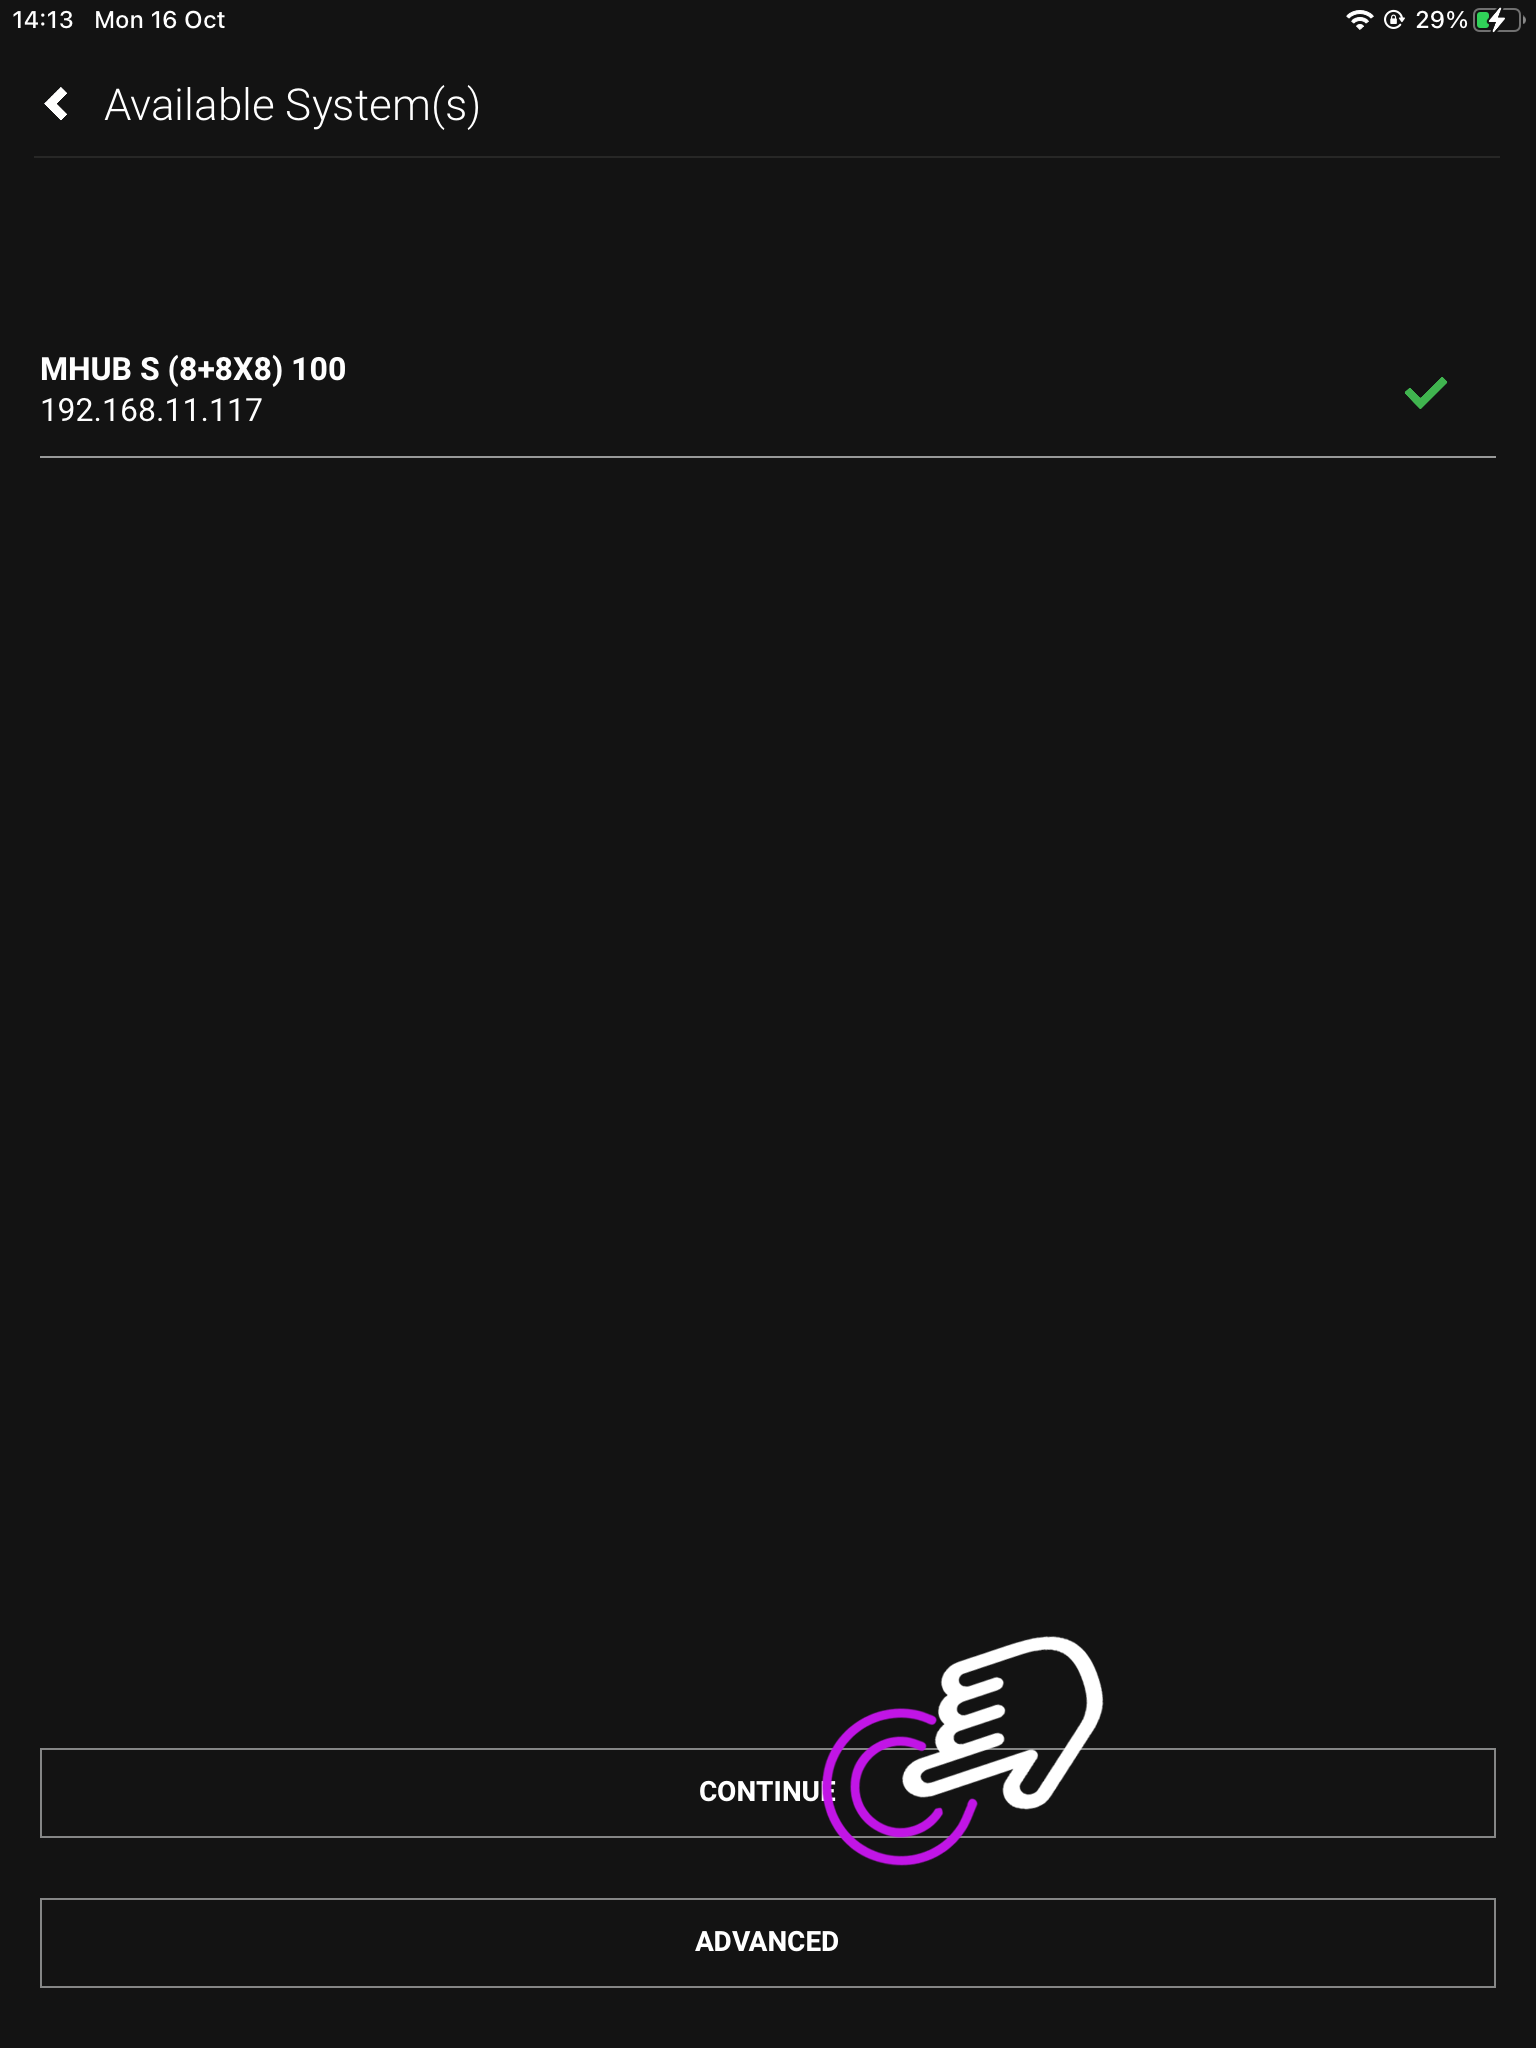
    The next page will show you your connected HDA devices.

    5.“Available Systems”

    If you have a stacked system, or multiple devices they will show here.

    Once an update is found you will be taken to the update screen.

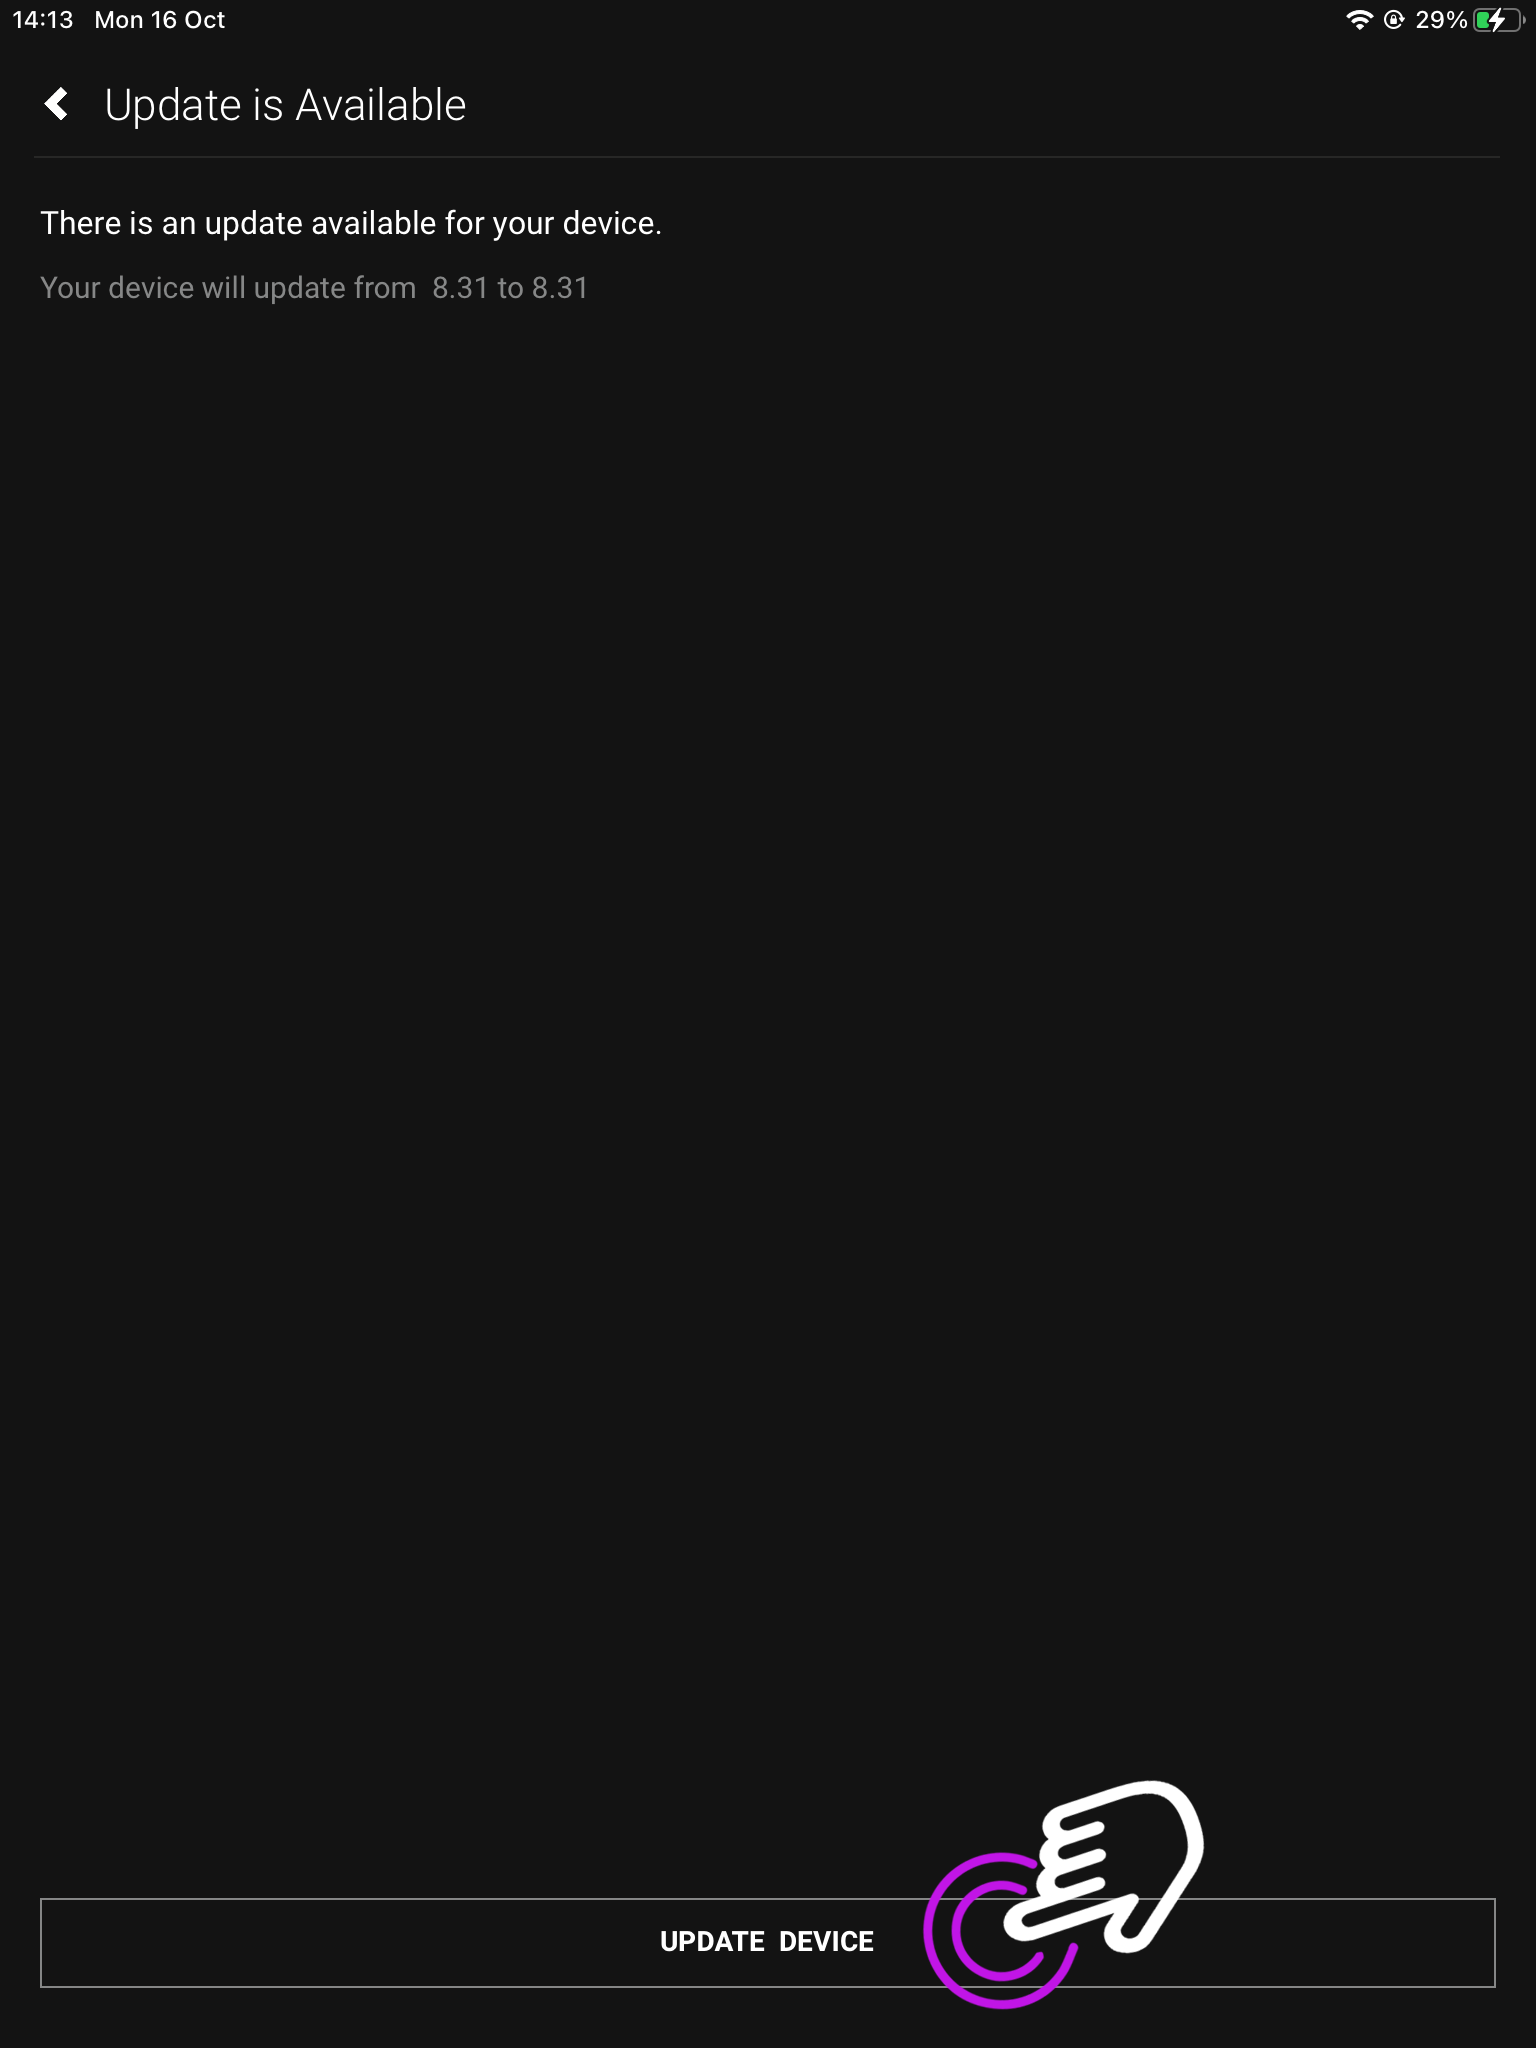
    6. Begin update

    If your device is updateable it will start, and include which version you’re updating to.

    Press “Update Device”.

    7. Terms and Conditions

    To continue please acknowledge the legal terms.

    For more information on the legal terms, you can read the End-User Licence Agreement (EULA) and the Privacy Statement.

    8. Await download

    This process can take up to 5 minutes, however, depending on your network it could be longer.

    Please make sure not to power down your device whilst the update is downloading.

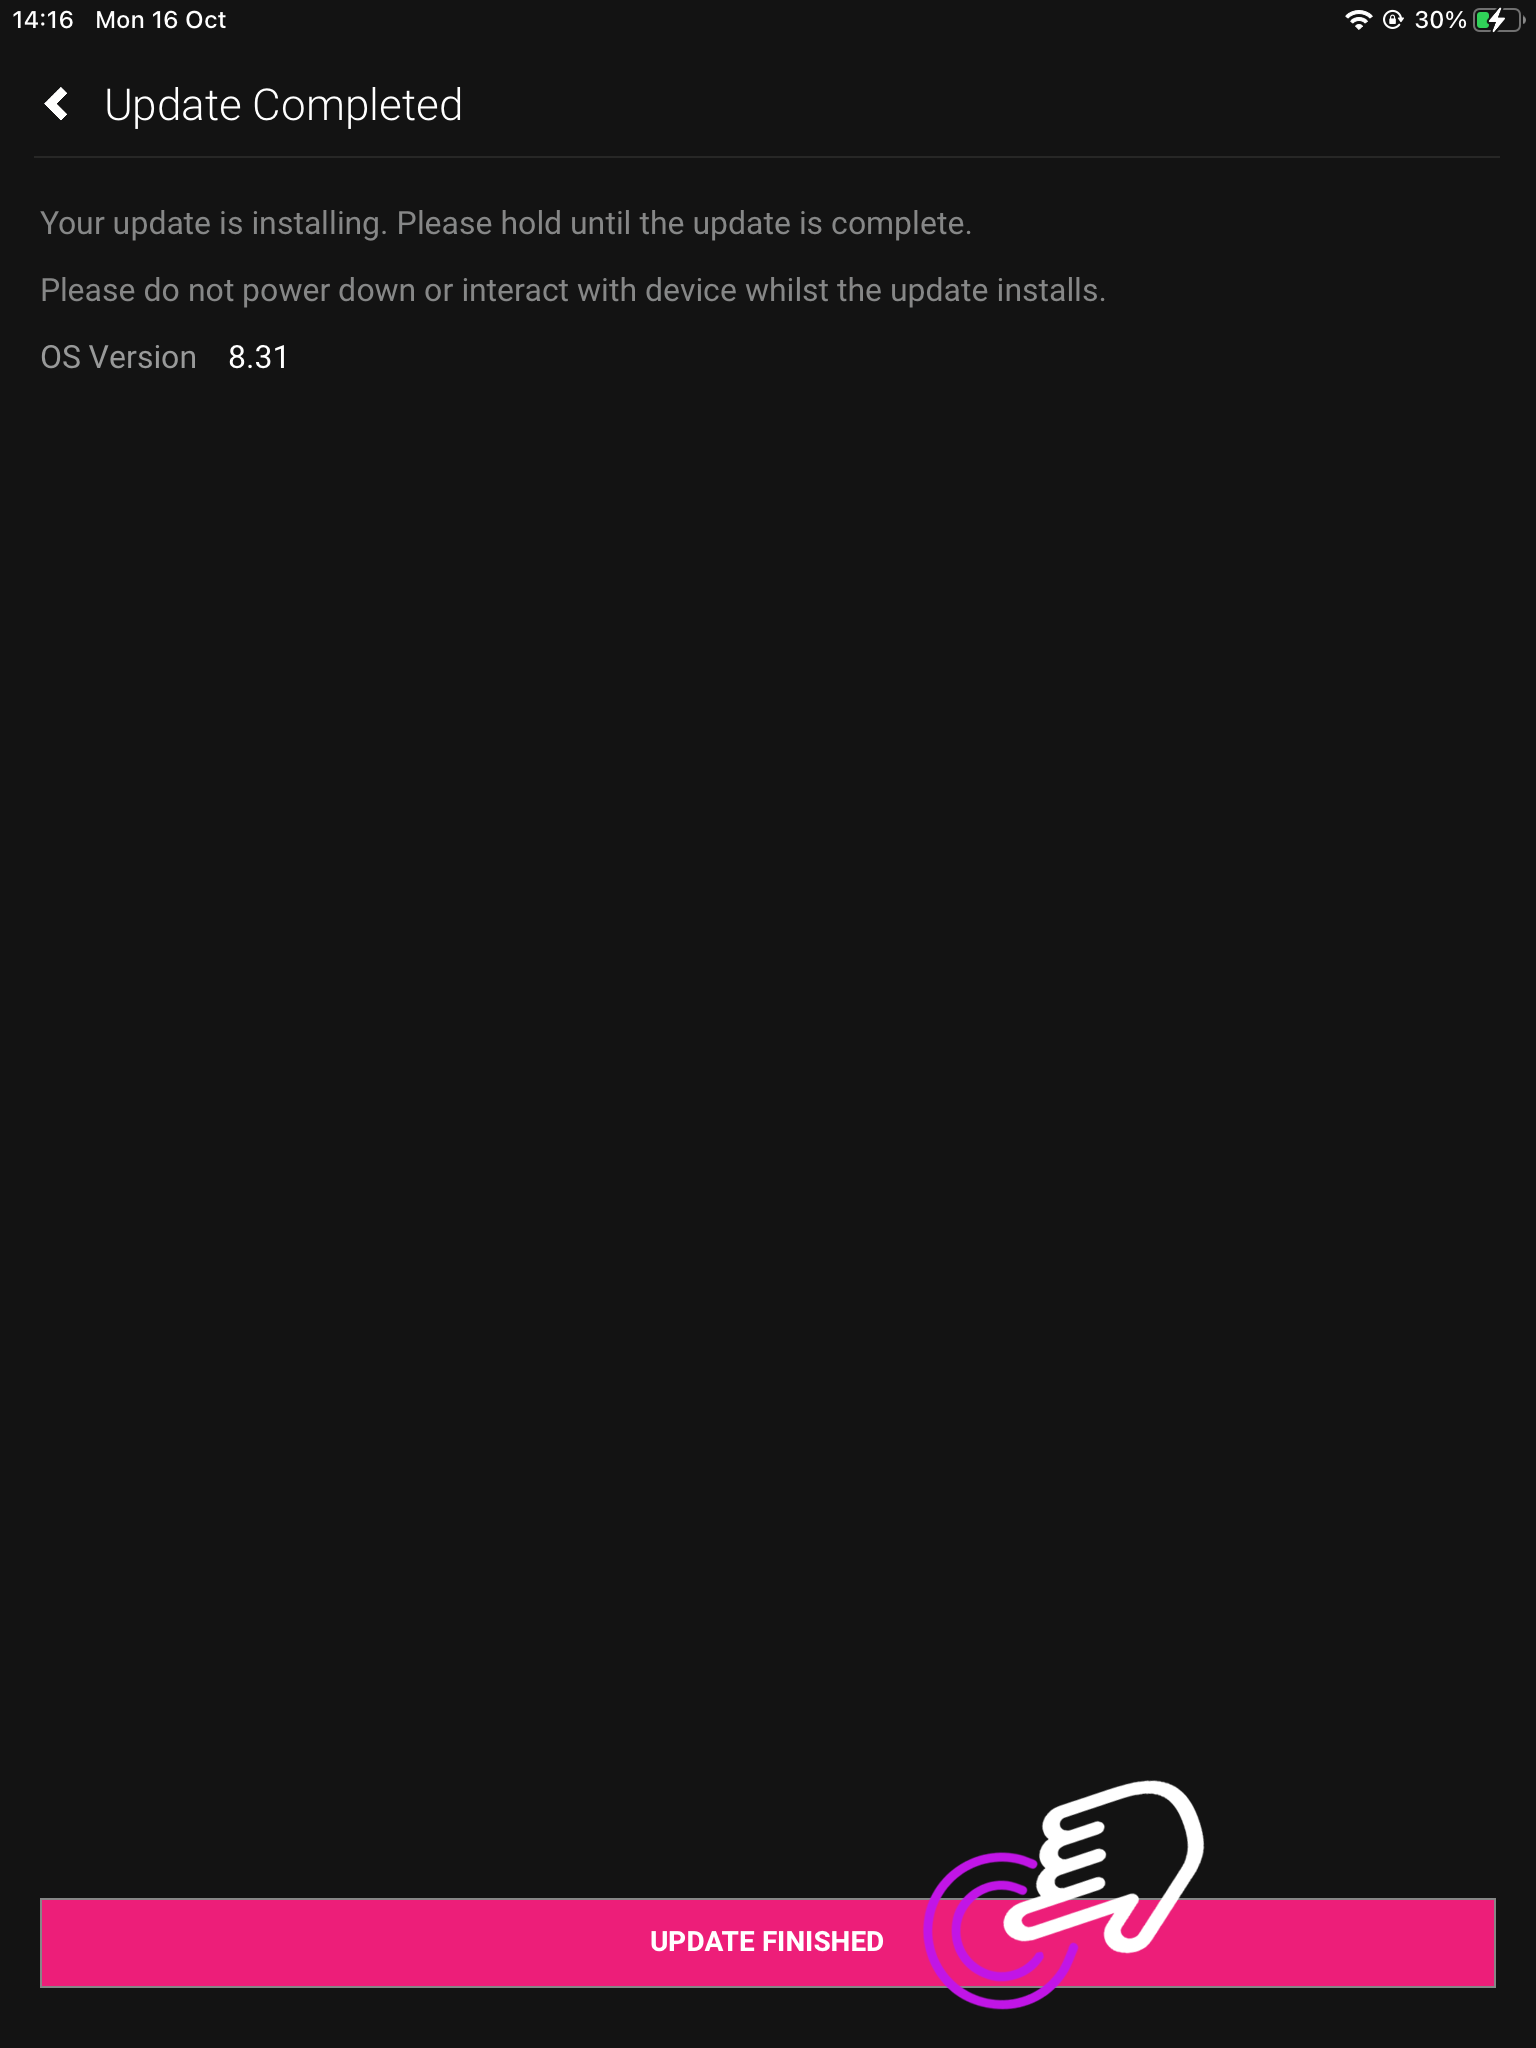
    9. Update completed

    uControl will now let you know the update is complete.

    Press “Update Finished”.
  • Configuring the uControl Remote for use

    Before you begin:

    To ensure a smooth setup process for your uControl Remote, please make sure you have the following in place before you start:

    uOS 11 or above: The uControl Remote will work correctly with uOS 11 or above. Ensure that you have checked for updates beforehand.

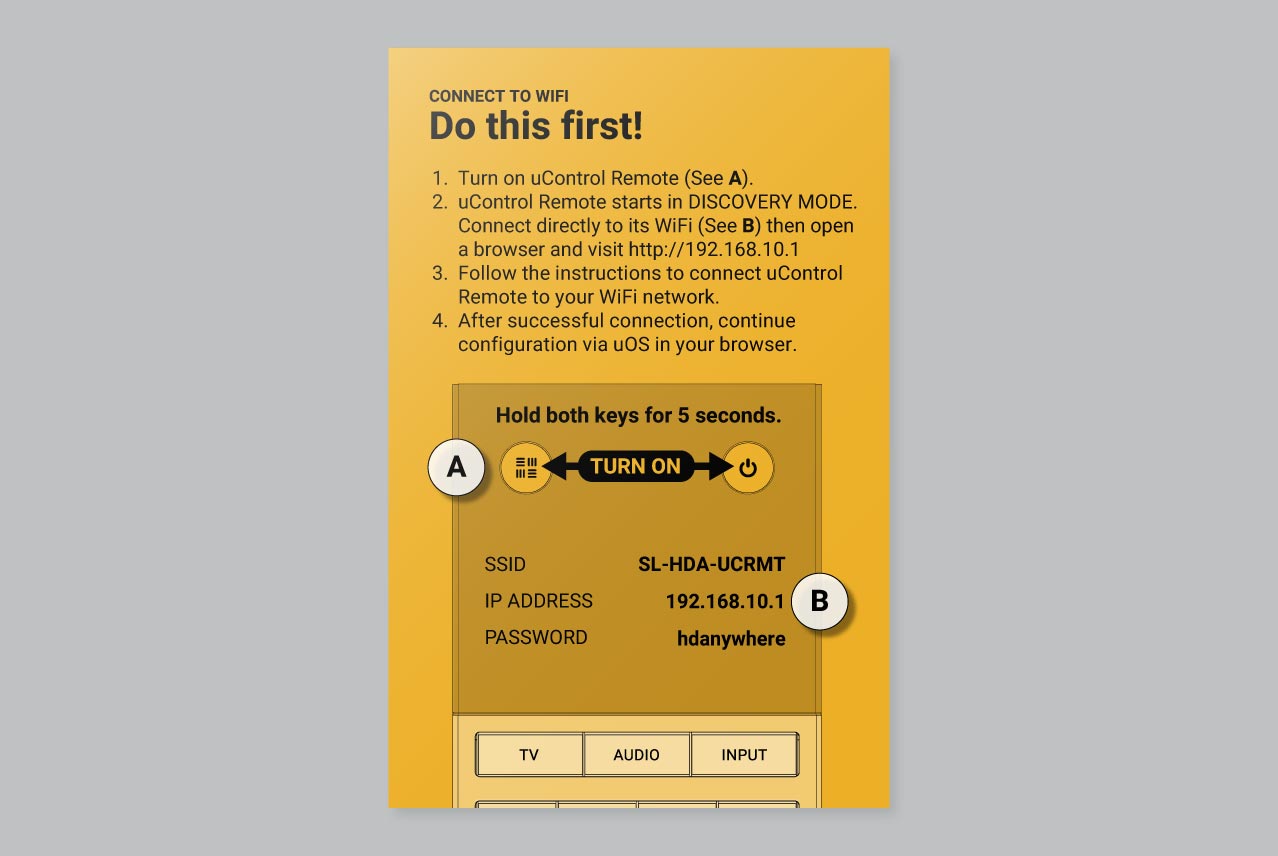
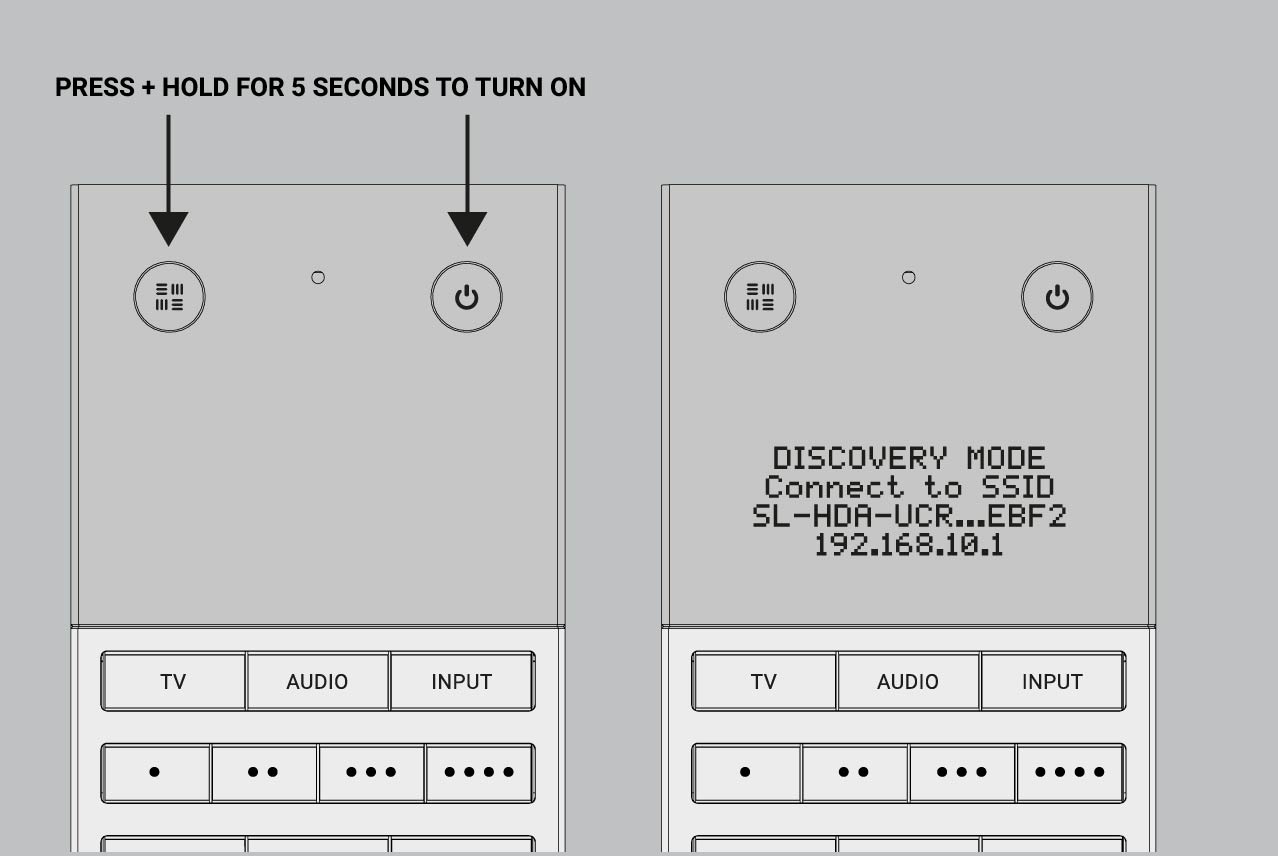
    Powered On: Press and hold the HDA Key (top left circular button) and the Power Key (top right circular button) simultaneously for 5 seconds.

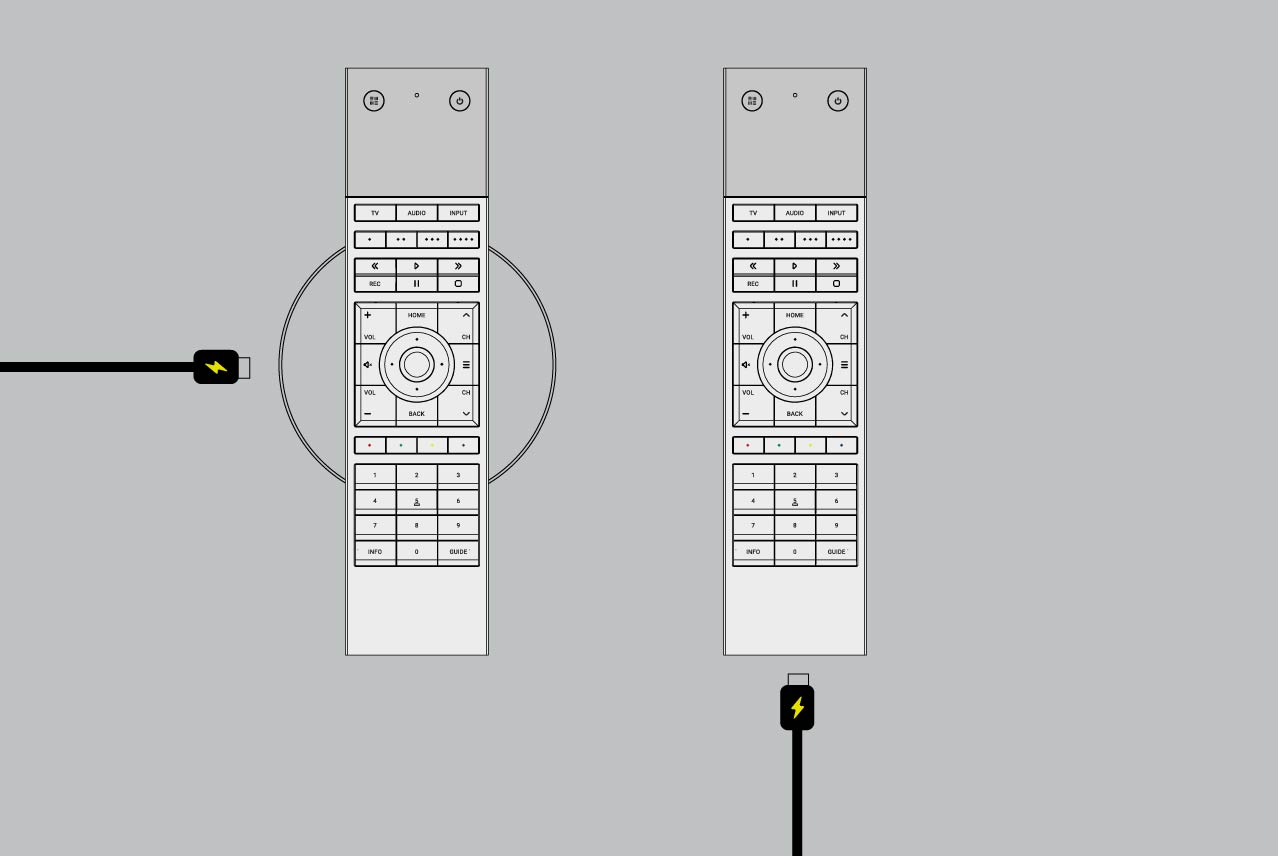
    Sufficient Power: Ensure the Remote is charging using the provided USB-C cable or a wireless charger.

    Setup tested on uControl app: uControl Remote should be the last device setup in uOS. It is recommended that all uControl packs have been downloaded, all Smart Automations have been created and tested inside uControl app before transfering any configuration to .

    20 minutes (approximately) to work through.

    Contents:


    In a hurry? Refer to the quick start guide in your packaging

    The fastest way to connect your uControl Remote to your WiFi network is to refer to the quick start guide found inside your packaging.

    Connect your uControl Remote to your WiFi network by following the instructions the quick start guide inside your packaging.
    If you need more help then a detailed version of this process is described below.

    Getting uControl Remote on your WiFi network (full description)

    1. Ensure that the uControl Remote is charging before you start

    Ensure the uControl Remote is fully charged before setup. Place it on a charging pad or connect it to a power source using the provided USB-C cable and a standard 5V USB charger.

    2. Turn the uControl Remote ON

    Start by peeling off the screen protector and turn on the uControl Remote by press and holding both the HDA and Power keys for 5 seconds until the device turns on. The uControl Remote will boot up and display “DISCOVERY MODE” showing an abbreviated WiFi network name (SSID). The last 4 characters of the SSID will always be unique.

    3.Connect directly to uControl Remote’s WiFi

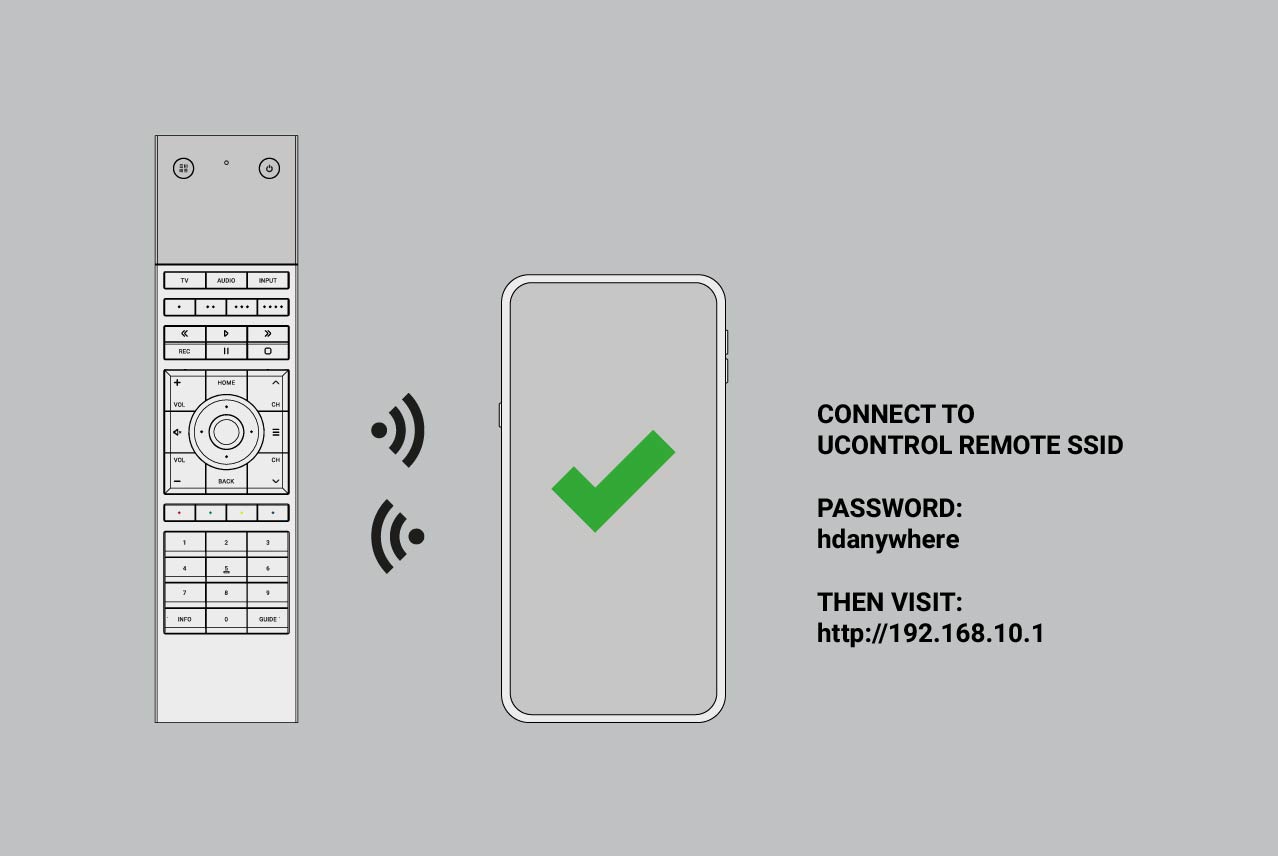
    Connect directly to uControl Remote on a PC, tablet, or smartphone. Go to your WiFi settings and search for the uControl Remote’s WiFi network name ensuring that you connect to the correct SSID (always starting with SL-HDA-UCRMT…) look particularly for those 4 unique characters in your WiFi list.

    To connect to uControl Remote’s WiFi use password hdanywhere.

    4. Access the uControl Remote’s Network Page.

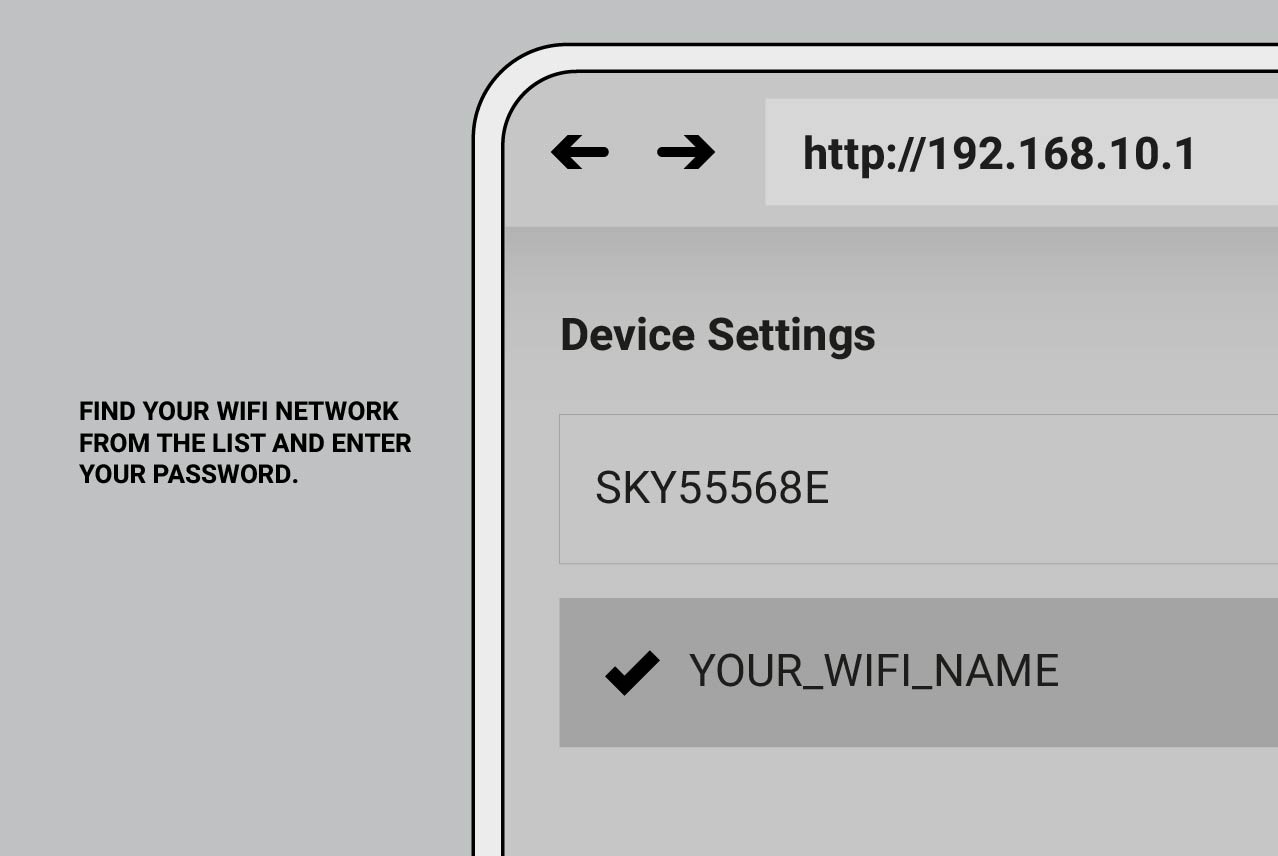
    Open a browser and go to: http://192.168.10.1 Follow the on-screen instructions to connect the uControl Remote to your local WiFi network.

    At this stage, uControl Remote will scan all available WiFi networks within range. uControl Remote only supports 2.4GHz WiFi and WPA/WPA2/WEP security standards.

    5. Wait for connection

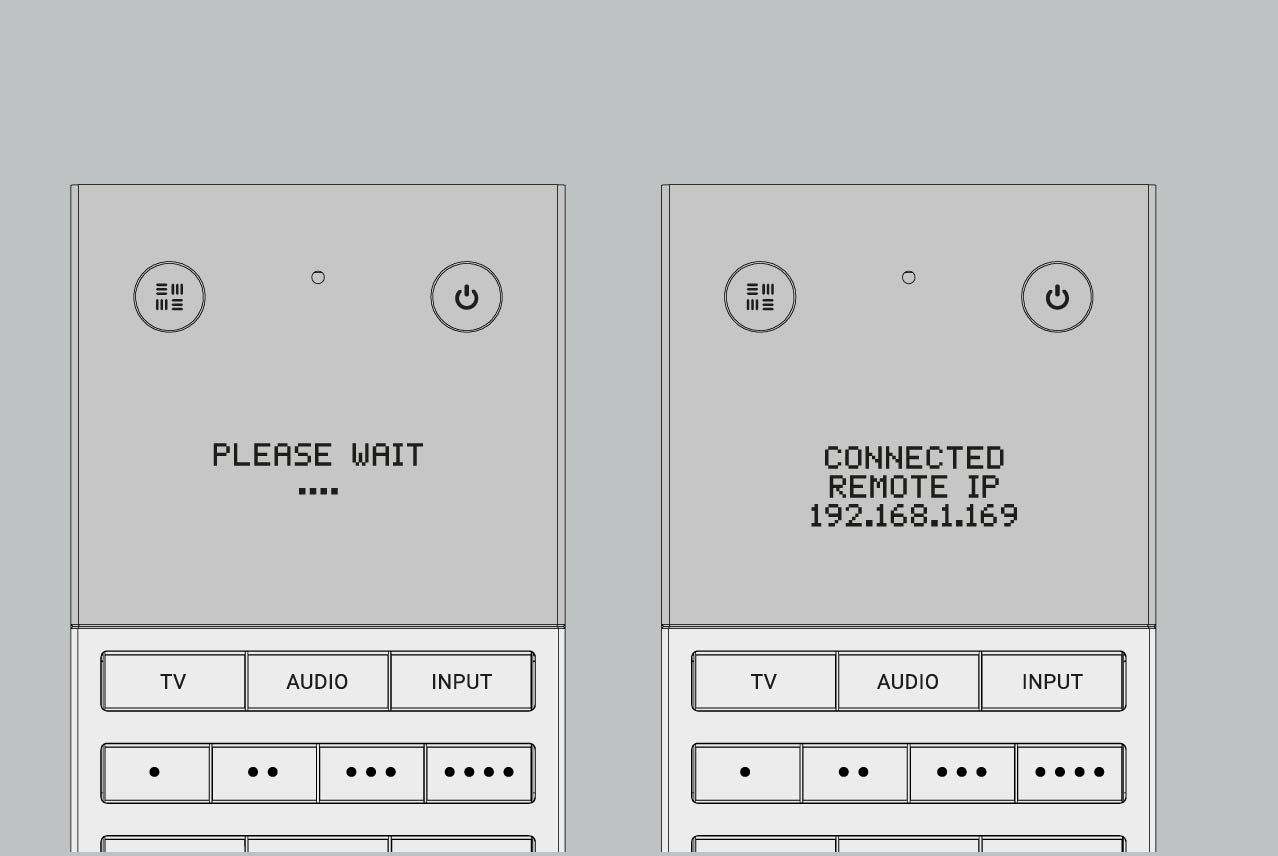
    The uControl Remote will attempt to connect to your WiFi. If the uControl Remote screen has turned off then press any button to wake the remote up. The screen will update you with its progress. If it fails, double-check your WiFi credentials and try again. Once the connection is successful, the uControl Remote will display a confirmation message along with its new IP address. Write this down—you’ll need it later for configuring.

    Once the uControl Remote has joined your WiFi network, it will be given a new IP address, take a note of this IP address as you will need it when you configure your uControl Remote for use.

    Starting uControl Remote basic configuration.

    Make sure your uControl Remote is on the same network as you controller and that the Remote is charging.

    Visit uOS and navigate to the “Remote” page.

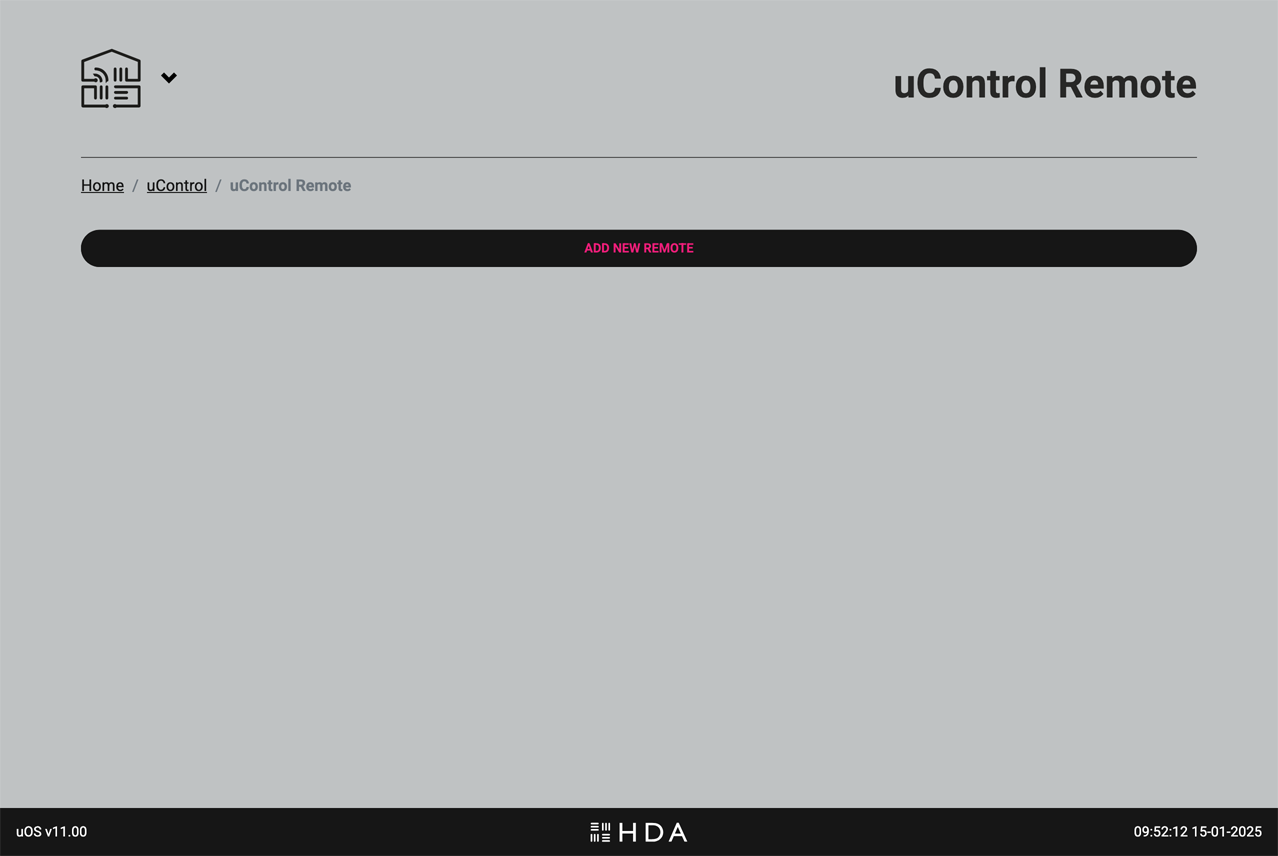
    Visit the IP address of uOS and open the menu in the top left corner to reveal the menu. Select the “Remotes” option and you will see a page similar to this one. Select the option “ADD NEW REMOTE” to start the configuration process.

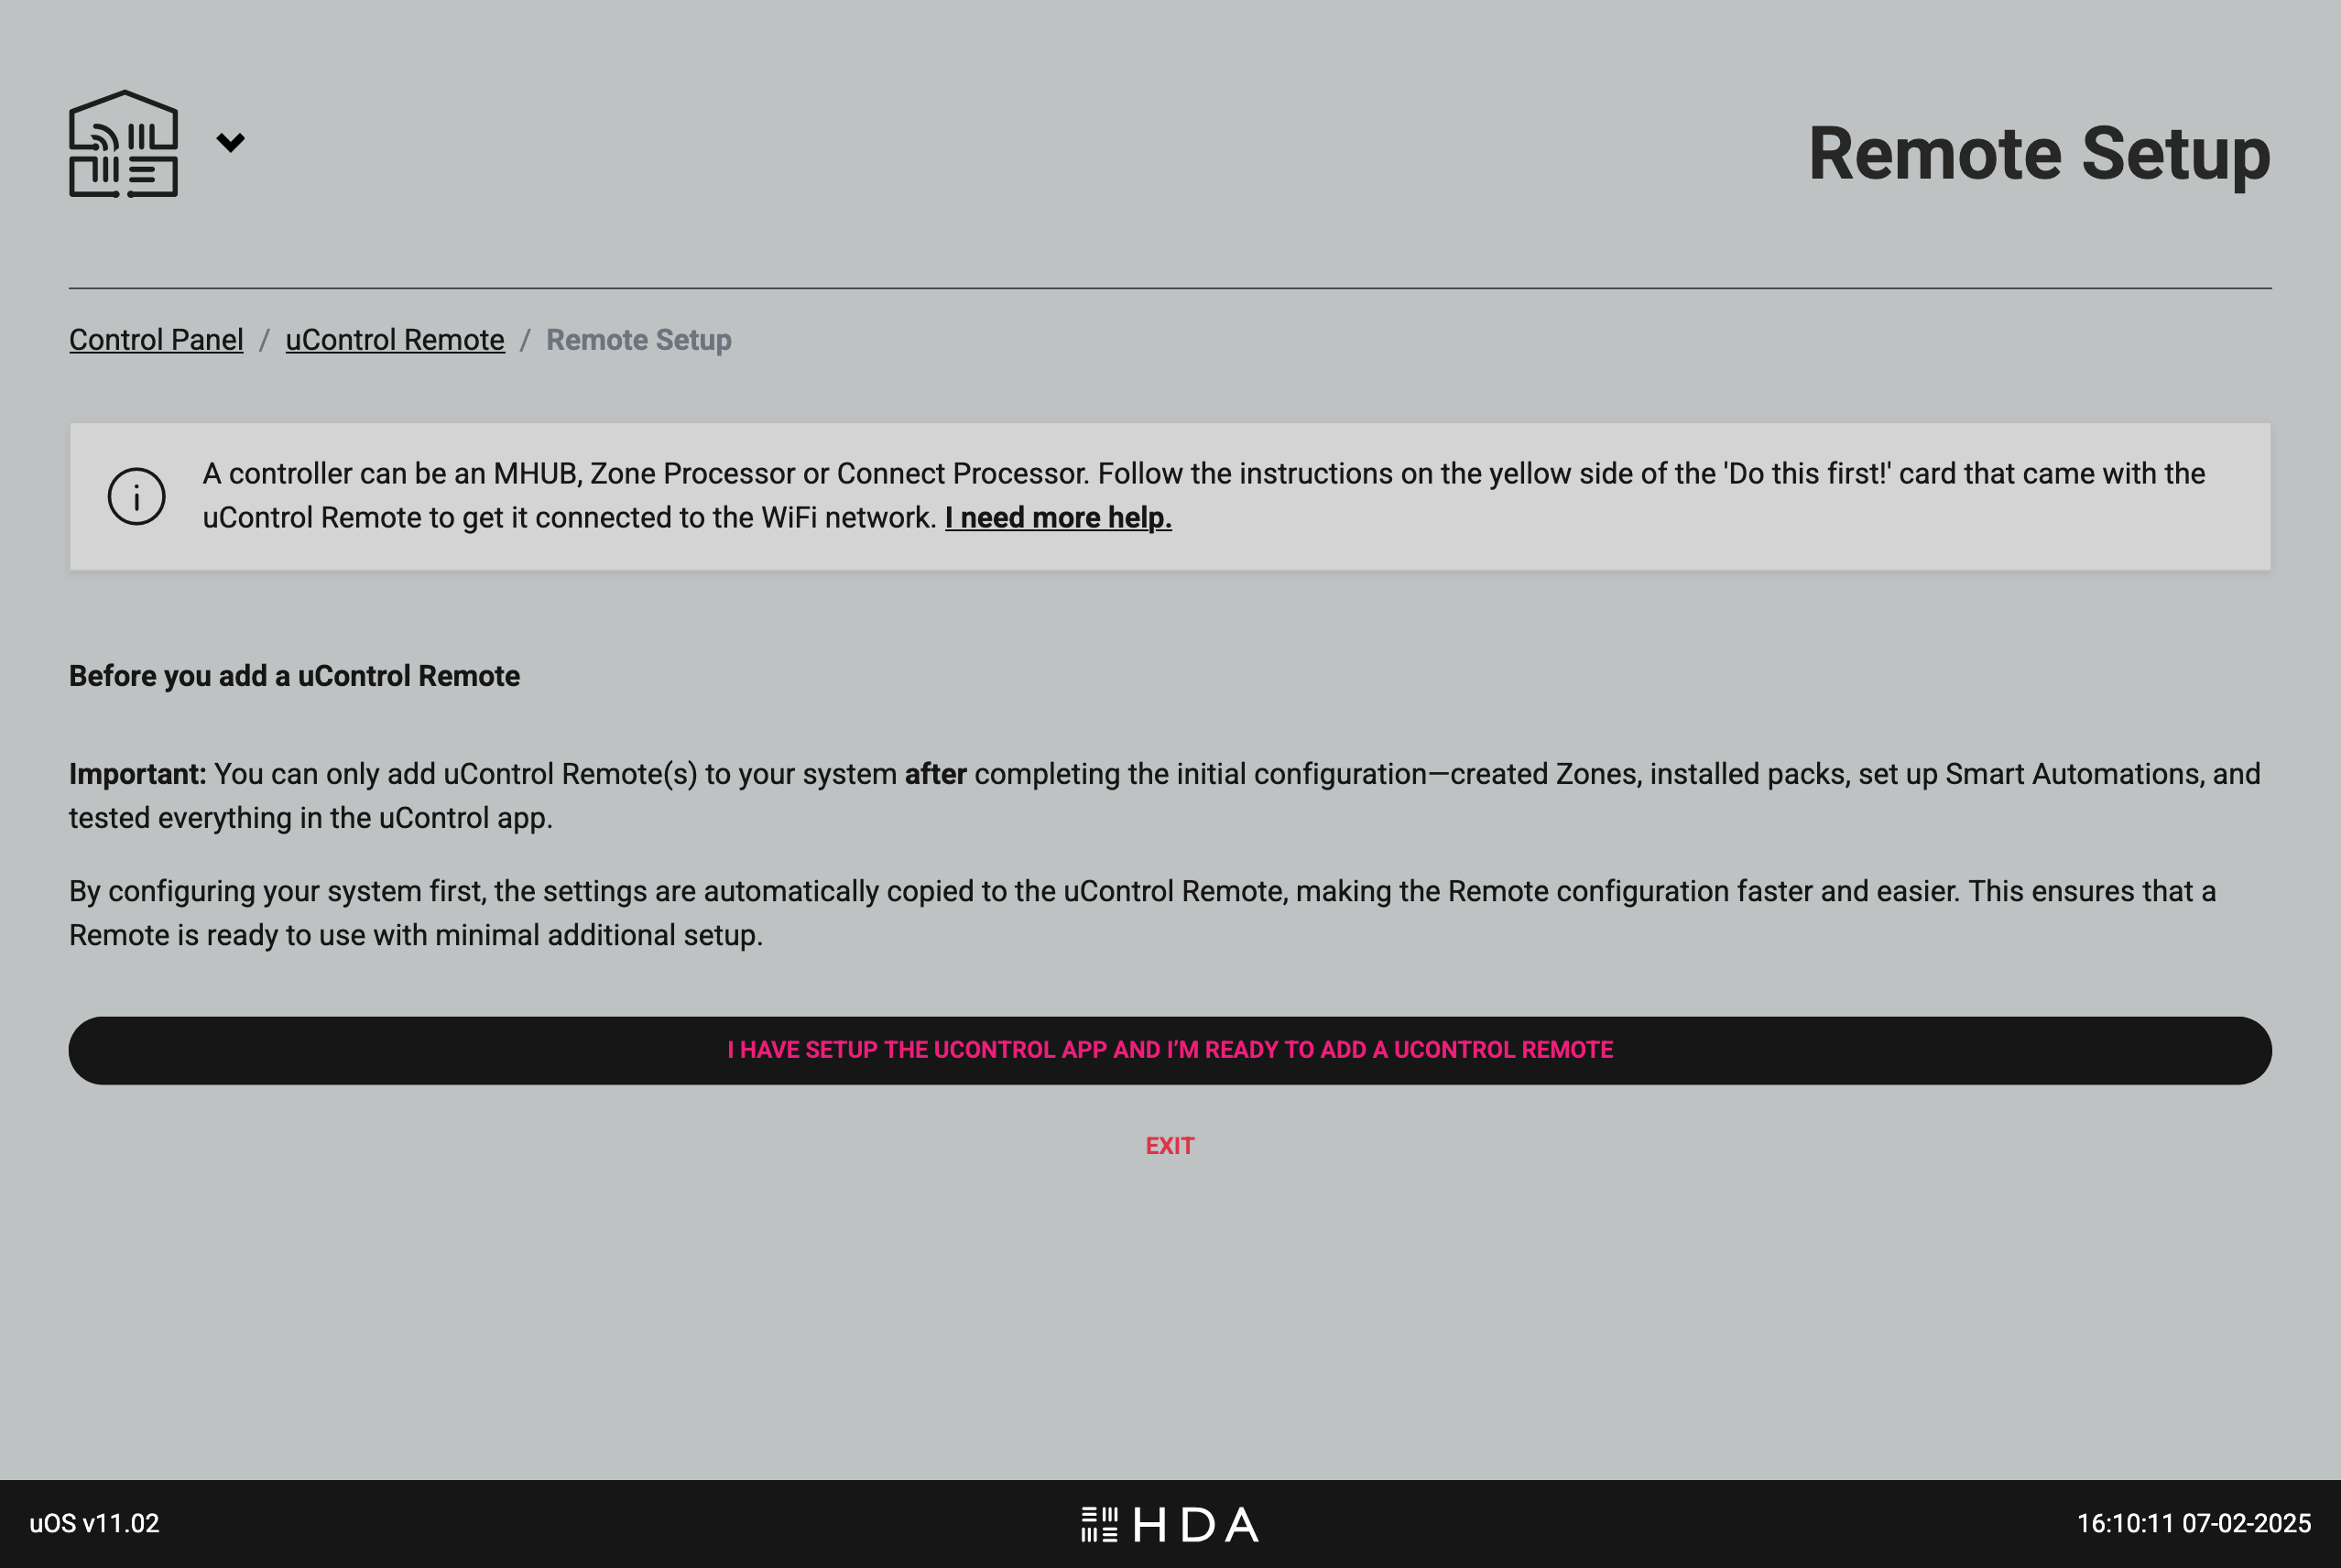
    Make sure that all uControl Packs, Smart Automations & Zone Settings have been completed before proceeding.

    The first question asks if all the necessary prerequisites have been completed before starting the uControl Remote configuration process. This is an important check because editing a configured remote, repeatedly, is slower (and more error prone) than making sure the system is working first using our app and transfering that config in one go instead.

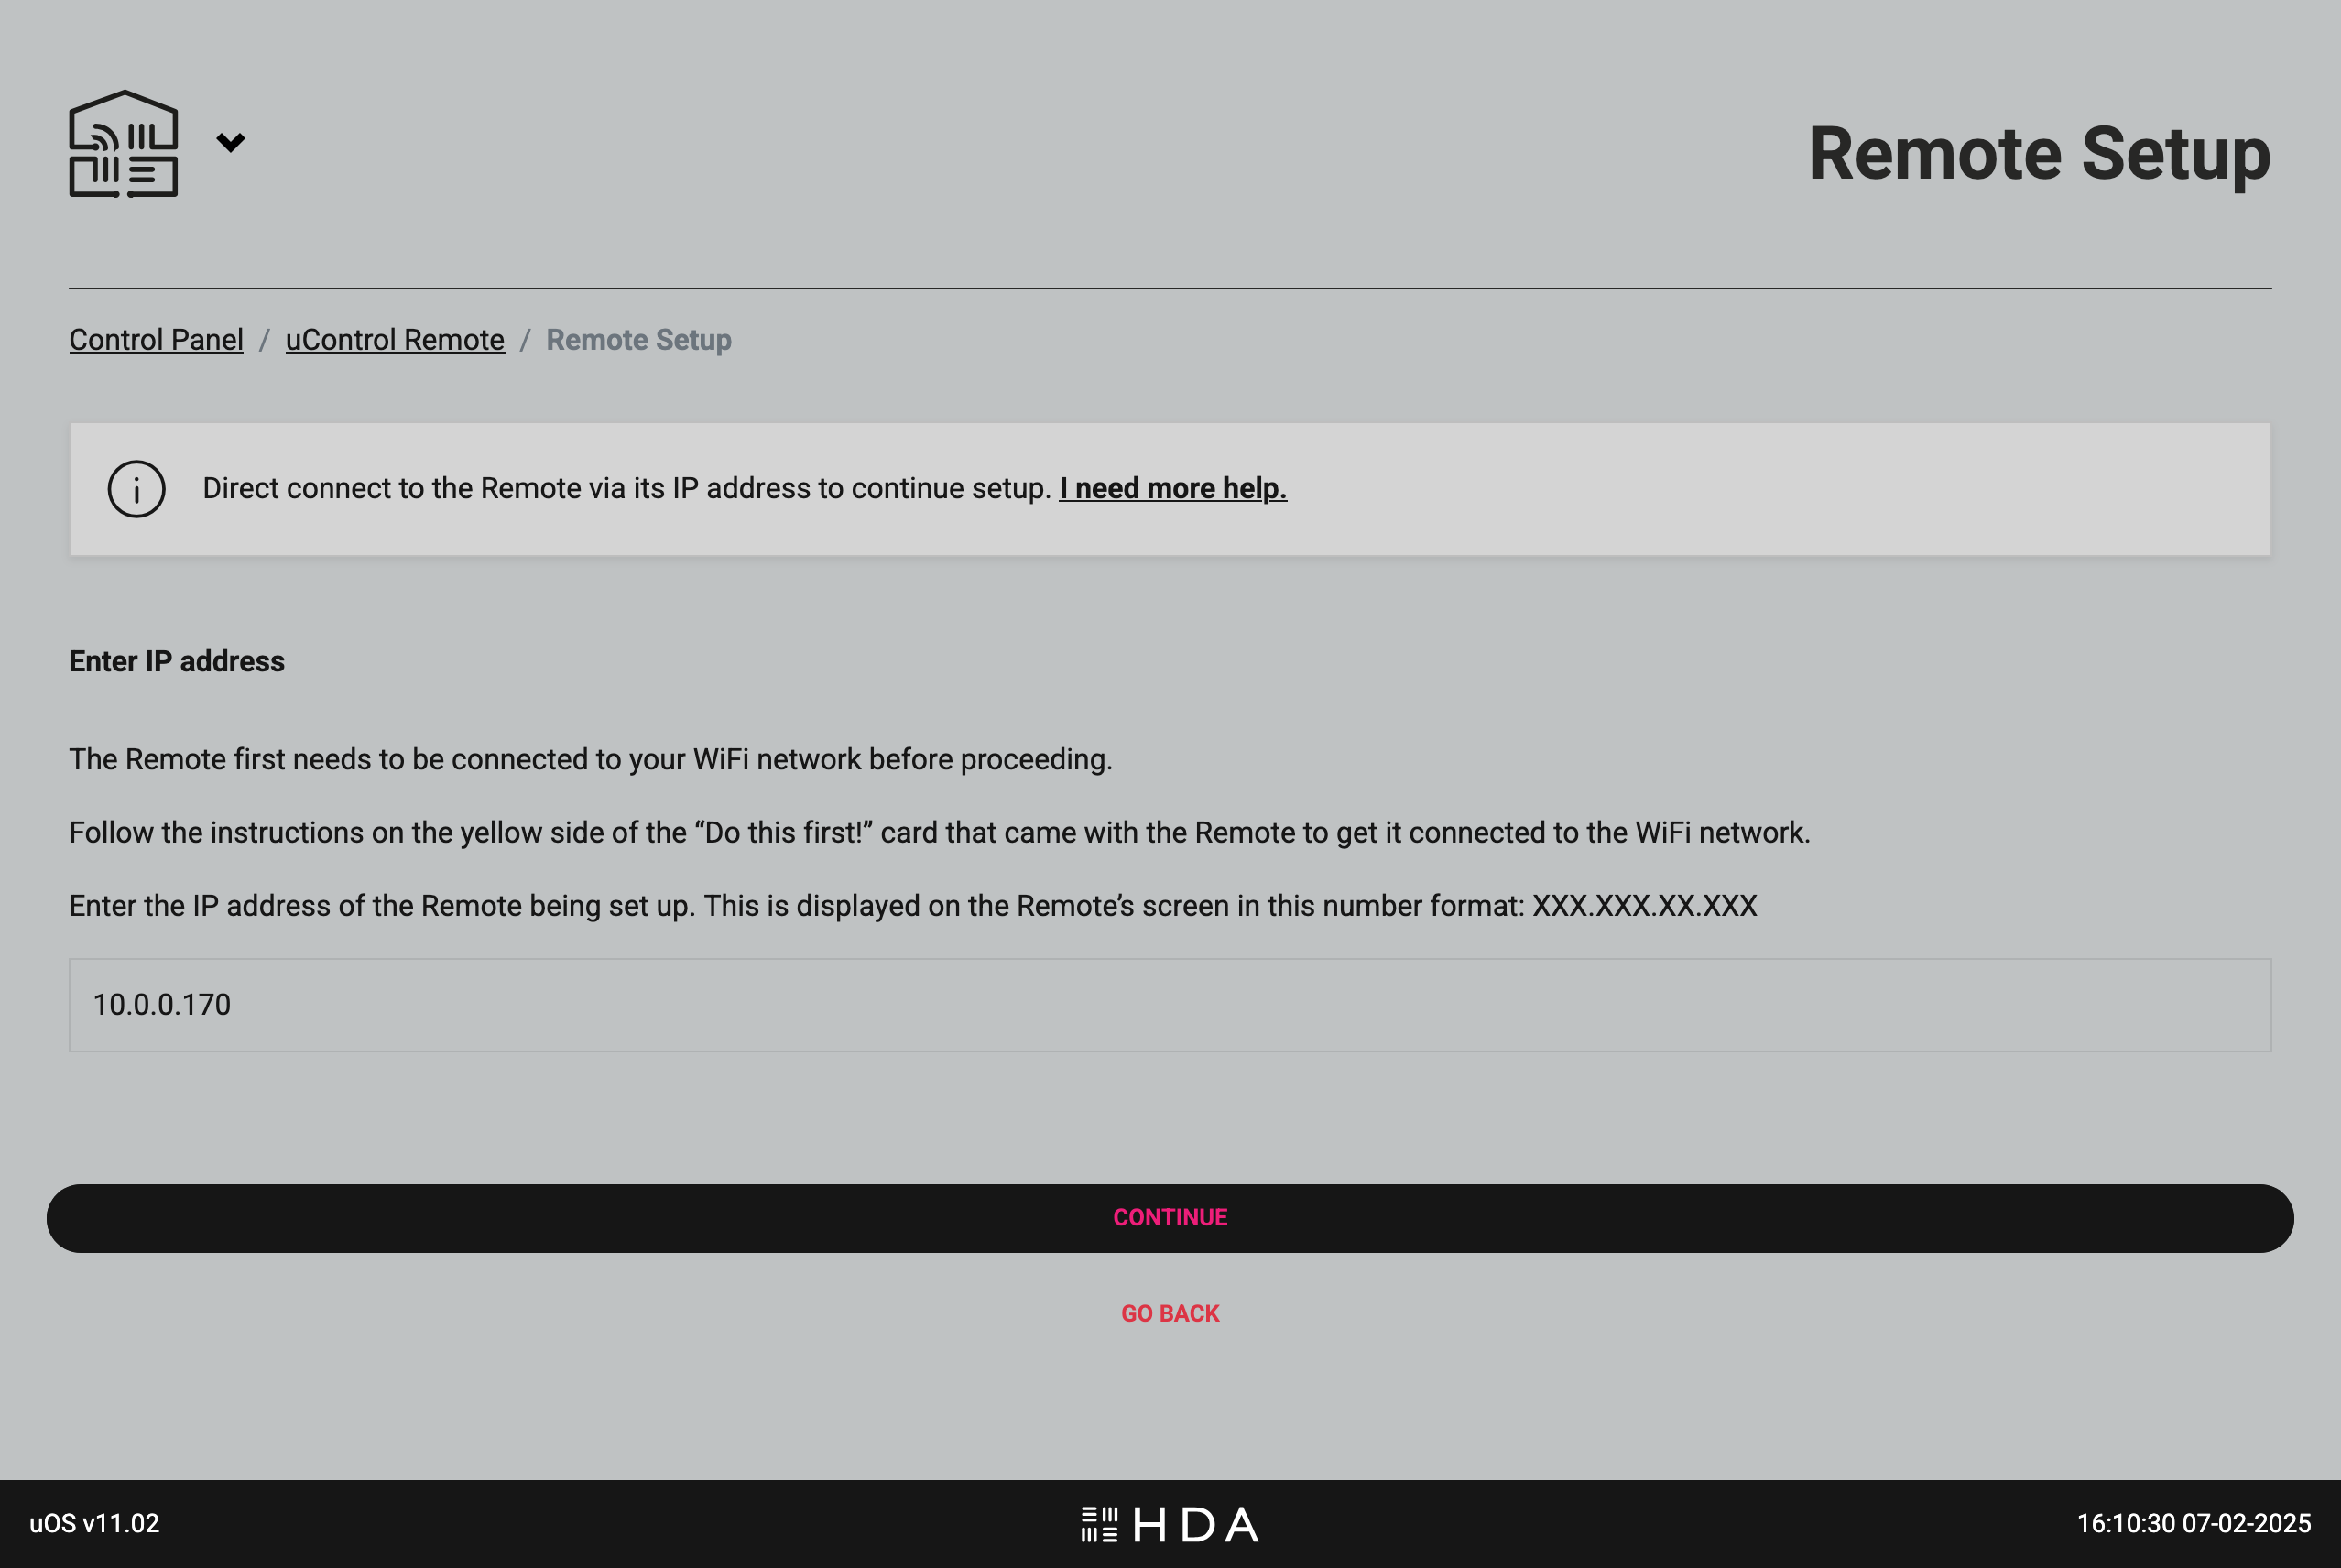
    Enter your uControl Remote’s IP address.

    Enter the IP address of the uControl Remote into the box to connect uOS to it. If you are unsure what your uControl Remote’s IP address is, you can find it by pressing on the HDA key (top right corner) then navigating to Network > WiFi Info > IP Address to reveal it on the Remote’s OLED display.

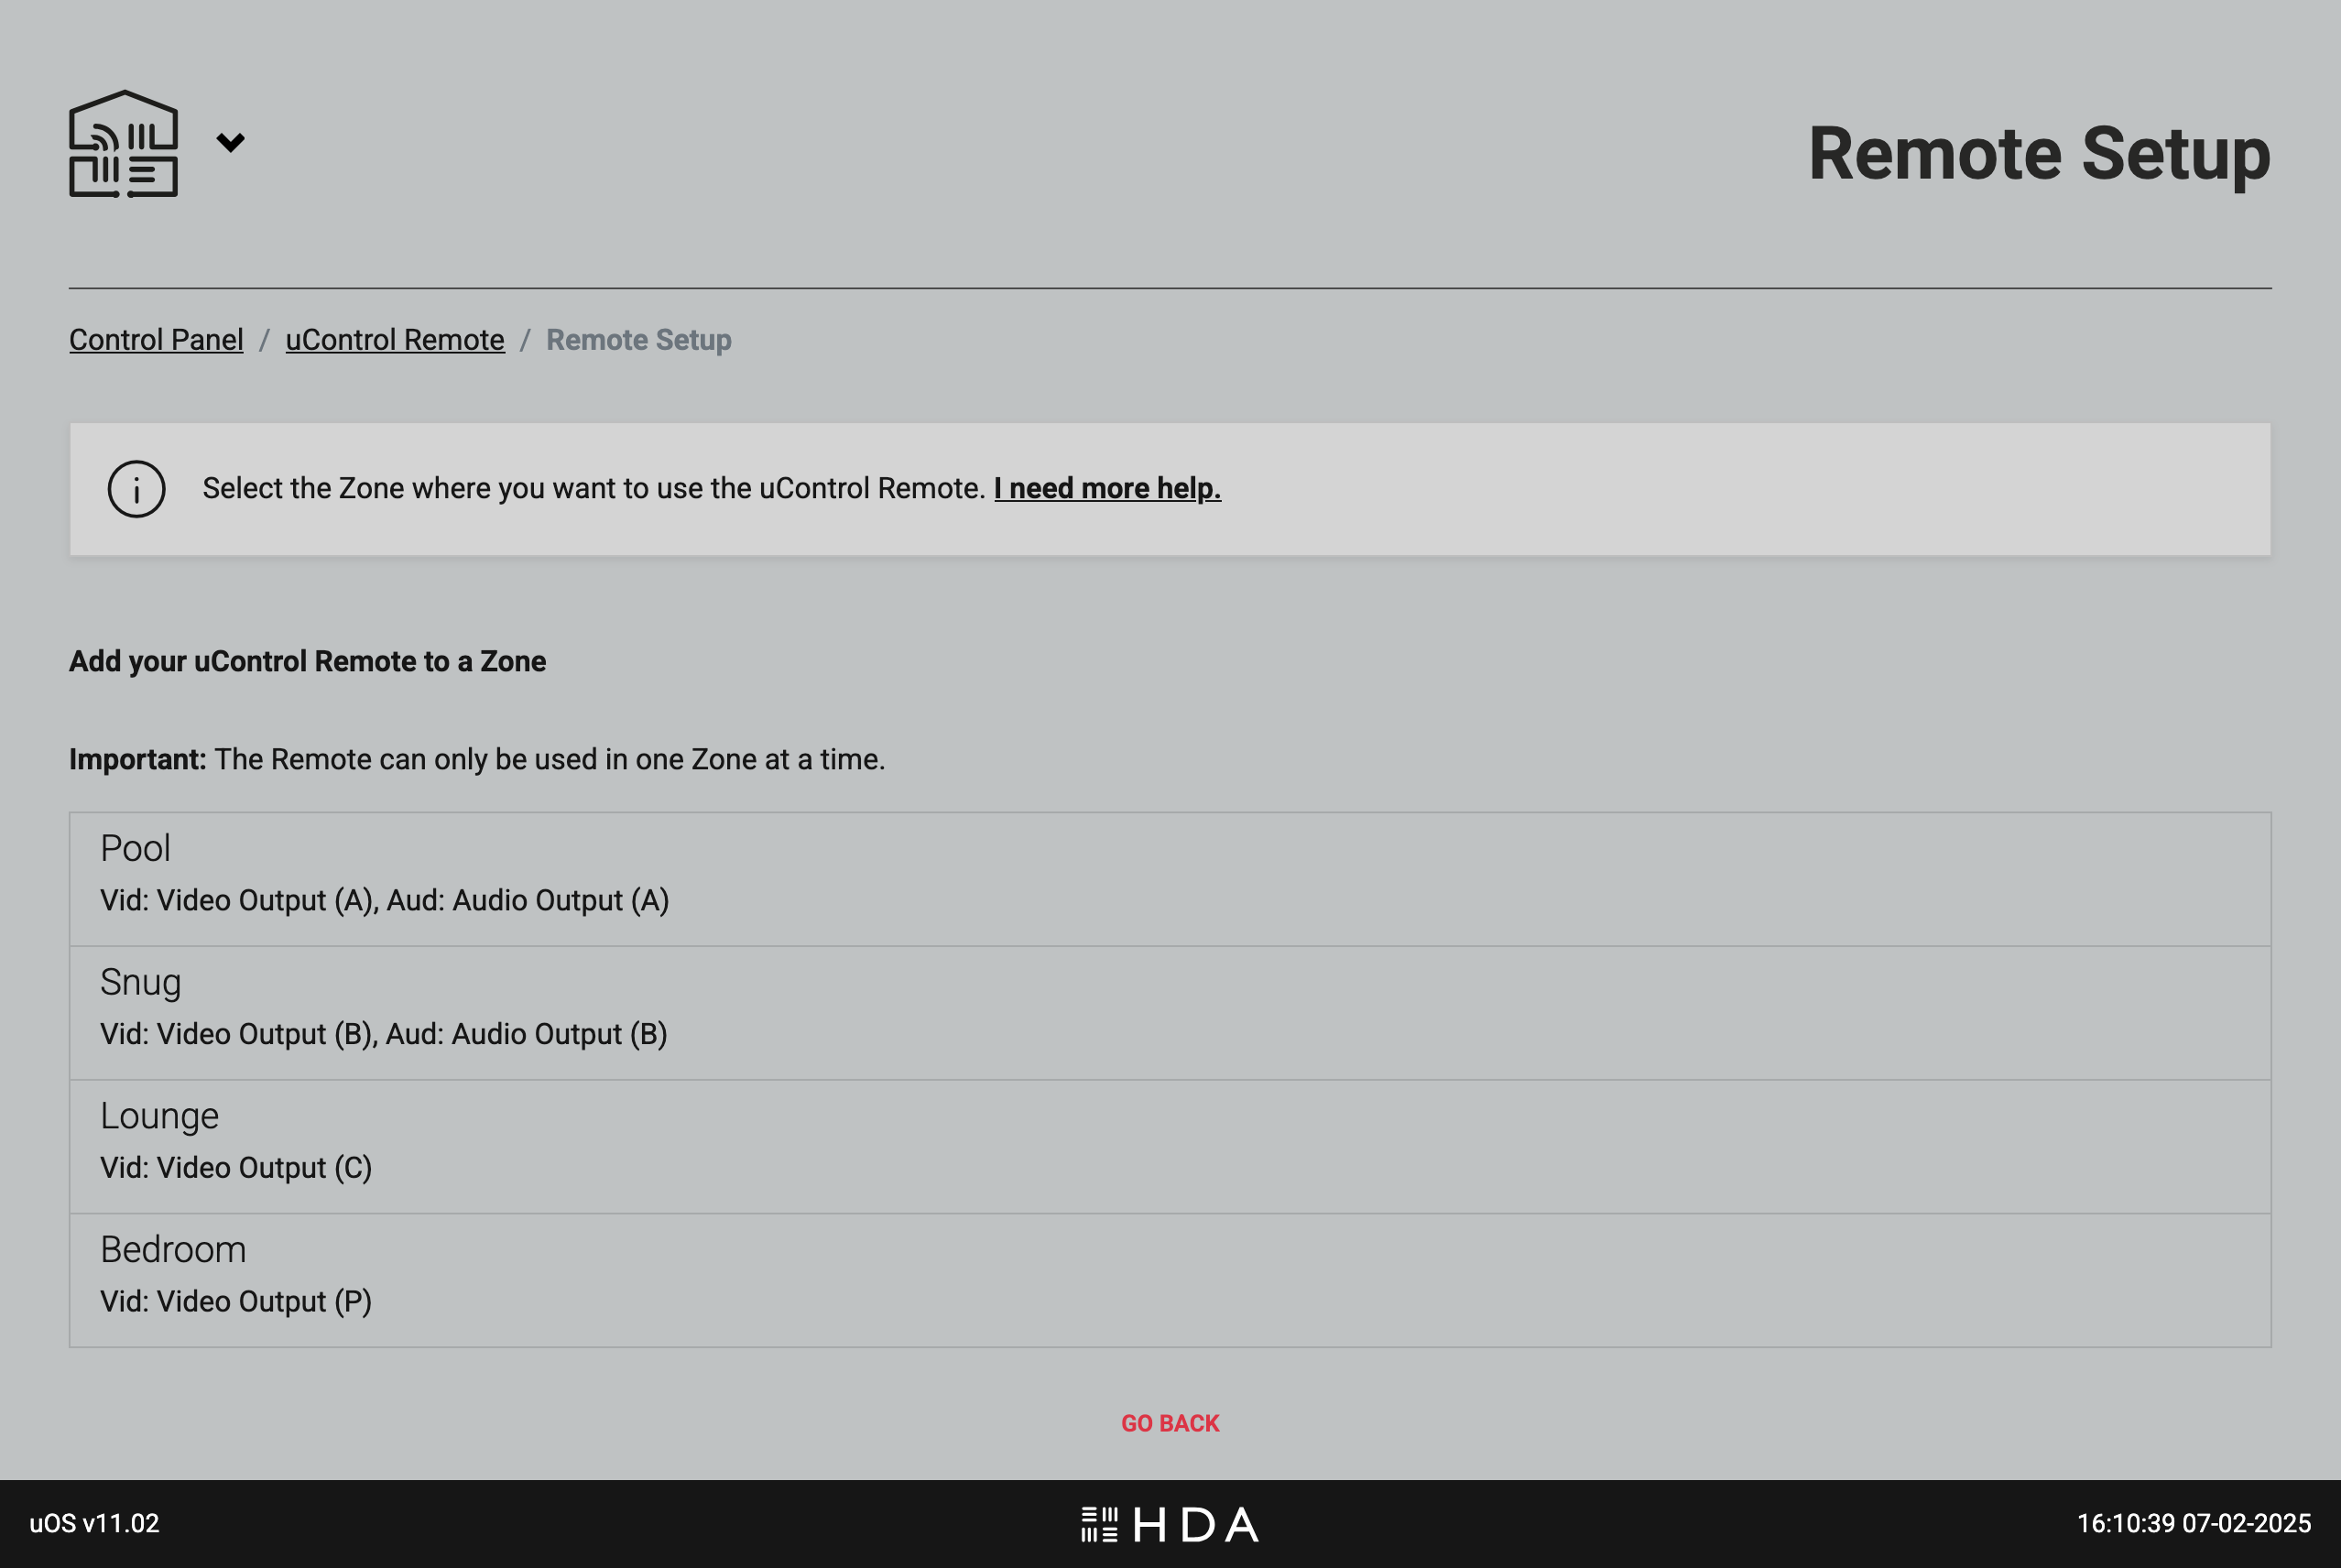
    Add your uControl Remote to your Zone or Room.

    uOS will display all Zones that are available on the system. If you do not see any options here, ensure that you have created your Zone properly and can see it inside the uControl app.

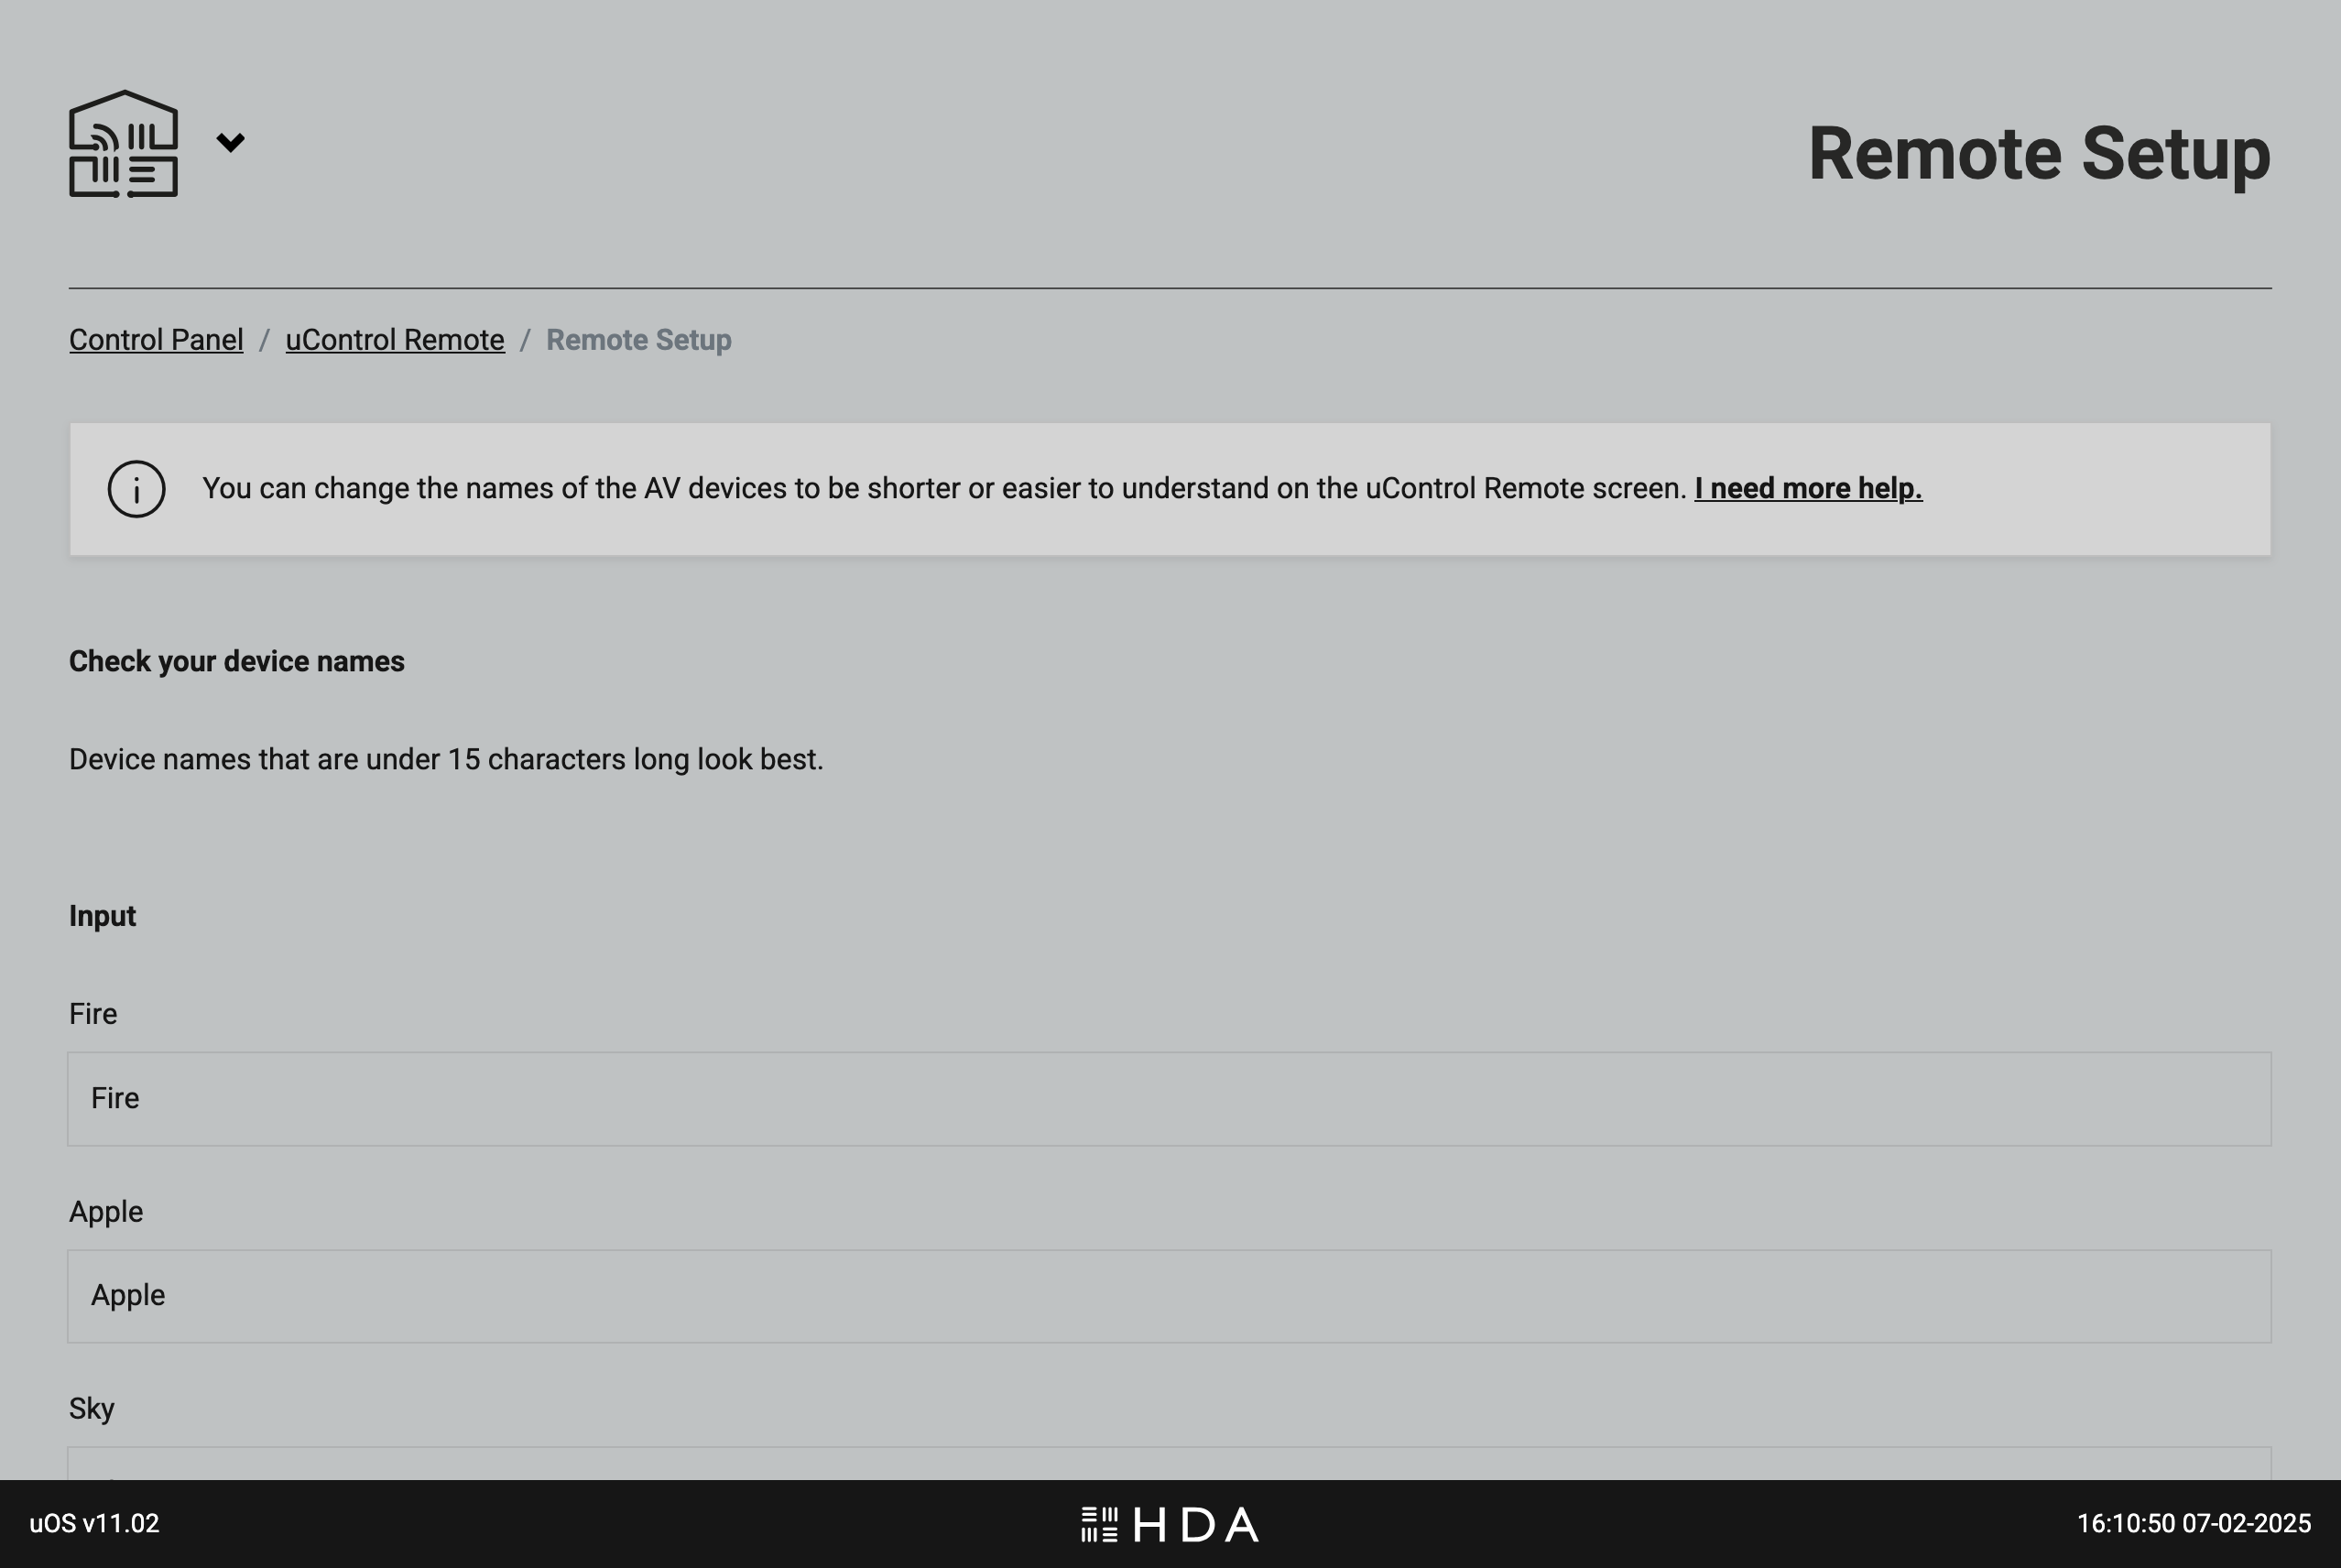
    Optional step: rename your devices so they are easier to read on uControl Remote’s screen.

    The uControl Remote’s screen has a maximum width of 15 characters. You can shorten any long names to make their appearance better on your Remote.

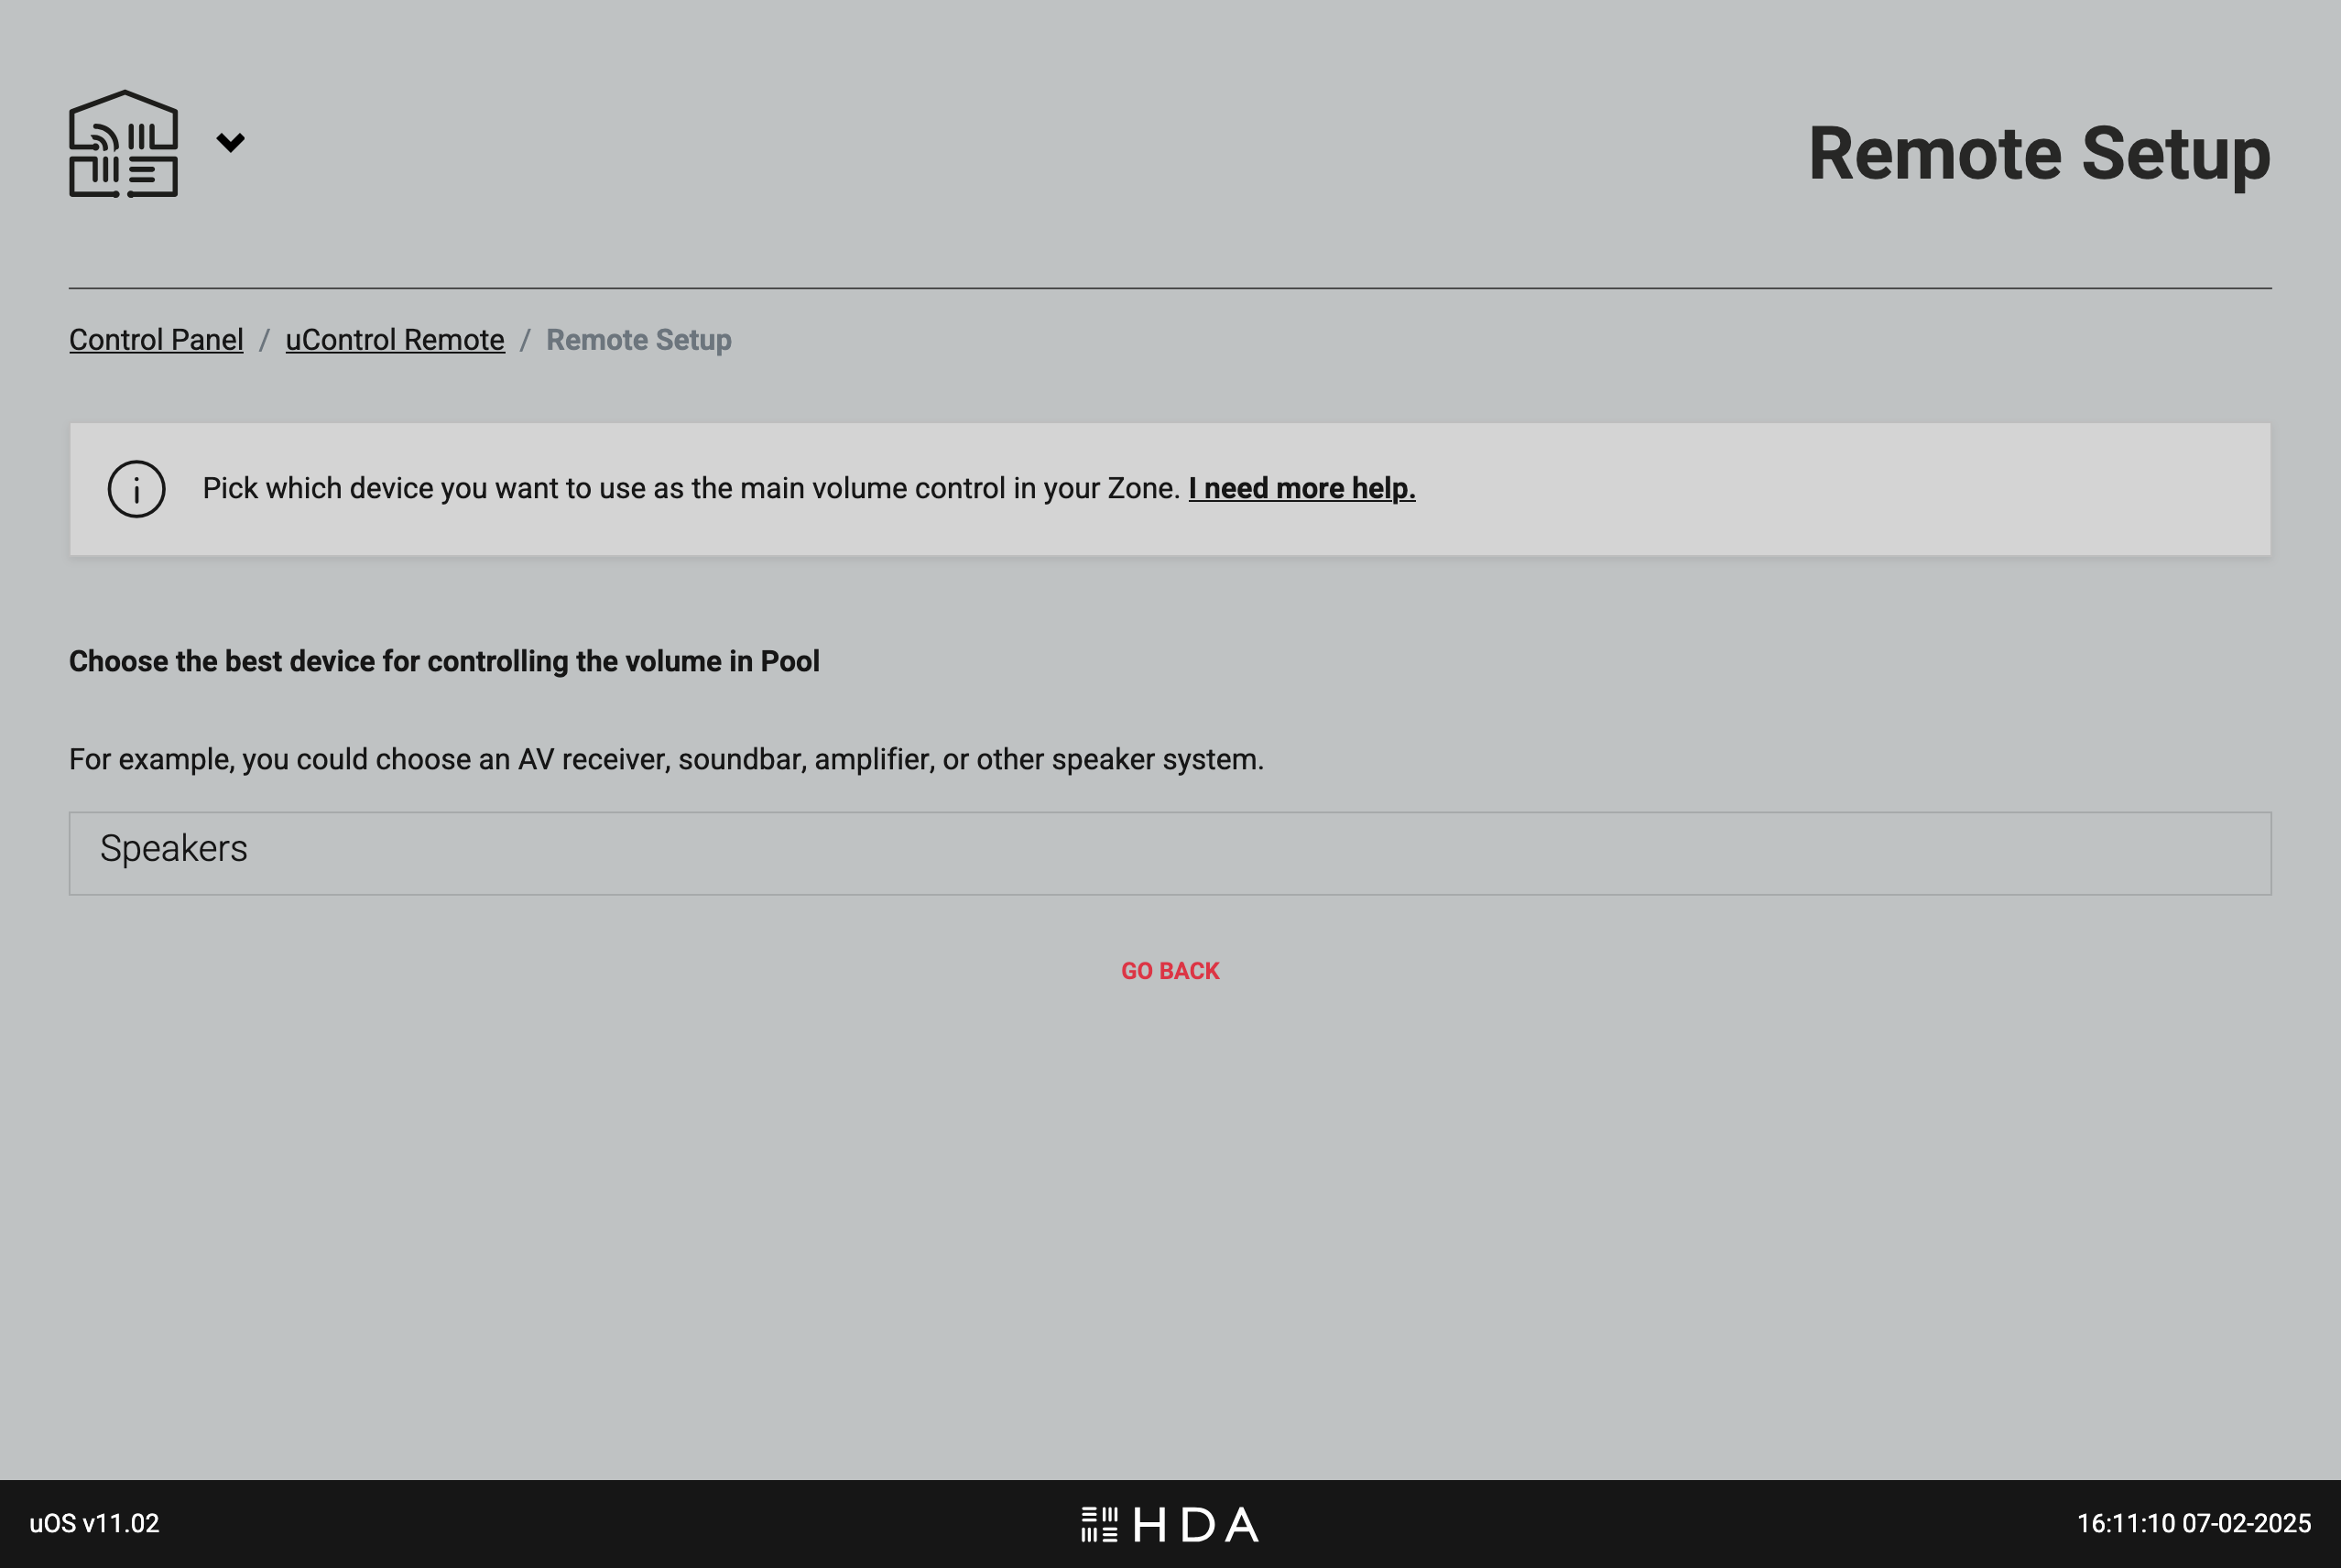
    Select what will be doing the volume control in your Zone or Room.

    uOS will automatically detect all devices that are capable of volume control in the Zone you have selected and will present them as an option for you. Once selected, this option will become the default volume control in that Zone when using uControl Remote.

    More about volume: uOS will automatically select devices you’ve installed that offer volume control and will present them in this list based on how they are categorised by HDA. This includes TVs, Projectors, audio streamers/amplifiers (Wiim, Sonos), AVRs and HDA hardware like MHUB or MZMA.

    If you have multiple devices that are all volume controllable (eg TV + AVR) then you will still need to nominate which device is default but uOS will transfer all options to the remote. This means you can switch away from the default option by pressing and holding the “AUDIO” key on the Remote. If you power down the remote or it is restarted, uControl Remote will revert to it’s default setting.

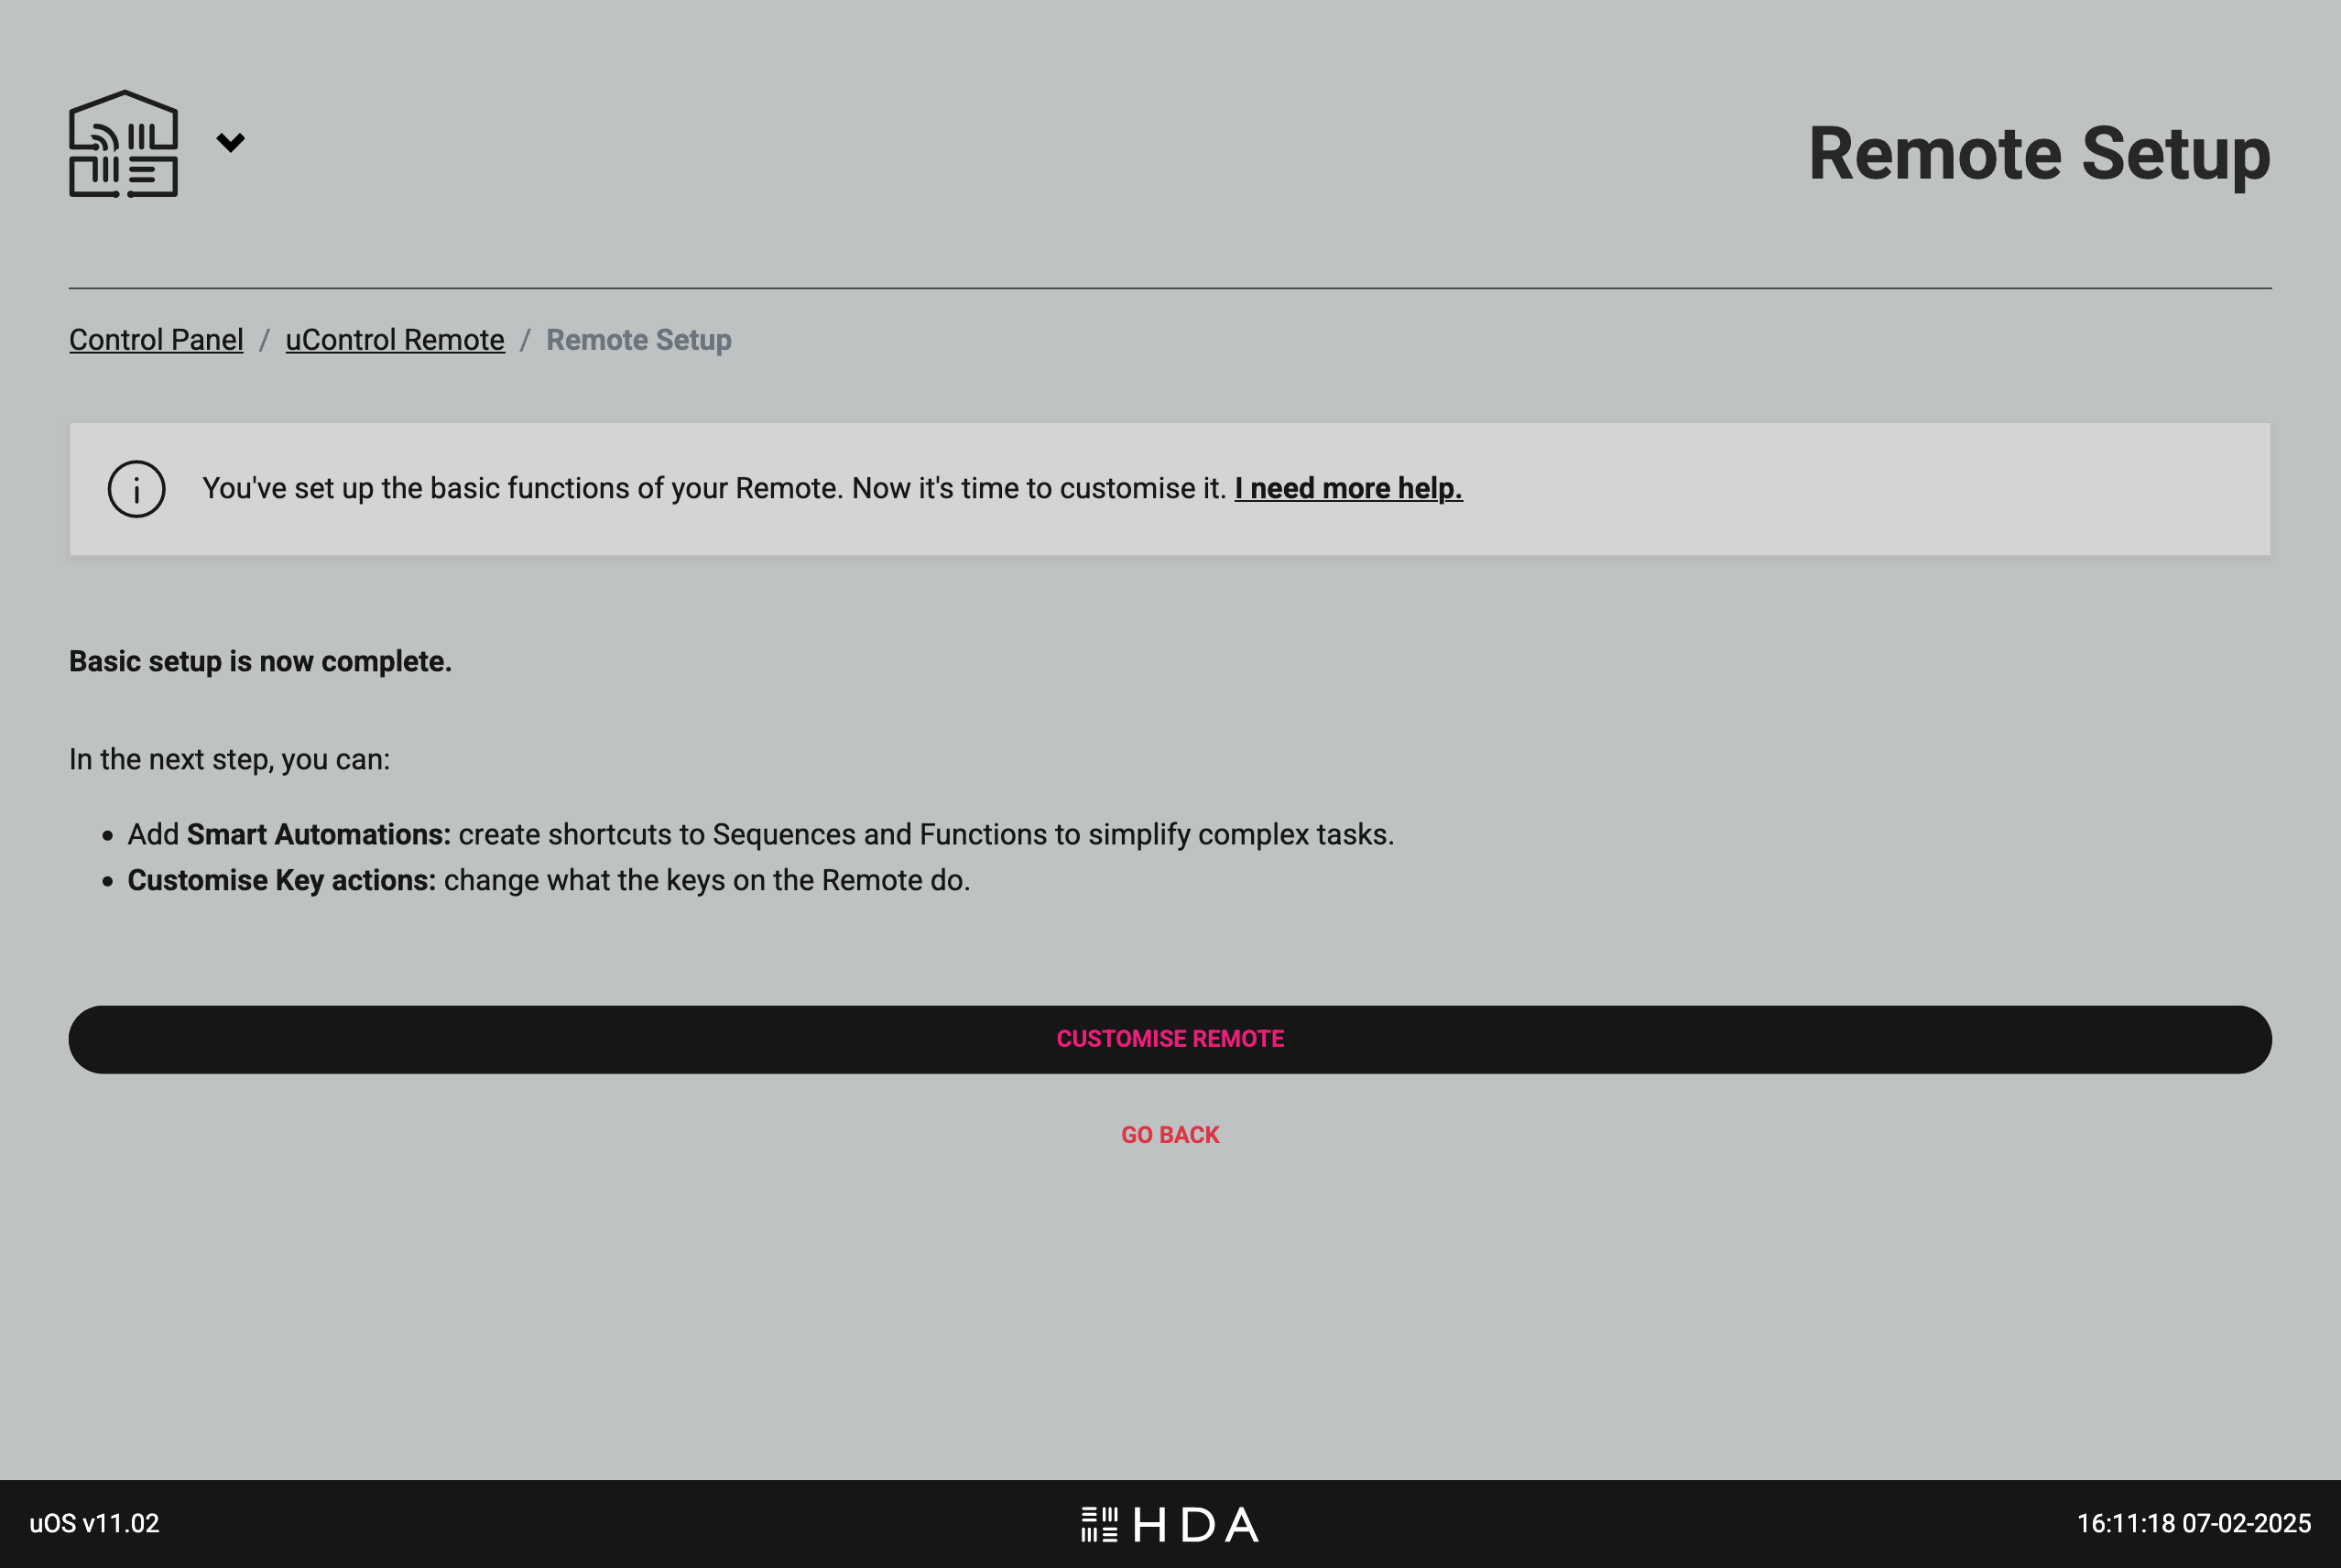
    Basic setup is complete.

    The basic setup is now complete and you are now able to customise how the uControl Remote works down to individual keys.
  • mHub 4K Network Discovery Tool

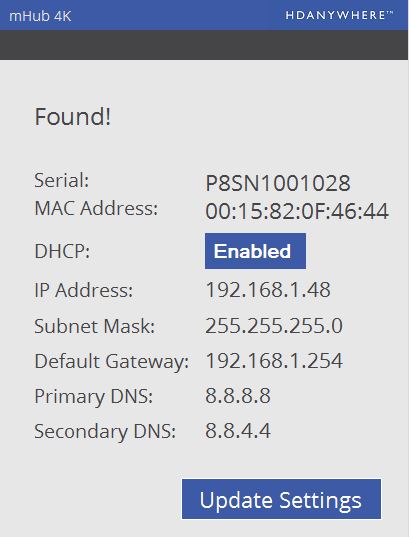
    mHub 4K Network Discovery tool

    To enable access to the mHub 4K web interface, you will require the IP address of the unit.

    This is found using the Network Discovery tool. Simply download and run the software below and this will give you the current IP settings of your unit, and also the option to change the settings to suit you network infrastructure.

    Discoverytool

    To change to fixed IP settings, please click ‘Enabled’. This then allows you to manually enter network information. Finally click ‘Update Settings’ to store entered information.

    Download software – Network Discovery Tool

  • MHUB 4K 4×3+1/8×6+2 RS232 Connection

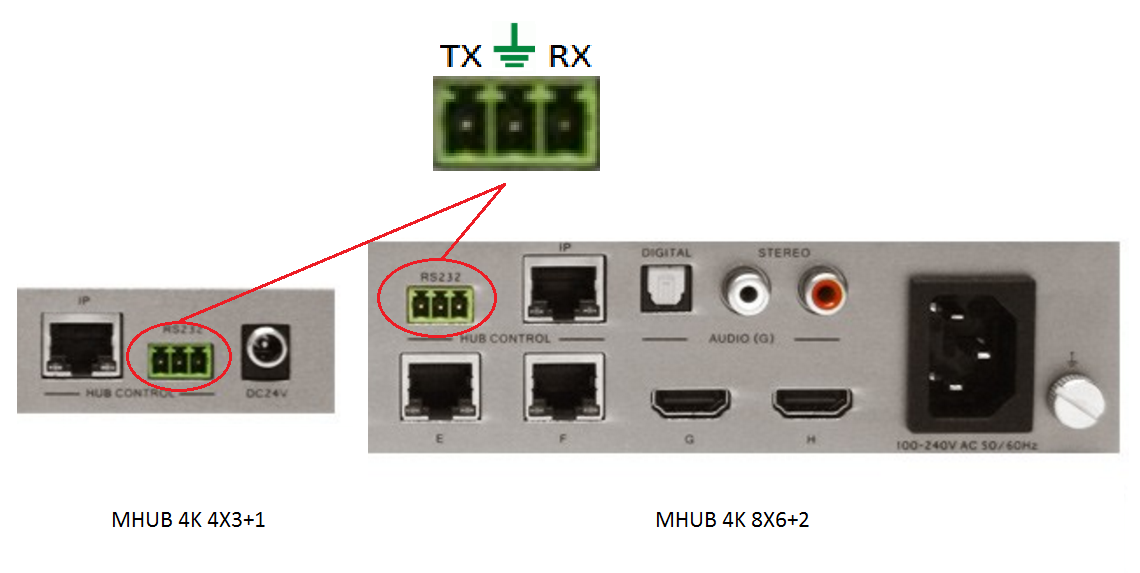
    If you wish to control your MHUB 4K 4×3+1/8×6+2 from an external control system via a RS232 connection you will need to wire the included phoenix connector to the following specification.

    rs232

  • Using Flirc with Amazon devices for use with uControl

    Some devices no longer have built in IR receivers. To enable them to be used with the uControl app you can add a third party device called FLIRC. This connects to a source device via USB and turns IR codes into control commands the source device recognises.

    There are two Flirc devices that we are compatible with, the first part of this guide is for the older model which can be found here. The second part of this guide is for the Flirc device that is specifically for the Amazon Fire TV and can be found here.

    Regular Flirc

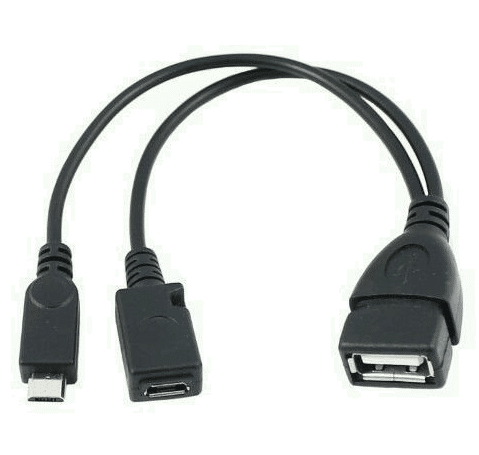
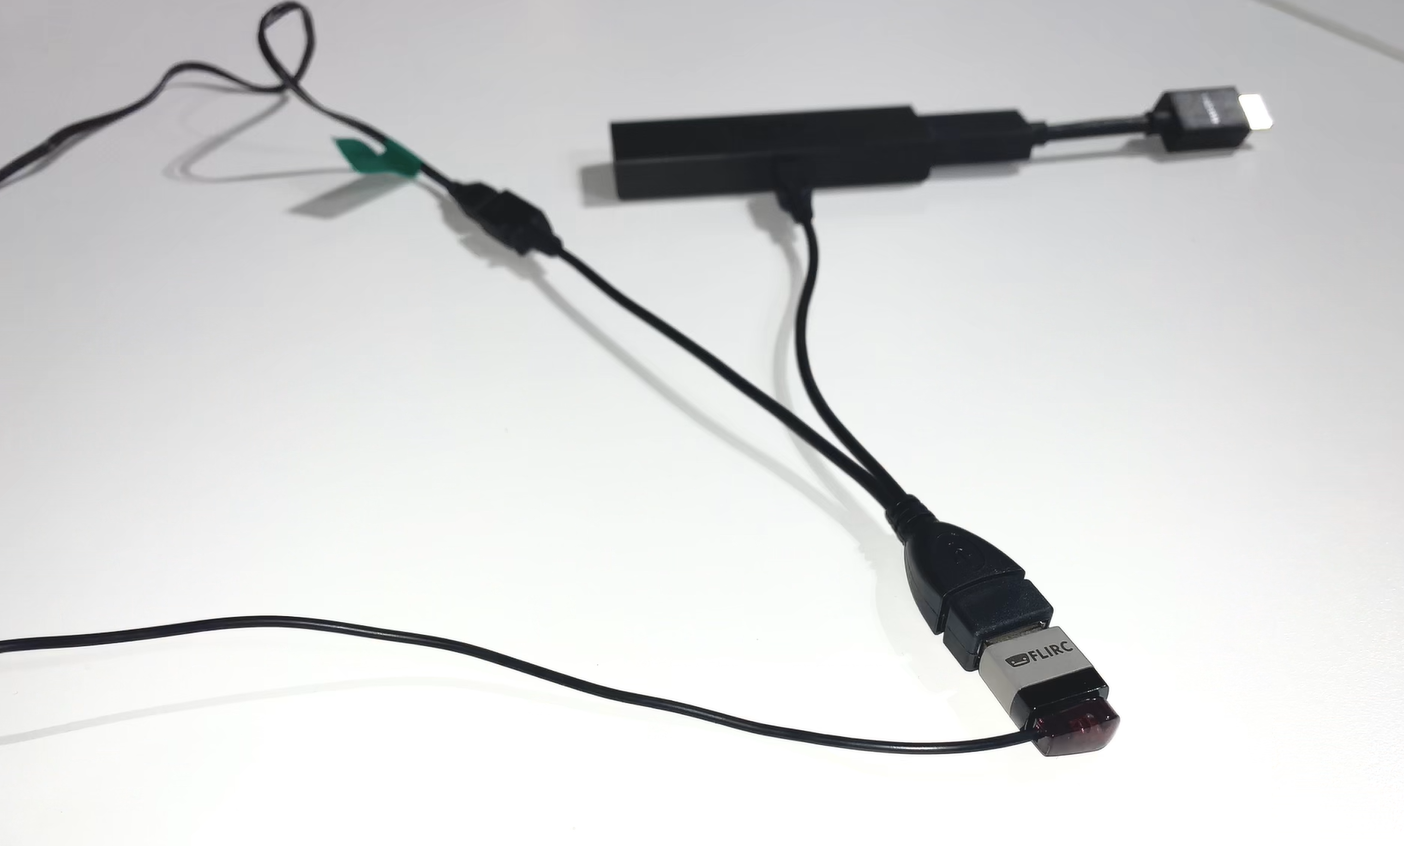
    If you are using the older model of Flirc you will need an OTG cable like this –


      update-mos

    Install the Flirc software on your computer and install this profile onto your laptop/PC – Fire TV

    Load up the Flirc software and in the top left click File, and then Load Configuration and choose the Fire TV profile you have just downloaded.

    Remove your Flirc from the laptop/PC and connect it to the female USB port on the OTG cable. Then taking the male micro USB section of the cable plug it into the Firestick. Lastly plug your power into the female micro USB port.

    Next place the IR transmitter from you HDANYWHERE device on or near to the Flirc. You may need to move it around to test which positioning works best, but we recommend taping it to the top of the Flirc.


      update-mos

    Once this is done you can install the FireTV(FLIRC) IR pack and control your Amazon device with uControl.

    Amazon Fire TV Flirc

    If you are using the Fire TV specific Flirc you will not need the OTG cable, but will need to install the Flirc software on your computer and install this profile onto your laptop/PC – Fire TV

    Load up the Flirc software and in the top left click File, and then Load Configuration and choose the Fire TV profile you have just downloaded.

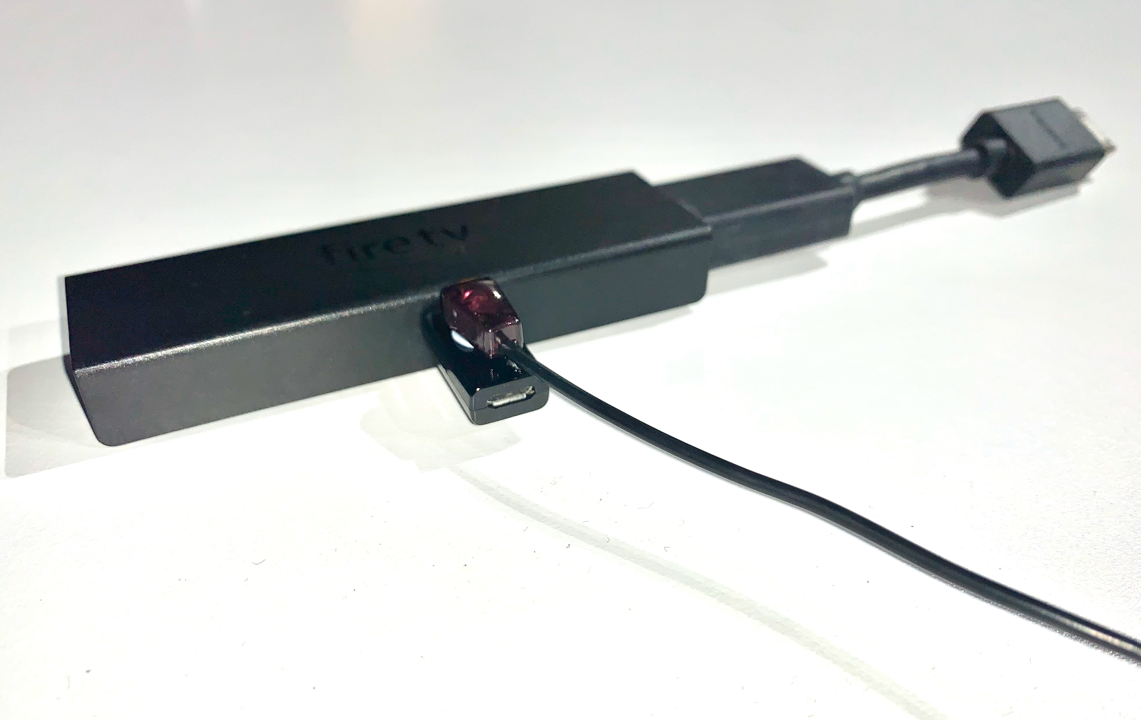
    Remove the Flirc from your laptop/PC and connect the power lead to the micro female USB port on the Flirc. Plug the other side of the Flirc (male USB) into the side of the Firestick, and then plug the Firestick into your desired input.

    Lastly place the IR transmitter from you HDANYWHERE device on or near to the Flirc. You may need to move it around to test which positioning works best, but we recommend taping it to the side, adjacent to the Flirc.


      update-mos

    Once this is done you can install the FireTV(FLIRC) IR pack and control your Amazon device with uControl.
  • Integrating Stream Deck with uOS

    Stream Deck & HDANYWHERE.

    Using an Elgato Stream Deck along with an MHUB or Zone Prossesor you can use the Elgato device and our API to send commands to uControl/uOS to control virtually any display, source inputs and lighting control.
    Below you will find a step by step how-to guide:


  • Using the USB port on MHUB models for recovery and diagnostics

    MHUB 100A matrices have a USB A port on the front panels in the bottom right corner.

    With MHUB PRO models you can enable DHCP from the MENU button on the front panel by holding it down for 3 seconds. For MHUB 100A models you need to follow Guide 1, for newer MHUB U models follow Guide 2 and for older MHUB U (micro USB on front) models use Guide 3.


    Guide 1

    Guide 2

    Guide 3


  • EDID management: Modular 4×4 and 8×8

    EDID (Extended Display Identification Data) is information provided by a display to describe its capabilities to a source. It contains information including resolution, audio formats and frame rates. Modular has the ability to ‘Fix’ the EDID profile to allow a source to always pass video with a fixed resolution and/or specific audio output (i.e 1080p 60Hz, with 5.1 multi-channel audio)

    If the system is functioning as normal, then no EDID management is required, however if you have a source that will not output the correct resolution/audio type, this can be resolved by following the instructions below

    Please remove the SD card from the unit and connect it to a PC (Please do not use a MAC). On the route of the SD card is a file called ‘settings.ini’, this is the file that will be edited. Open the file in a text editor such as notepad, then scroll down to the bottom of the file

    Enter one or more the following lines where required

    edidprofile1 = x     ; sets the EDID profile for source connected to input 1
    edidprofile2 = x     ; sets the EDID profile for source connected to input 2
    edidprofile3 = x     ; sets the EDID profile for source connected to input3
    edidprofile4 = x     ; sets the EDID profile for source connected to input4
    edidprofile5 = x     ; sets the EDID profile for source connected to input 5  (8×8 only)
    edidprofile6 = x     ; sets the EDID profile for source connected to input6 (8×8 only)
    edidprofile7 = x     ; sets the EDID profile for source connected to input 7 (8×8 only)
    edidprofile8 = x     ; sets the EDID profile for source connected to input 8 (8×8 only)

    where x equals:
    0 – Presents the source with the 1080p template EDID
    1 – Fixes the EDID
    2 – presents the source with the 4K template EDID
    3 – presents the source with the 1080p template EDID with 5.1 enabled
    101  – presents source with the EDID of the Sink connected to Output 1
    ..

    108  – presents the source with the EDID of the Sink connected to Output 8


    Once all editing has been done, save the settings.ini file, and reinsert the SD card back into the Modular unit.

    Also please reboot any source where the EDID profile has been modified to allow the new EDID data to be passed.