Category: Miscellaneous

  • Controlling Philips Hue lighting from uOS

    This guide explains how to pull data from the Philips API so you can control it directly from uOS, uControl App and uControl Remote.

    • For Philips Hue V2 API click Here
    • For Philips Hue Legacy API click Here

    Philips Hue V2 API


    Before you begin, you will need:

    • A HTTPS test program such as Postman, available here
    • The Philips Hue Bridge address
    • A configured Hue lighting system on the same network as the HDA system
    • A fully-commissioned HDA or uControl system with the latest version of uOS (MHUB-OS does not support IP integrations) on the same network as the Philips Hue.
    • A tablet or laptop using any of the most popular browsers (or an iPhone with the uControl app, at the very least) on the same network as the HDA system.

    Please Note – Before you can access the full Philips Hue API you must have made a Philips Hue Developer account.


    Step 1:Get data about the Philips Hue system

    You need to know:

    • Light ID’s
    • Group ID’s
    • Scene ID’s

    There are a few ways you can get the IP address of your Philips Hue device:

    1. Use a network scanner app like Fing to find Philips Hue on your network.
    2. Use Philips Hue broker server discovery process.
    3. Log into your wireless router and look for Philips Hue in the DHCP table.
    4. The Philips Hue app – Start the Hue app and push link to connect to the bridge. Use the app to find the bridge and try controlling lights to ensure that everything is working. Then, go to the settings menu in the app, go to Hue Bridges, select your bridge and then the IP address of the bridge will be revealed.


    Step 2: Build Function


    command-generator-link

    Example Commands

    Hue Command Examples

  • Android APK Download

    If you want to manually install the Android version of uControl you will need to enable Developer Mode on you phone, and allow app installation from unknown sources.

    Once set click the link below.

    uControl2016 for Android

    Important– Development for this version of uControl has stopped, no update will be made, and you install this apk at your own risk.

  • Creating a stacked MHUB system using uControl

    When an MHUB video device is paired with an MHUB AUDIO device we call that a Stack. Stacks can contain up to 4 MHUB products with 1 Master device and 3 slave devices. Master devices can be either VIDEO or AUDIO, slaves are AUDIO only.

    Below are a few examples of stacked systems.

    • Master : MHUBPRO4440, Slaves : 3x MHUBAUDIO64
    • Master : MHUBAUDIO64, Slaves : 3x MHUBAUDIO64
    • Master : MHUB4K44PRO, Slaves : 2x MHUBAUDIO64

    To create a stacked system you will need to download uControl (available on iOS and Android app stores), and your MHUB hardware will need to be powered on and connected to your network.

    CS1
    CS2

    Open the uControl app and select ‘Connect to MHUB System‘. The following screens will be displayed. uControl will search your network for all MHUB devices. To create a stack select ‘Video + Audio

    uControl will now ask you to select first a master device, then upto 3 slave devices. (The order in which you select the slave devices will be their order in the stack. this is indicated by a numeric value on the left side of the device button. If you are unsure which MHUB AUDIO device is which you can simply click on the Identify button at the side of each device which will start the HDA and AUDIO logo flashing.)

    Once this is done you will be taken to MHUB-OS where the first boot Process will be run.

    MHUB FIRST BOOT PROCESS(link)

  • MHUB Control Options

    With the release of the MHUB PRO 2.0 systems, you can now control your HDA system and attached devices with our widest range of control methods. See below for more details.

    IR Passthrough

    Using the included IR cabling included with every MHUB system you can control your source devices using their original IR remote.

    IR Engine

    Included in every MHUB system is HDANYWHERE’s patented IP to IR-engine. Our technology allows you to send IR commands using uControls built-in control packs or by passing Pronto hex into MHUB via our API V2.1

    CEC(MHUB 2.0 Systems Only)

    CEC (Consumer Electronics Control) is a feature of HDMI and allows controls of devices via the HDMI cable linking them. MHUB PRO 2.0 systems support CEC control of displays connected to the HDBaseT or HDMI Mirror outputs.

    API 2.1

    Our most powerful and versatile API has recently be released allowing 3rd party devices and developers to use HDA’s embedded technology such as our IR-engine by sending a single command. Our API uses RESTful

    Voice

    All MHUB systems support voice control as standard via an Amazon Echo (Alexa) device. Voice control is not designed to act as a primary control method but to assist
    the other methods listed on this page. Using voice it is possible to change channels, execute sequences, turn MHUB on/off, increase or decrease display volume and basic
    transport commands such as play/pause/forwards/backwards from any zone.
  • What MHUB systems does uControl Remote support?

    uControl Remote will work with any HDA system marked “uControl inside”. These are typically MHUB’s, MZMA or uControl Zone Processors which shipped with uControl OS (uOS) version 10 or above. MHUB’s which were installed with MHUB-OS (MOS) will not support the uControl Remote, but some can be upgraded (see below).

    Supported Stacked Systems

    REQUIRES A UCONTROL ZONE PROCESSOR 1

    List of systems that support uControl Remote

    Natively Supported

    MHUB (4×1+1) 40 (uOS 11.xx)
    MHUB (4×4) 100A (uOS 11.xx)
    MHUB (6×6) 100A (uOS 11.xx)
    MHUB S (8+8×8) 100A (uOS 11.xx)
    MHUB S (16+16×16) 100A (uOS 11.xx)
    MZMA (6×4) 55 (uOS 11.xx)
    uControl Zone Processor 1
    uControl Zone Processor 5
    uControl Connect Processor

    Upgradable

    REQUIRES A UCONTROL ZONE PROCESSOR 

    MHUB PRO 2.0 (4×4) 40
    MHUB PRO 2.0 (8×8) 100
    MHUB PRO 2.0 (4×4 & 8×8) & MZMA
    MHUB S (100A) & MZMA
    MHUB S (100) + MHUB S (100A)
  • Replacing the uControl Remote’s battery (Step-by-step instructions)

    Required tools

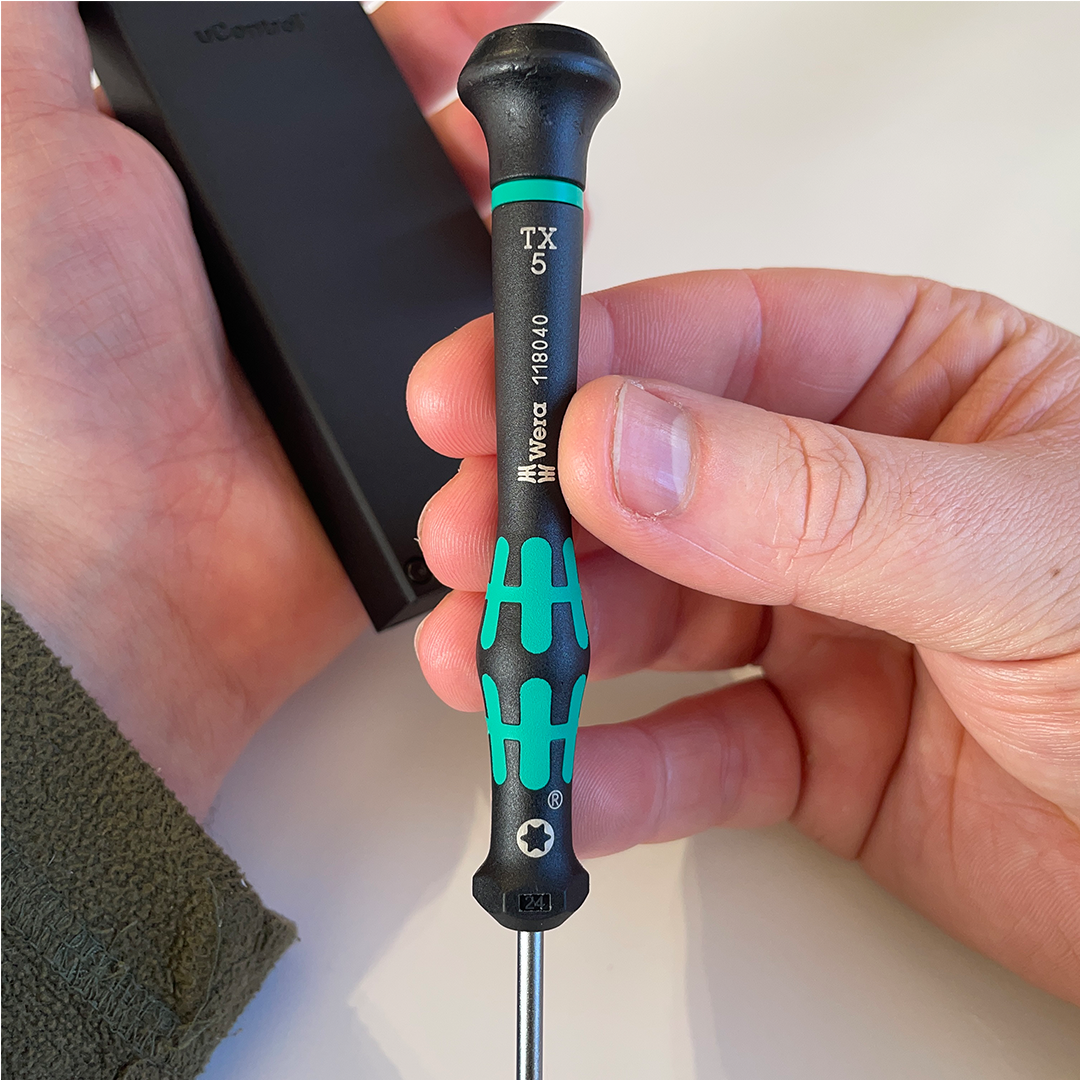
    Make sure you have a T5 Torx Screwdriver to remove the screws on the uControl Remote.


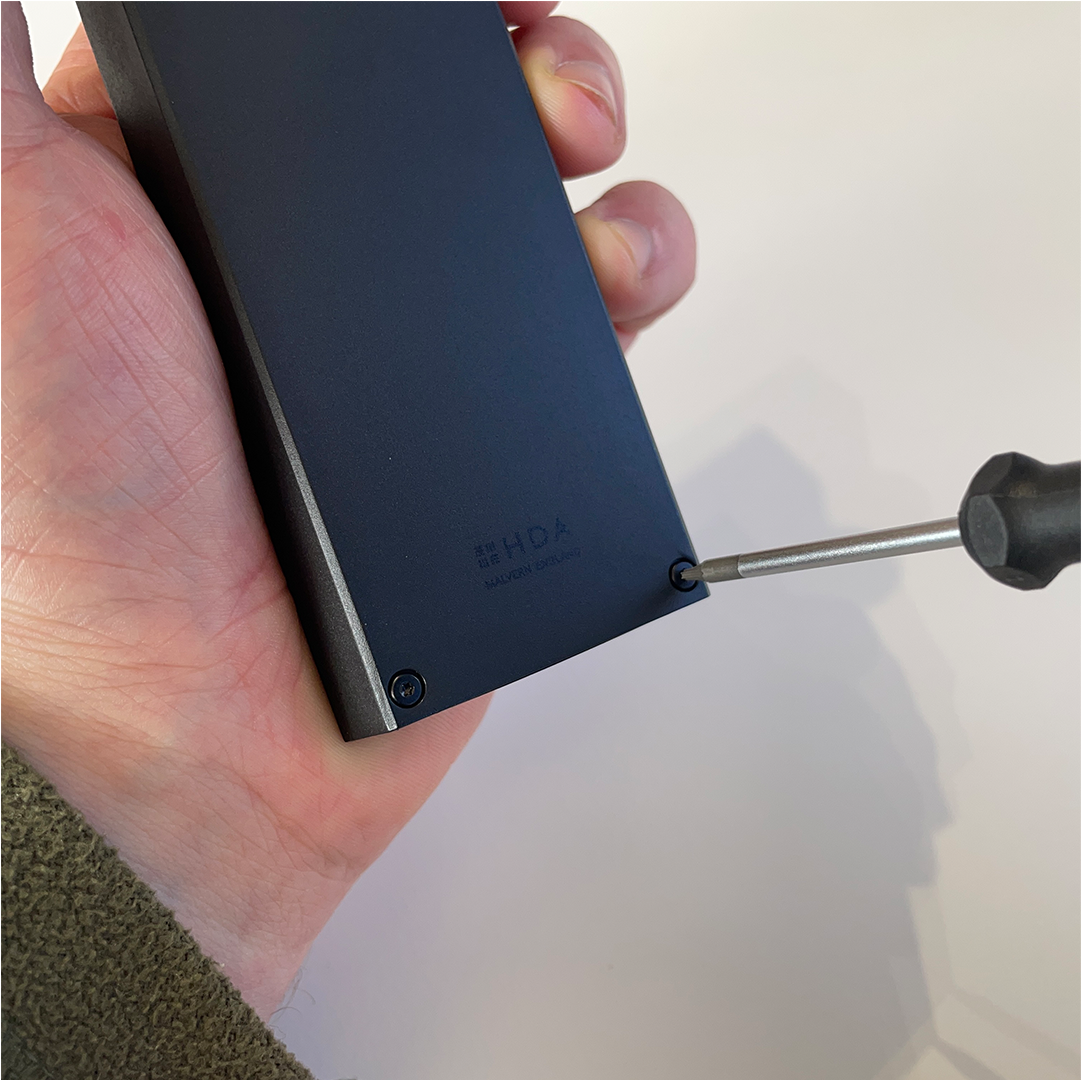
    Flip your uControl Remote over and look to the bottom of the device, you will notice two screws, remove them with your T5 screwdriver.


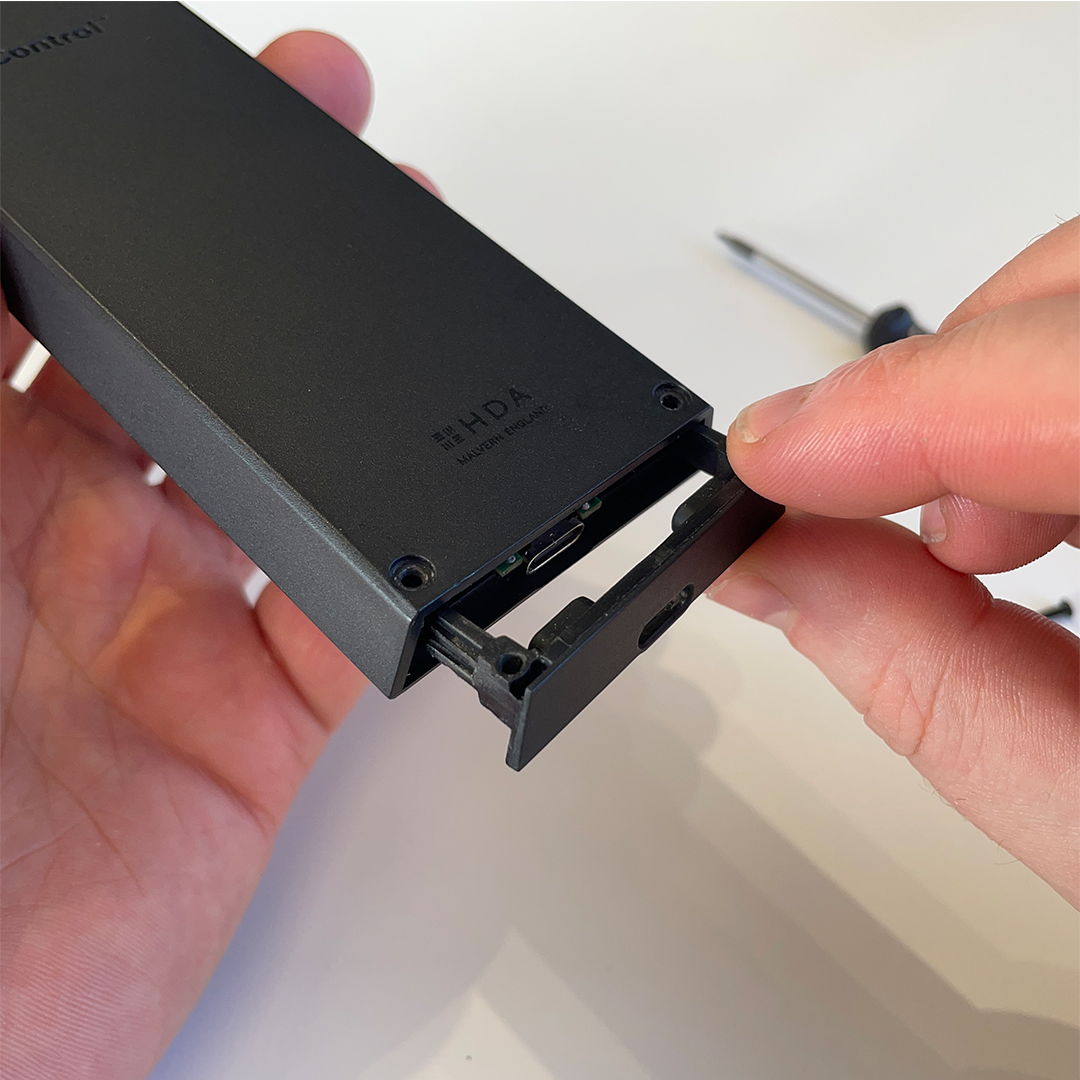
    The screws will release the battery hatch and use your fingers to extract it from the main case.


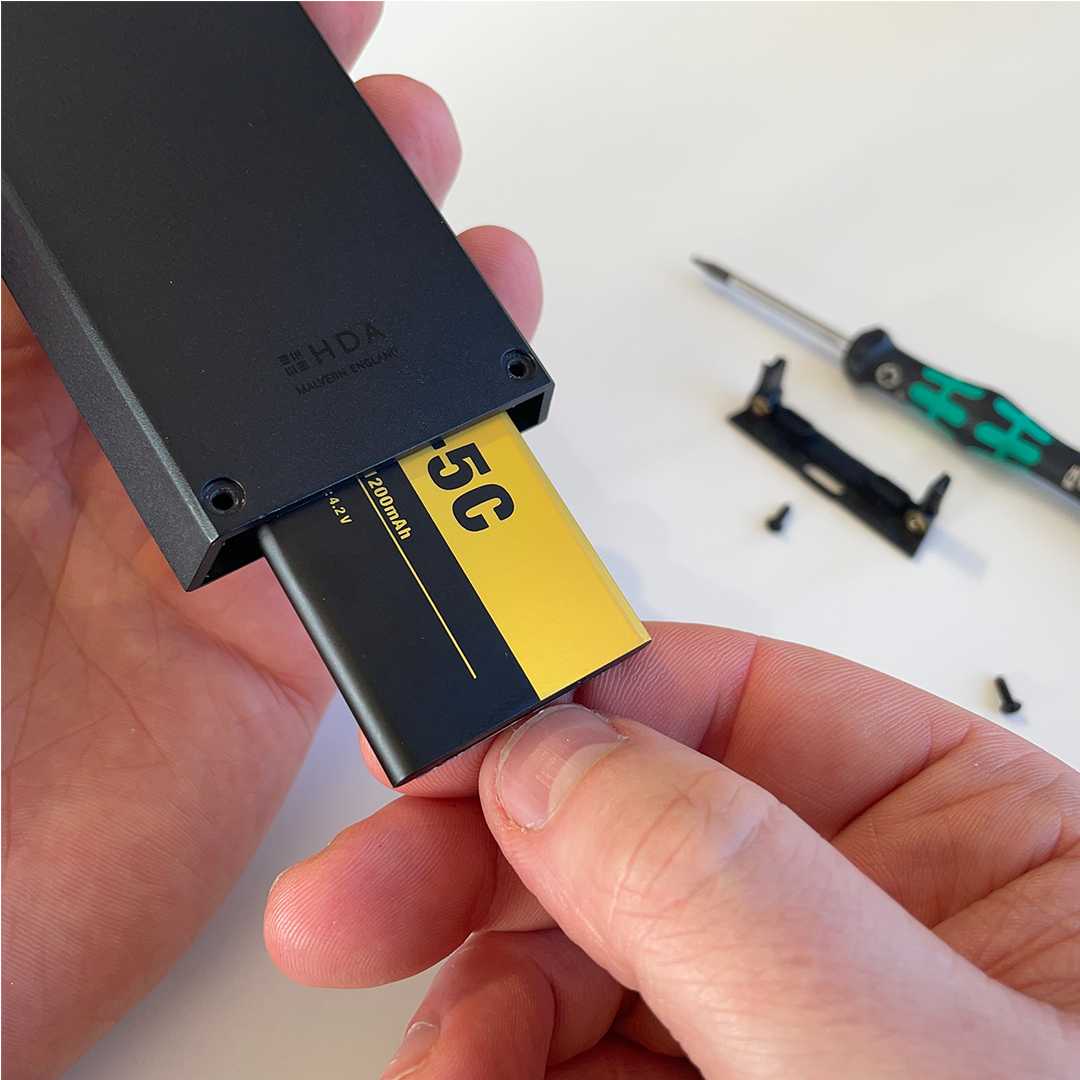
    Gently tip the uControl Remote to remove the battery, it should slide out with little resistance.


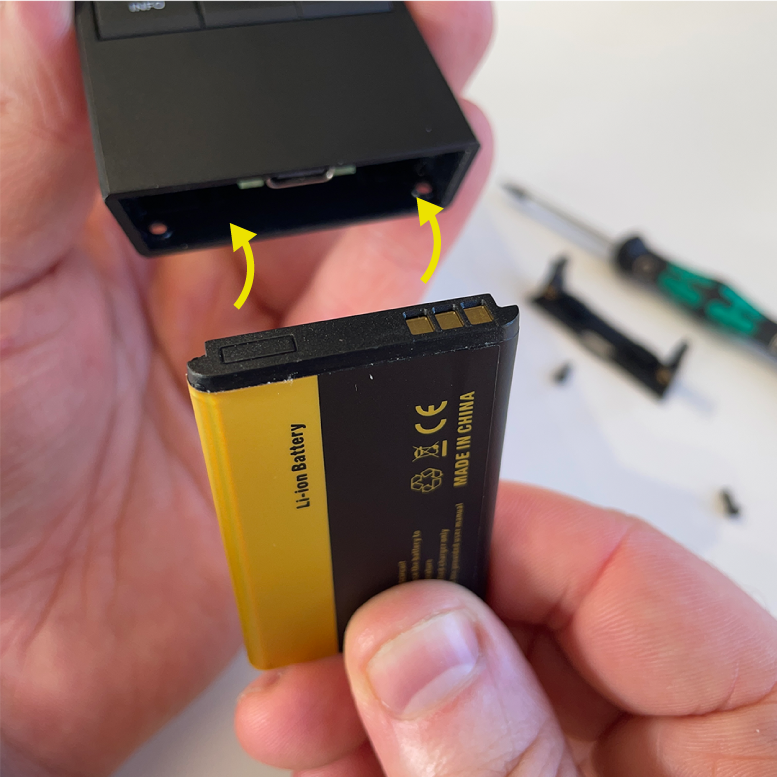
    Insert the new battery with the connector on the right-hand side, ensuring the connectors face inward. Once inserted, the connectors should be hidden. If you can see them, the battery is in the wrong way.


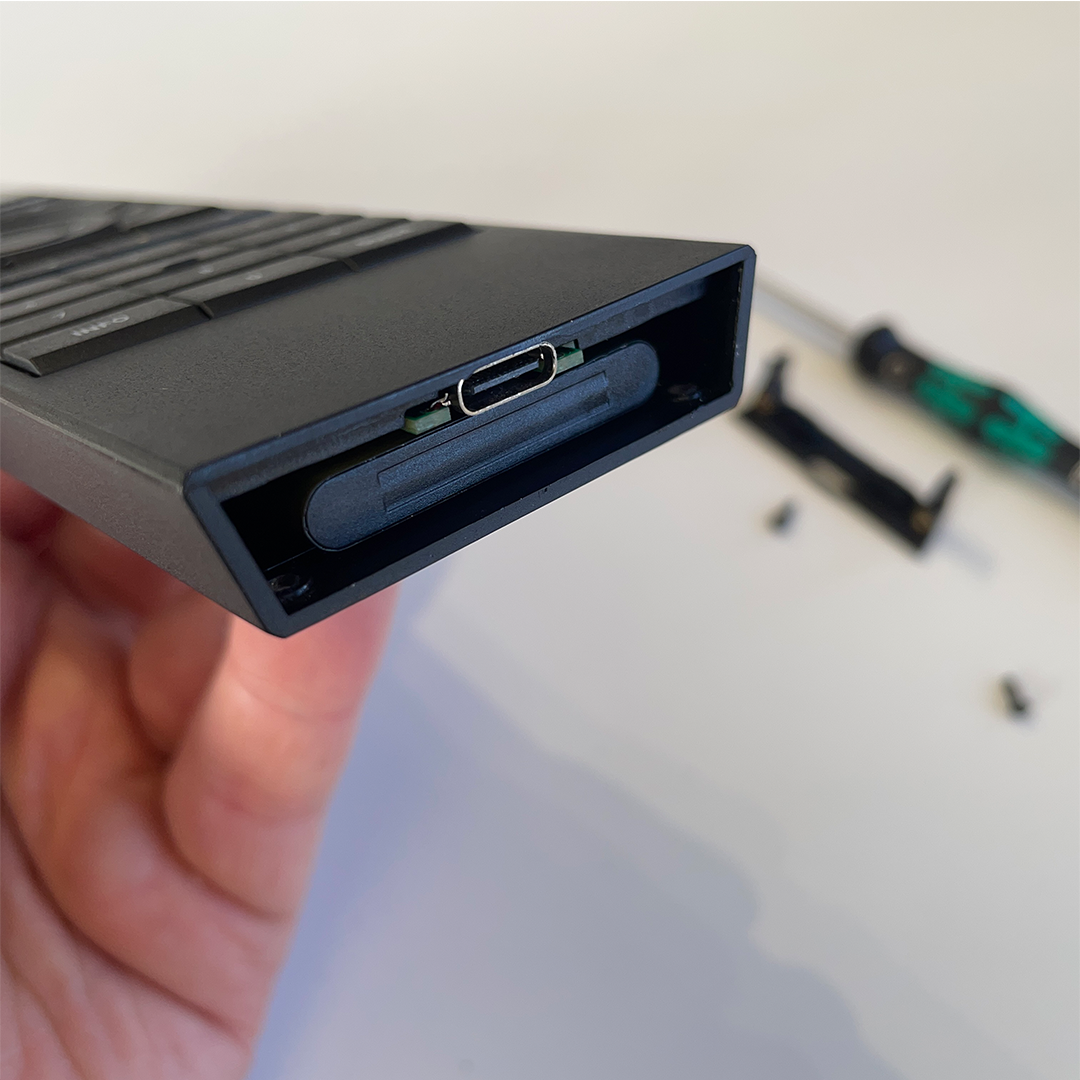
    Ensure that you can not see the battery connector once inserted.


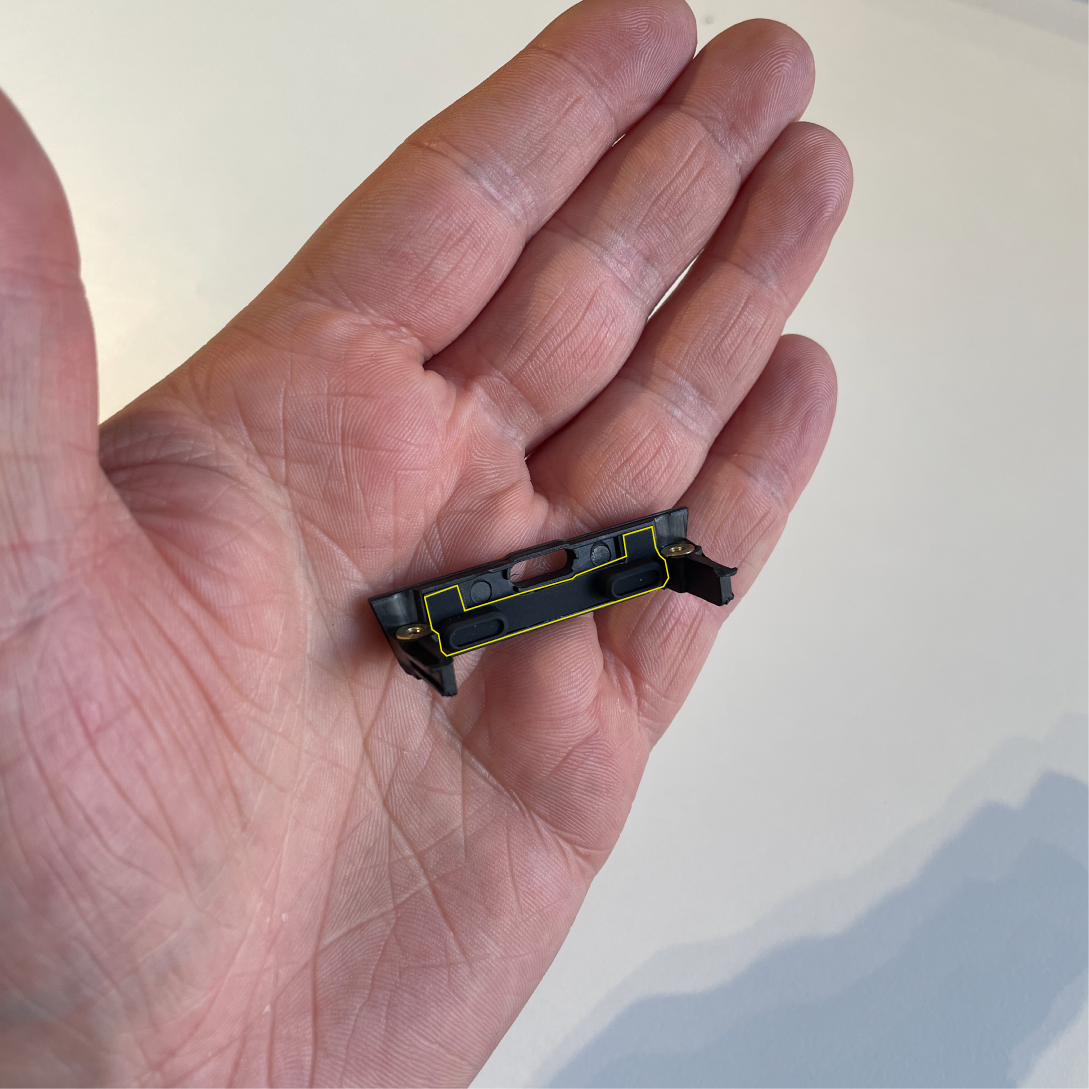
    Before closing the battery hatch, make sure that the rubber stopper is correctly seated as indicated by the yellow outline.