If you wish to control your MHUB 4K 4×3+1/8×6+2 from an external control system via a RS232 connection you will need to wire the included phoenix connector to the following specification.
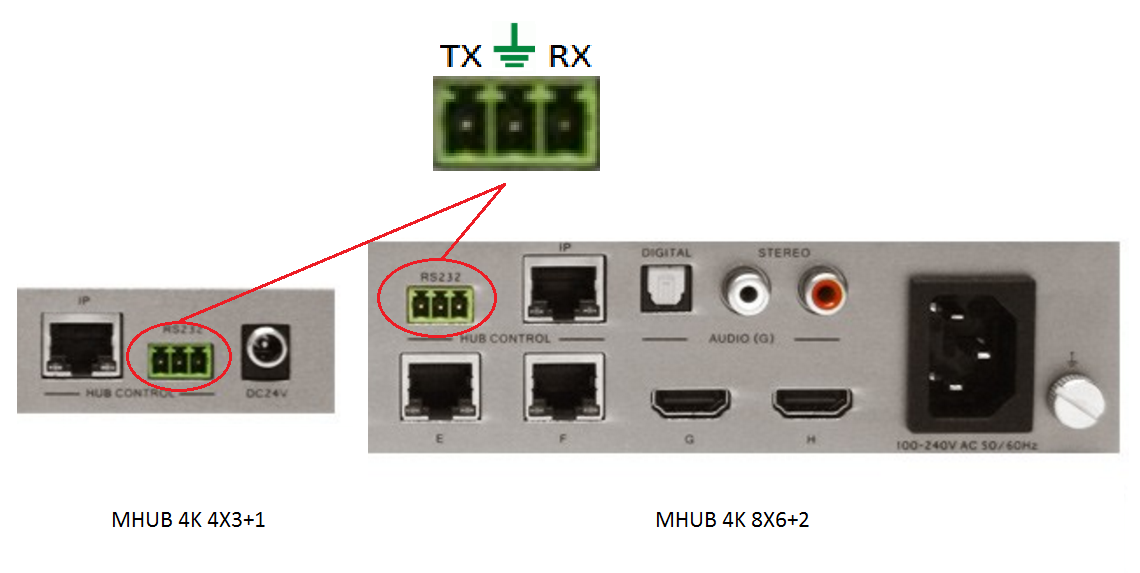

If you wish to control your MHUB 4K 4×3+1/8×6+2 from an external control system via a RS232 connection you will need to wire the included phoenix connector to the following specification.
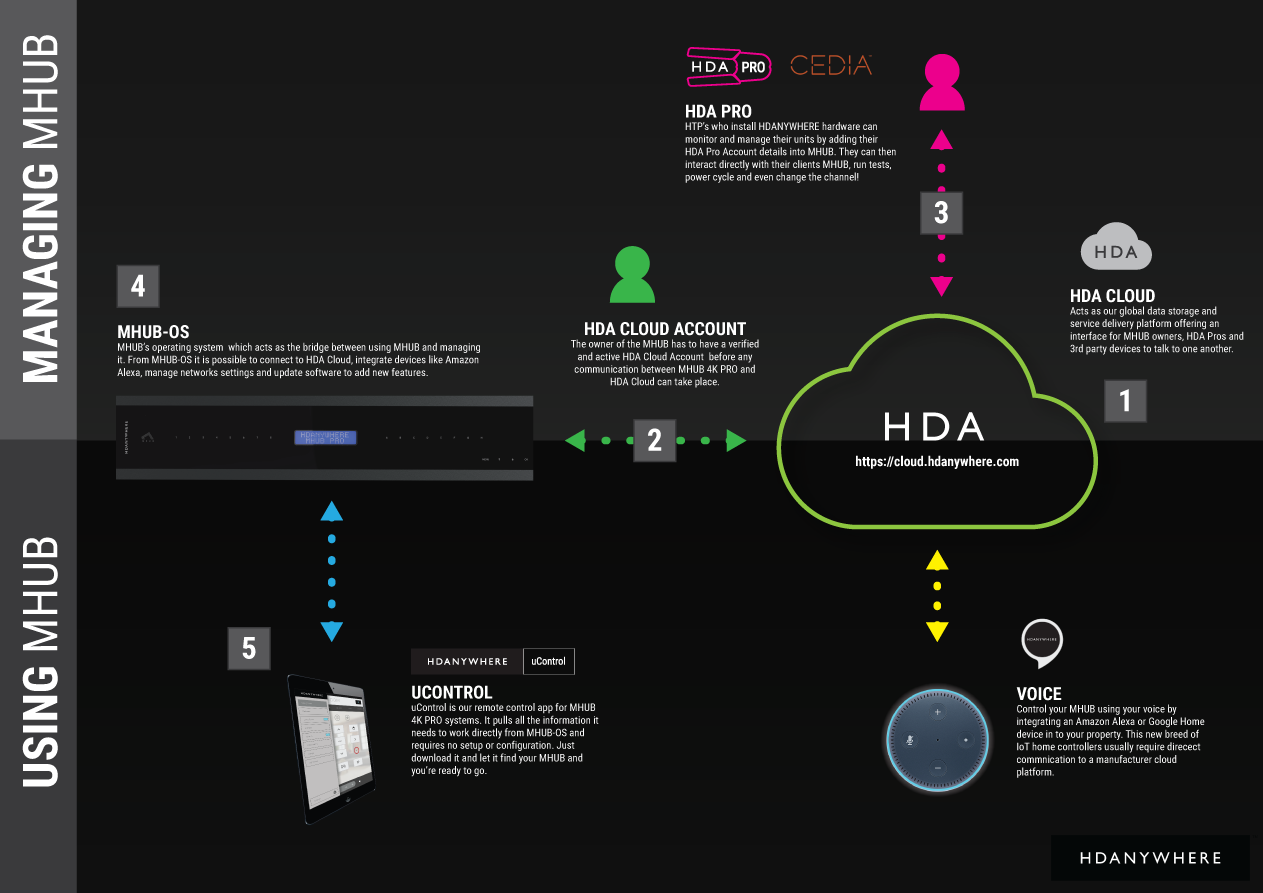
The HDA Cloud acts as our global data storage and service delivery platform offering an interface for MHUB owners, HDA Pro’s and 3rd party devices to talk to one another.
There are two types of cloud account that can be associated with an MHUB system.
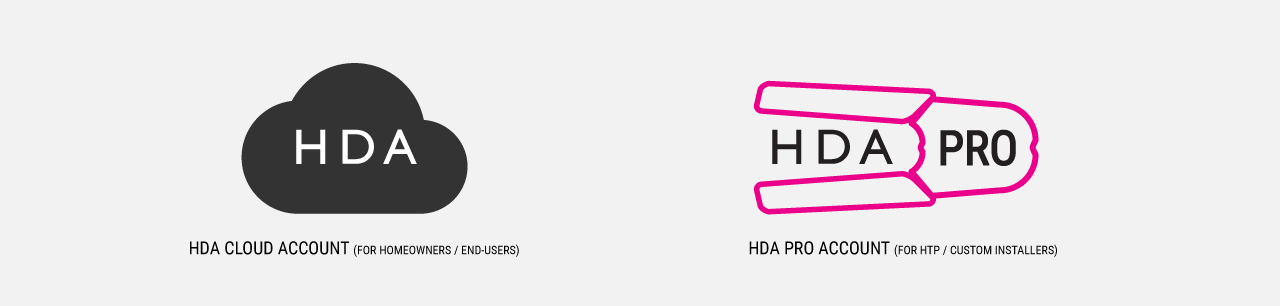
The HDANYWHERE (HDA) Cloud account is the account that belongs to the Homeowner and/or End-User. The owner of the MHUB has to have a verified HDA Cloud account before any communication between MHUB systems and the HDA Cloud can take place.
Registering the MHUB system provides numerous benefits including:
The HDA Pro account can not be added to a unit unless a HDA Cloud account (outlined above) is present first. This account authorises the installer to monitor the MHUB on their customer’s (the homeowner) behalf. This account sits alongside the Cloud account and gives a 3rd party access to the MHUB’s data and the ability to control it. HDA Pro’s can register Here
The following Settings can be managed remotely:
You can also monitor the following:
IMPORTANT: a HDA Pro Account has to be created first Here and authorised by HDA staff before the installer can use their account details to enable monitoring on the MHUB.
MHUB’s operating system which acts as the bridge between using MHUB and managing it. From MHUB-OS it is possible to connect to HDA Cloud, integrate devices like Amazon Alexa, manage network settings and update software to add new features.
uControl is our remote control app for MHUB 4K PRO systems. It pulls all the information it needs to work directly from MHUB-OS and requires no setup or configuration. Just download it and let it find your MHUB and you’re ready to go.
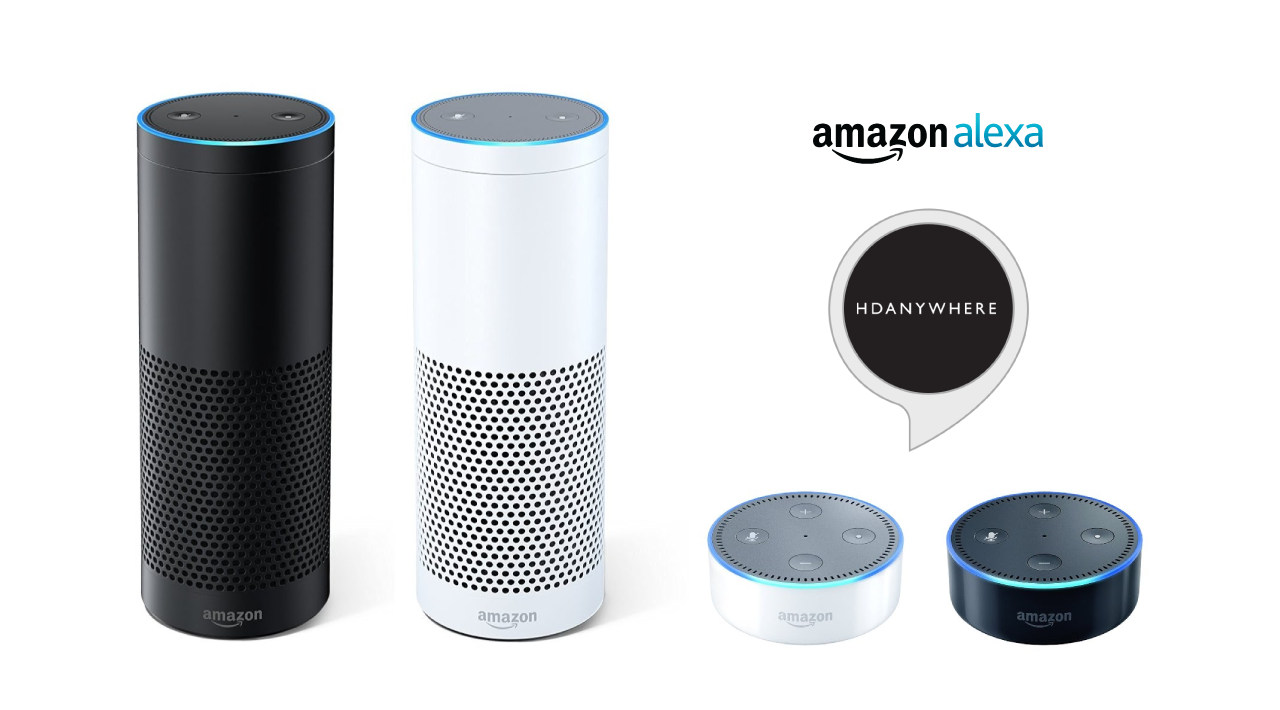
We are assuming that you have already downloaded the Amazon Alexa app and have a functioning Amazon account.
Skill types:
There are two types of skill which you can enable on the Alexa app.
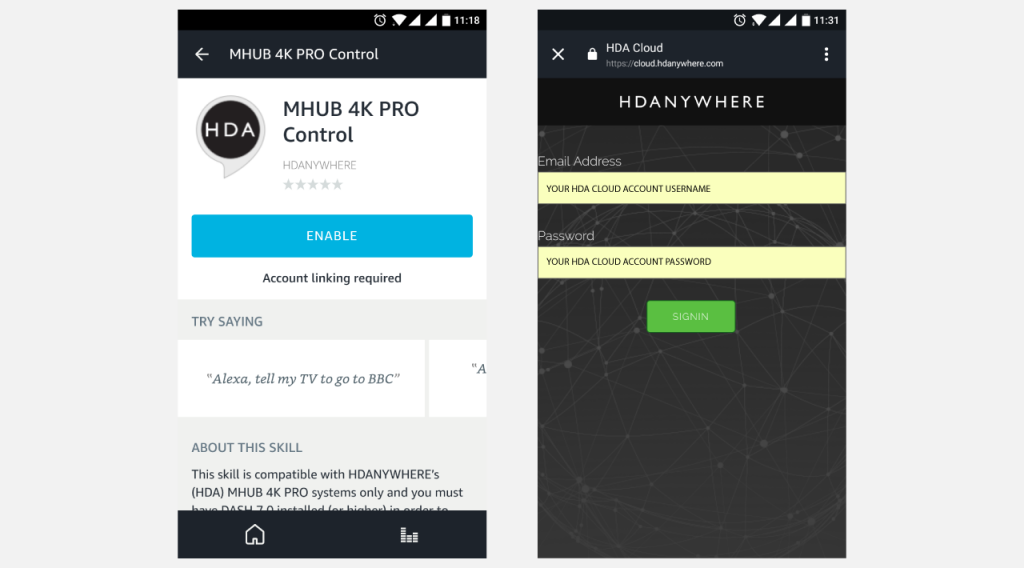
Let’s take the command “Alexa, tell my TV to watch football” as an example.
It might appear like a very simple command but there are a number of things that need to happen in order to watch football! First the TV might need to turn on, but in which room? The volume might need to be set to a desired limit. The correct source input might need to be selected on MHUB and finally that source will need to navigate to the channel hosting the football.
You can configure all those actions in what we call a “Sequence”.
Taking the example above:
Alexa (this wakes up your Amazon Dot/Echo/Show)
tell my TV to… (this invokes HDA’s custom skill)
watch (this is a special function which tells MHUB to start a Sequence)
football (this is your custom name for the Sequence, it can be anything you want)
Inside MHUB-OS we can configure exactly what “football” does.
Now you’re ready to go. Take a look at a full list of commands that you can say to your Echo.
HDANYWHERE(HDA) recommends that every MHUB install goes through its first boot process to ensure that the MHUB is setup correctly. Please follow the quick start guide (inside MHUB packaging) to make sure your MHUB is connected correctly to your source devices, displays and has an active network connection before proceeding.
Yes. You do not need to access MHUB-OS if you don’t want to. MHUB will work distributing video as normal and will be controllable using the included remote controls. Please note that you will not be able to access advanced features such as voice control, the uControl app or build Sequences.
There are two ways to access MOS:
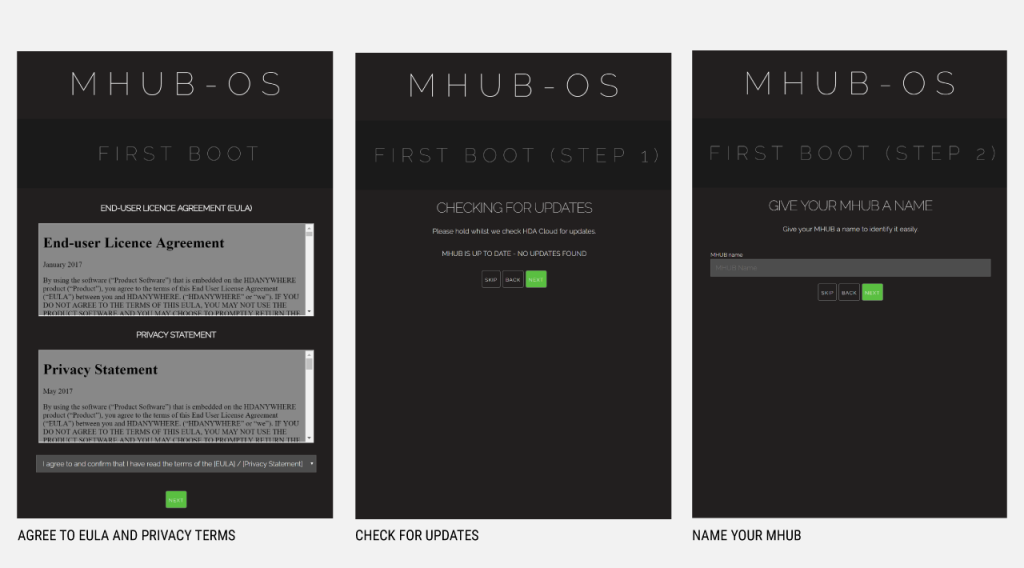
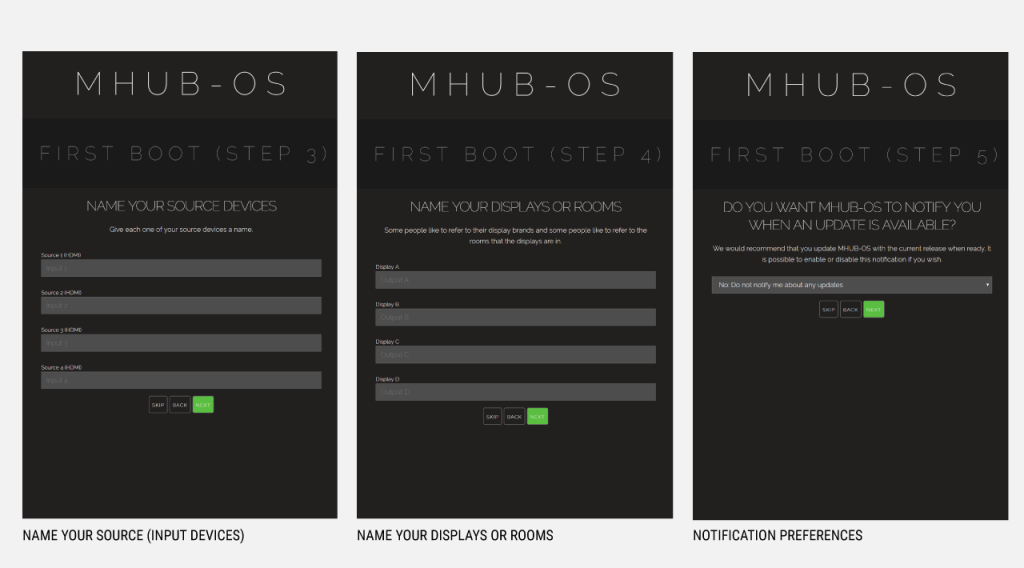
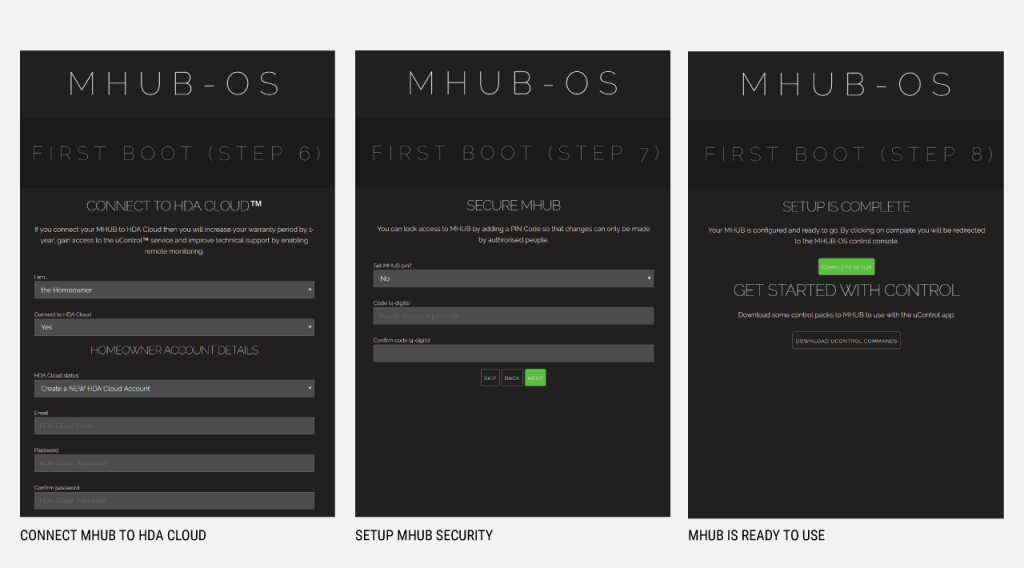
The first boot process for MHUB-OS has remained largely unchanged with the exception of zones.
The slideshow below walks you through the steps within MHUB’s first boot process and how to setup zones to refect the different rooms or areas within you property.
If you wish to configure a stacked system please watch this video – Creating a MHUB stacked system.
You should be able to complete the process in under 10 minutes.
HDANYWHERE(HDA) recommends that every MHUB install goes through its first boot process to ensure that the MHUB is setup correctly.
If you have an update to install then then first boot usually take about 10 minutes. If there is no update you can normally finish the entire process and have an operational MHUB system well within 5-7 minutes.
Yes. You do not need to access MHUB-OS if you don’t want to. But this is only recommended if you intend to control you MHUB via a control system. You will also miss the opportunity to increase your warranty period and open your MHUB to additional features or services.
Yes. You do not need to access MHUB-OS if you don’t want to. But this is only recommended if you intend to control you MHUB via a control system. You will also miss the opportunity to increase your warranty period and open your MHUB to additional features or services.
Yes. You can go all the way back to the update step and correct any incorrect information you entered. Alternatively, you can also access MHUB-OS (after you have completed first boot) and change anything then.
*Before you activate the Alexa Voice Service with your MHUB, make sure Amazon support your territory and version. We cannot guarantee voice services or offer support to those territories not officially supported by Amazon. Check here: https://www.amazon.co.uk/gp/help/customer/display.html?nodeId=202207000
Let’s take the command “Alexa, Turn on football” as an example.
It might appear like a very simple command but there are a number of things that need to happen in order to watch football! First the TV might need to turn on, but in which room? The volume might need to be set to a desired limit. The correct source input might need to be selected on MHUB and finally that source will need to navigate to the channel hosting the football.
You can configure all those actions in what we call a “Sequence”.
Taking the example above:
Alexa (this wakes up your Amazon Dot/Echo/Show)
Turn on… (this invokes the smarthome skill)
football (this is your custom name for the Sequence, it can be anything you want)
Inside MHUB-OS we can configure exactly what “football” does.
Read more about Sequences and Scheduling.
Now you’re ready to go. Take a look at a full list of commands that you can say to your Echo.
Do you have the correct guide?, please be aware this guide is for legacy systems.
When an MHUB video device is paired with an MHUB AUDIO device we call that a Stack. Stacks can contain up to 4 MHUB products with 1 Master device and 3 slave devices. Master devices can be either VIDEO or AUDIO, slaves are AUDIO only.
Below are a few examples of stacked systems.
To create a stacked system you will need to download uControl (available on iOS and Android app stores), and your MHUB hardware will need to be powered on and connected to your network.
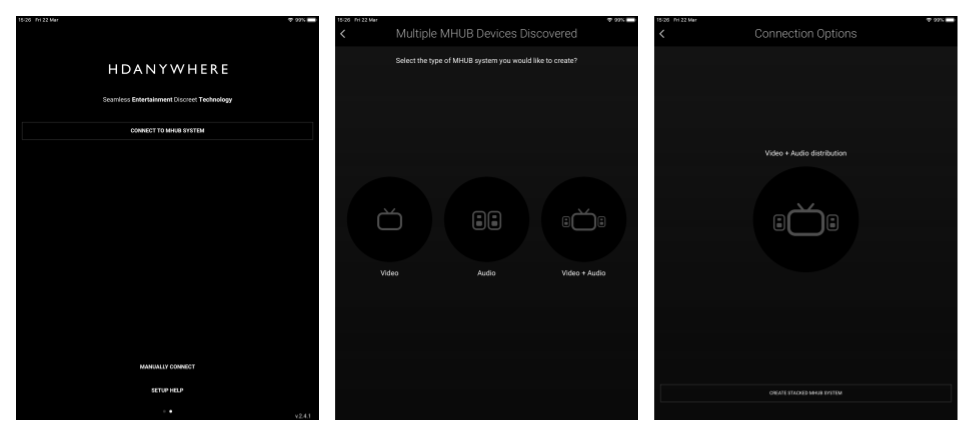
Open the uControl app and select ‘Connect to MHUB System‘. The following screens will be displayed. uControl will search your network for all MHUB devices. To create a stack select ‘Video + Audio‘
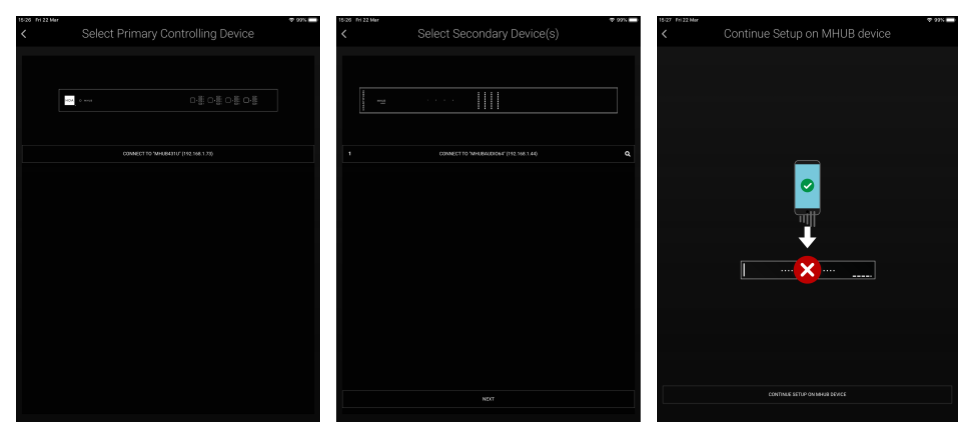
uControl will now ask you to select first a master device, then upto 3 slave devices. (The order in which you select the slave devices will be their order in the stack. this is indicated by a numeric value on the left side of the device button. If you are unsure which MHUB AUDIO device is which you can simply click on the Identify button at the side of each device which will start the HDA and AUDIO logo flashing.)
Once this is done you will be taken to MHUB-OS where the first boot Process will be run.
MHUB FIRST BOOT PROCESS(link)