Category: uOS

  • ADB Control Packs

    With uOS 11.08 support for ADB control of android devices is now included.

    Supported Devices

    • Amazon FireTV
    • Nvidia Shield
    • Android/Google Powered TV’s

    To enable ADB control, ensure the device you want to control is powered on and awake. You will need to know the device’s IP address.

    Step 1 – Enabling Developer Options

    To be able to use ADB control you will need to enable Developer Mode.

    For Amazon devices, follow the instructions here – Enabling Developer Tools

    For other devices –

    1. Open the menu and go to Device Preferences > About.
    2. Scroll down until Build is highlighted, then tap ok several times. You will get an onscreen message that developer mode has been enabled.
    3. Click back, scroll to the bottom of the menu you will see { } Developer Options.
    4. Open the menu and enable developer options
    5. Scroll down to Enable network debugging

    Step 2 – Installing the ADB pack.

    In the example below we will install the pack for FireTV.

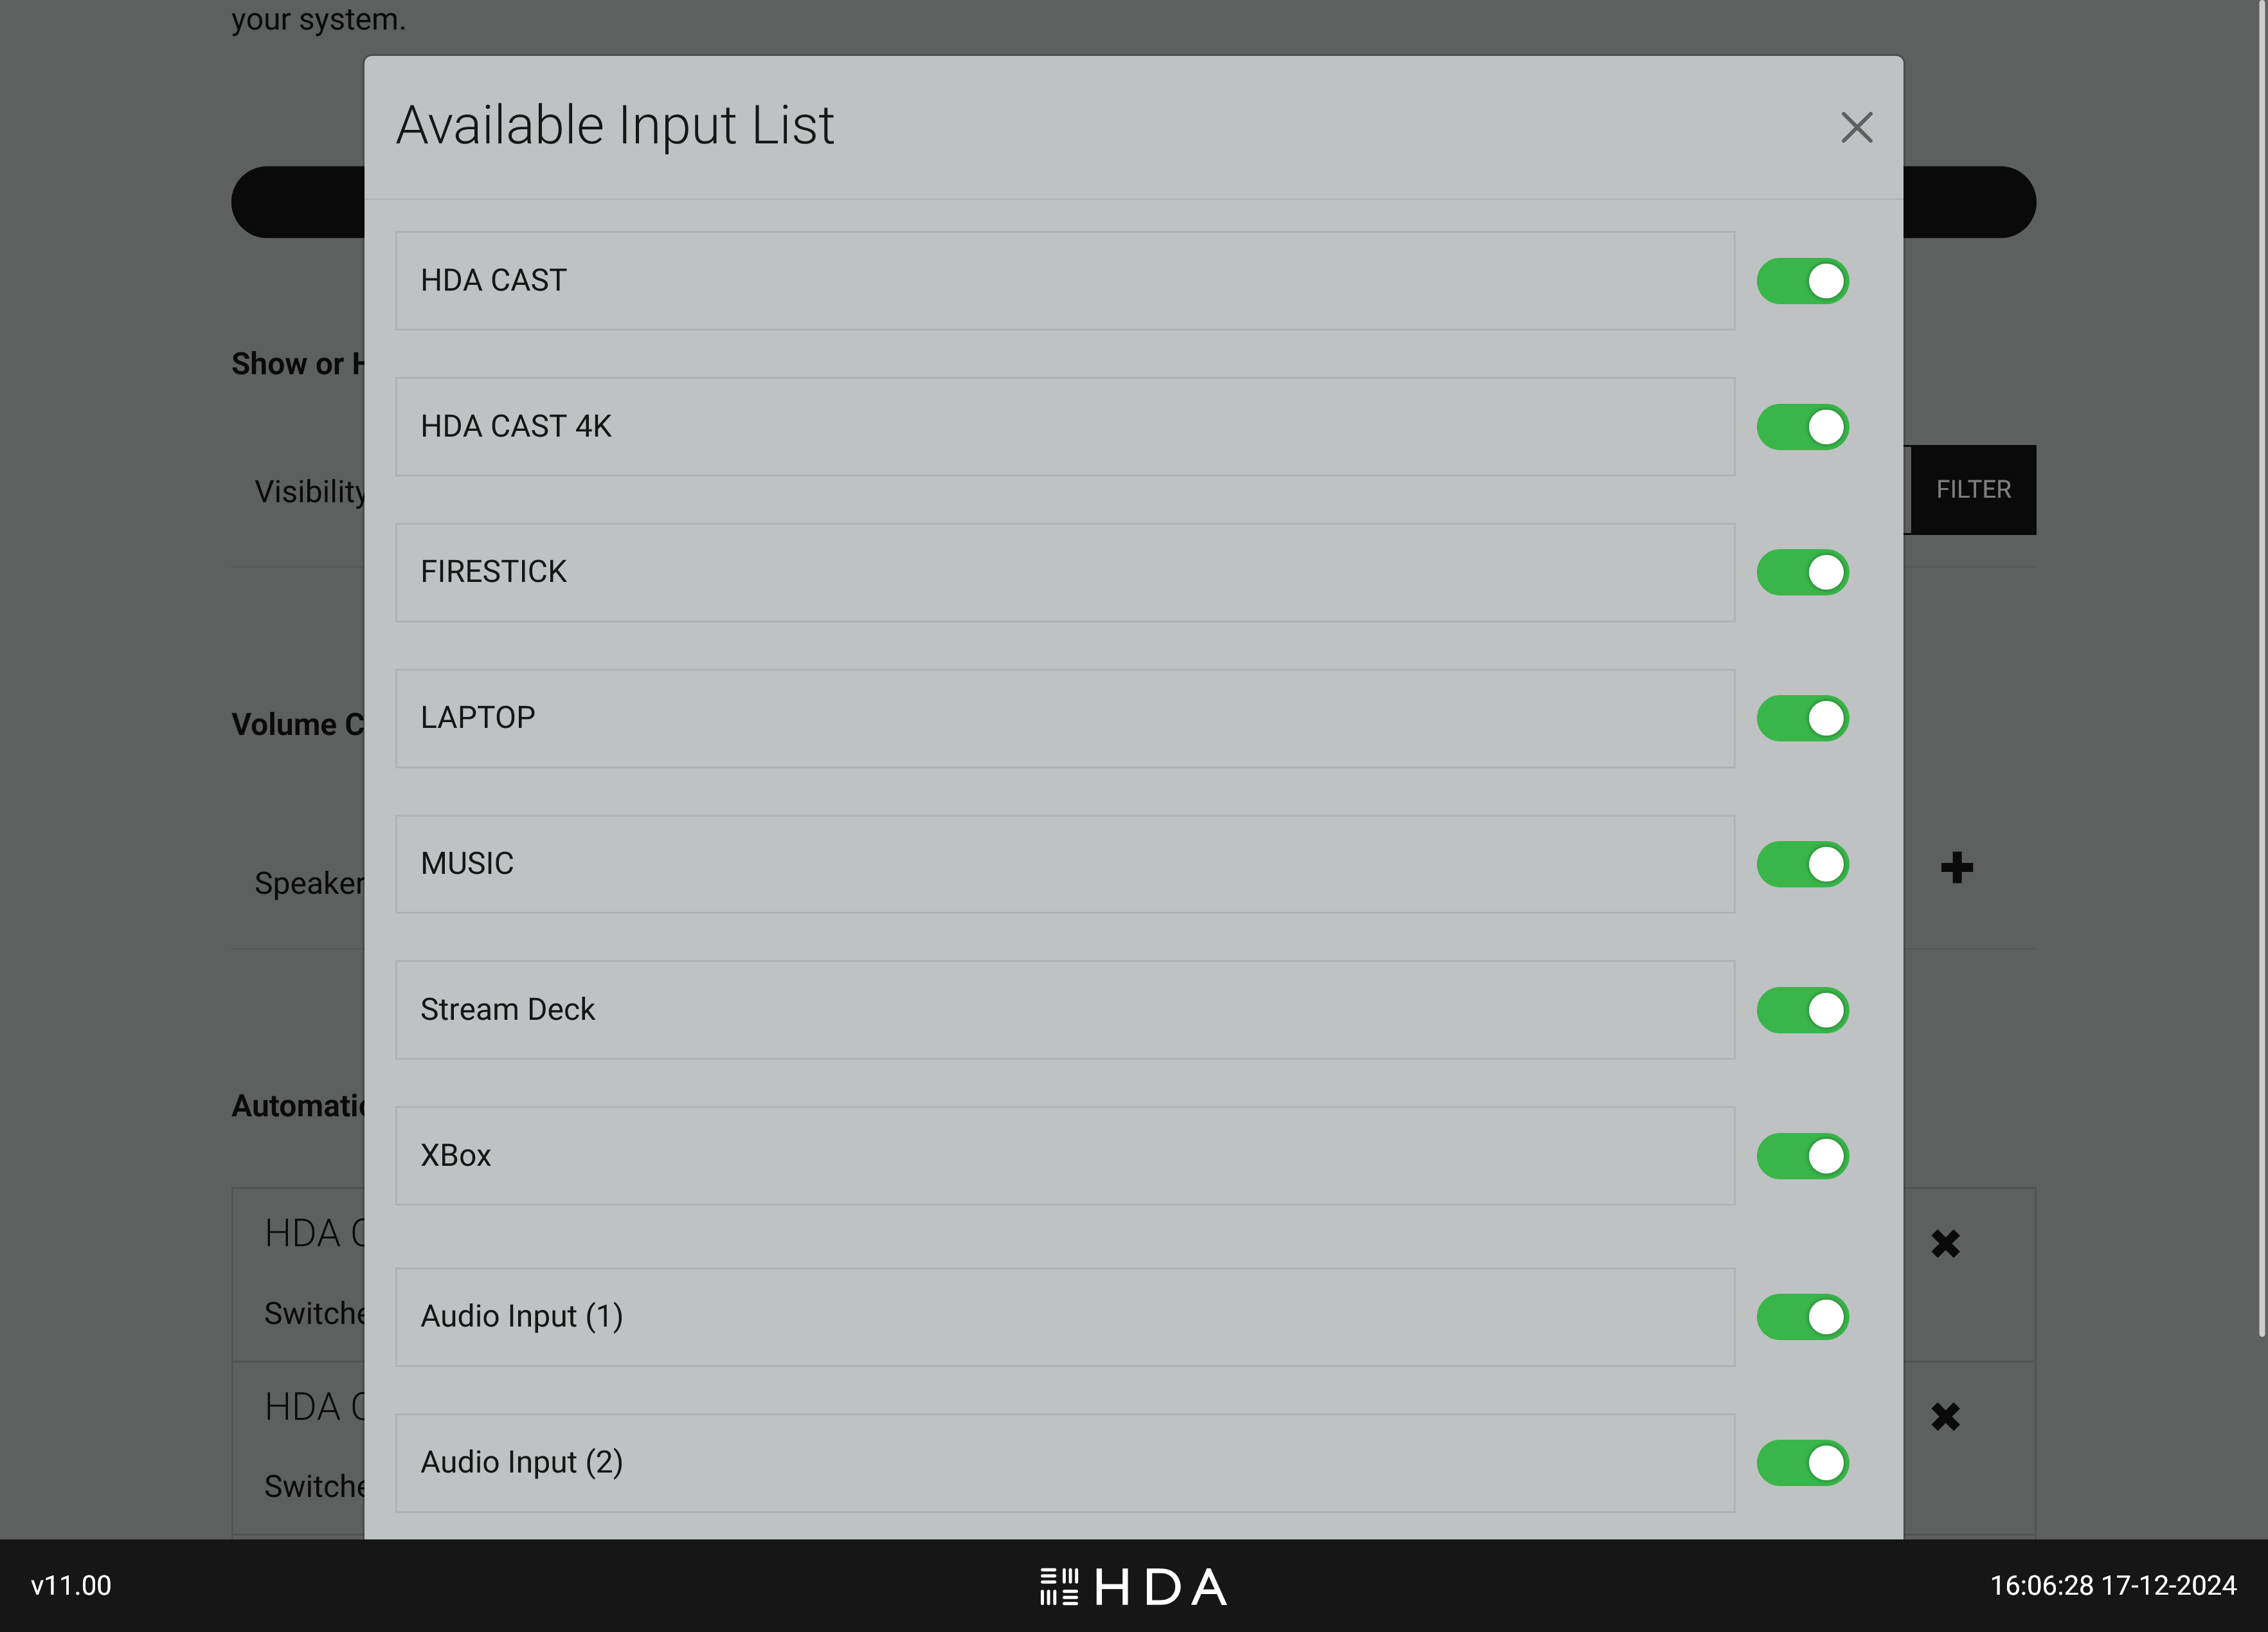
    2a – Select the pack


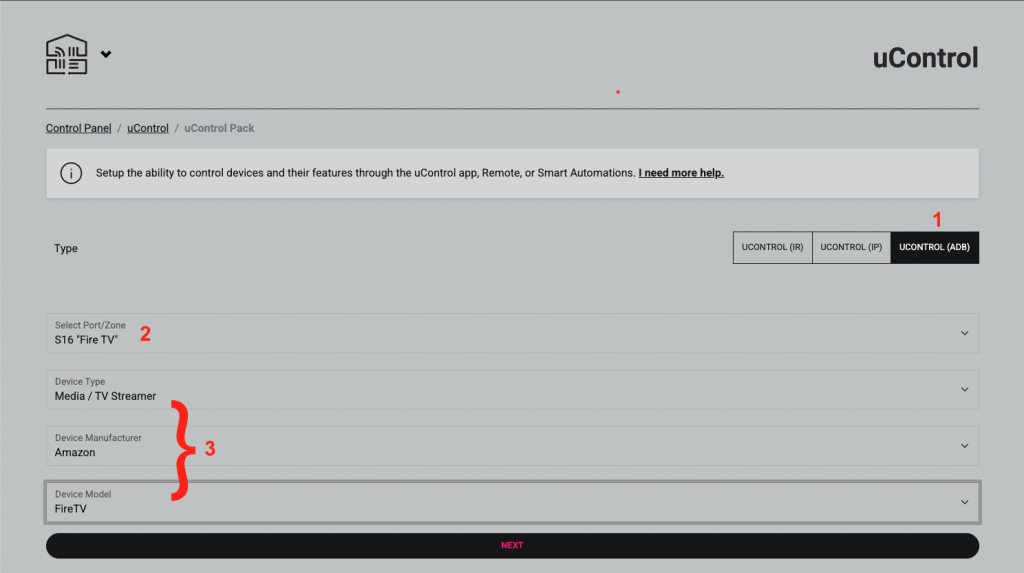
    1. Select uControl (ADB)
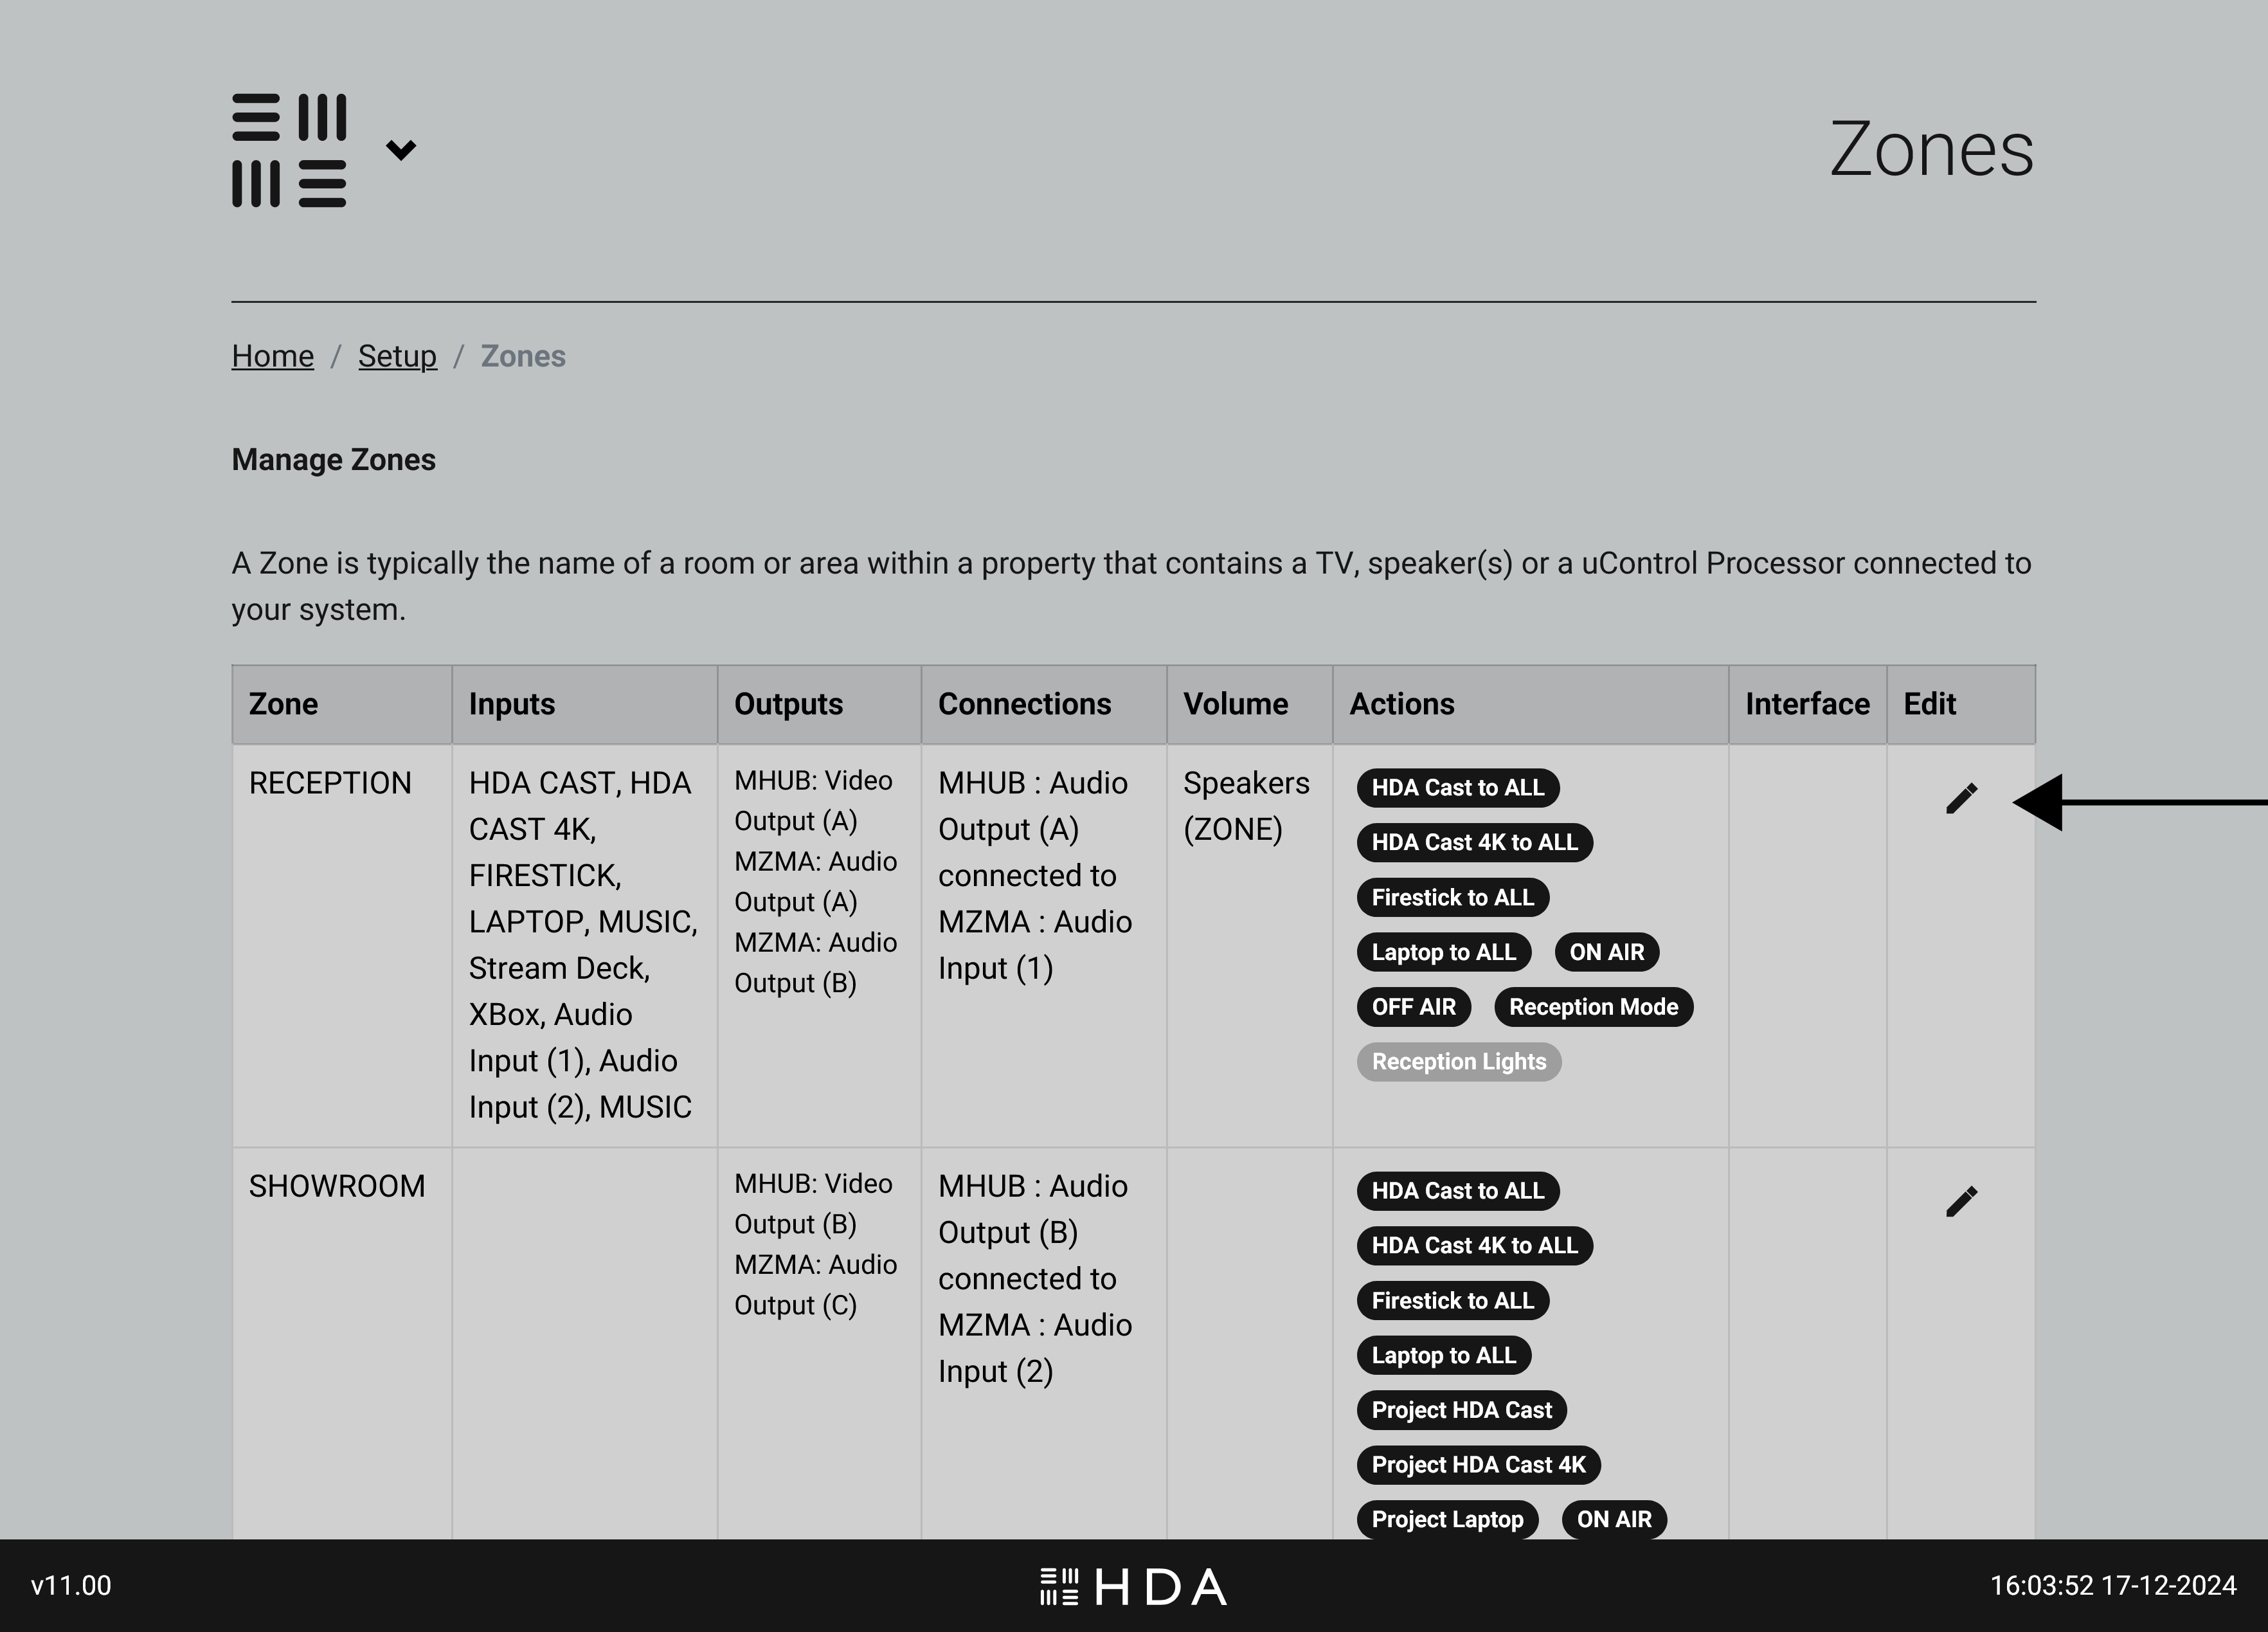
    2. Select the port or zone when the pack will be installed
    3. Select the device

    2b – Test and confirm installation


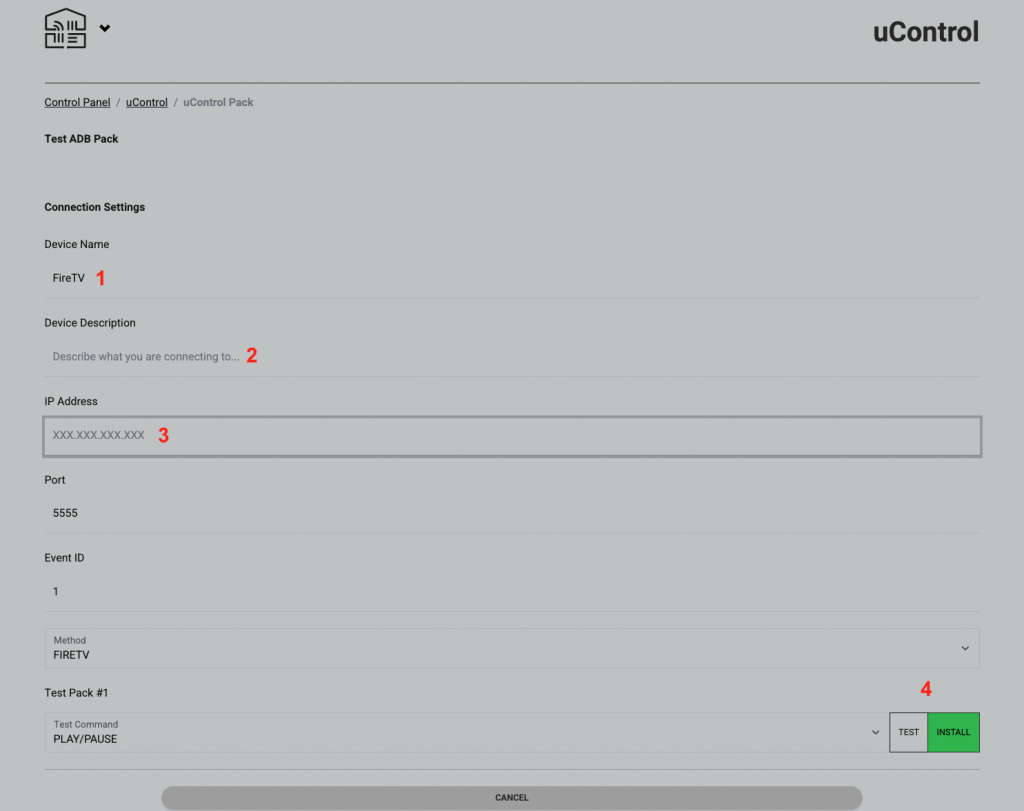
    1. Use the default name or enter a custom one. This will be displayed on the uControl app and remote
    2. Describe what you are connecting to, this field is not compulsary to install the pack
    3. Enter the IP address in the fireTV in the format
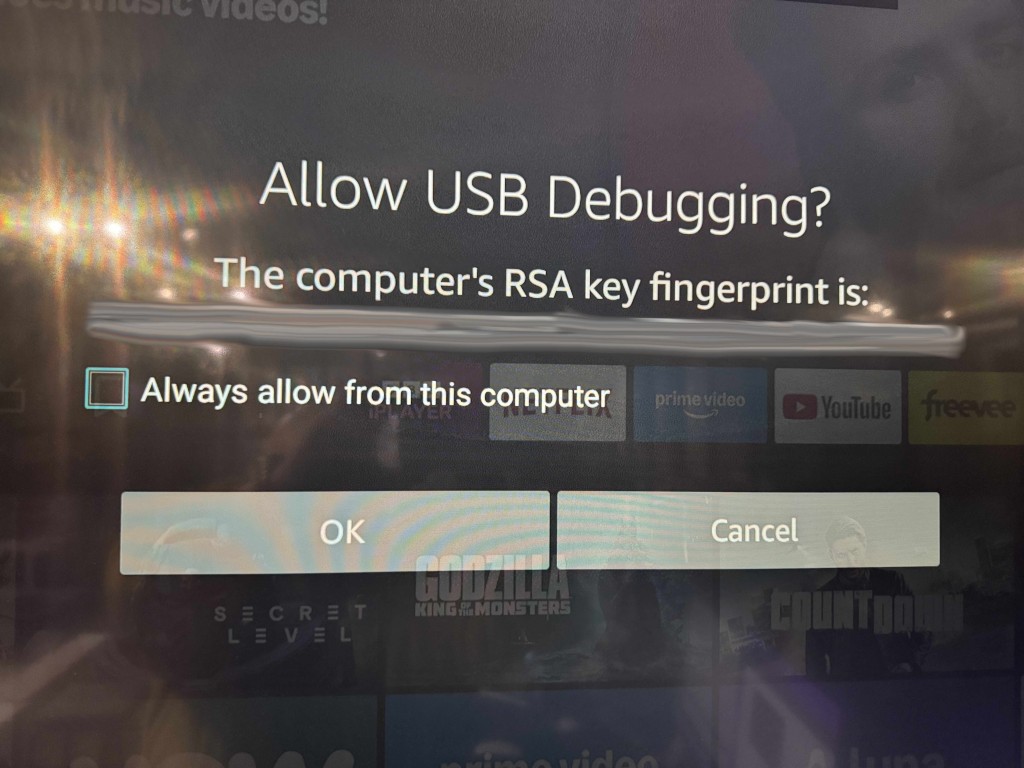
 xxx.xxx.xxx.xxx For example, 192.168.0.25.
    4. IMPORTANT – the first time to connect to the device you will get an onscreen message like the one shown below. Please select always allow then click ok.
    5. Once tested, click install and the pack is ready to use

  • Update your system to uOS 11

    Update to uOS 11

    Please read this first before updating your system:

    This guide will assist you with updating your MHUB, MZMA or Zone Processor to uControl OS (uOS) 11.

    The update will enable support for both the new uControl App and the uControl Remote which can be configured after completing the steps in this support post.

    It is strongly recommended that you read this guide carefully before you start the update process.

    15 minutes (approximately). Difficulty: Easy.

    What this guide will cover:

    Before you start the update, check that:

    • Your HDA controller is currently running uOS (10.XX)
    • You have uControl 2016 app installed
    • Your HDA controller and uControl 2016 app have access to the Internet
    • All HDA devices and uControl 2016 app are visible on your network.
    • A note of all HDA device IPs on your network, or the ability to scan for them using an app like Fing.
    • IMPORTANT:Once your system has updated, uOS will need some additional configuration applied before the new uControl app or uControl Remote will start to work.

    STACKED SYSTEMS:
    It is recommended that every device in your stacked system is updated to uOS 11. Start by updating your master controller, followed by each MHUB or MZMA in your stack. If parts of your stacked system feature older MHUB’s or MHUB Audio systems running MHUB-OS then you will not need to update these.


    1. Load uControl 2016 app to start the update process.

    Load the uControl 2016 app and follow the instructions in this guide to update your system(s). Ensure that you complete this process for all HDA devices which can be upgraded to uOS 11 (see checklist above). Please note that any MHUB operating on MHUB-OS (black background colour) can not be updated to uOS 11.

    GUIDE: How to update your MHUB or HDA Device

    2. Check that your HDA system has updated to uOS 11.

    After the update completes, check uOS to confirm that it is running uOS 11 which can be done by visiting the IP address of your HDA device. Repeat this step for each HDA device on your network if you are operating a stacked system.

    uOS Setup Page
    Figure 1: Visit uOS and navigate to the “Setup” page to find your uOS version.
    Check if uOS has updated to version 11
    Figure 2: The software version will appear in the top 1/3 of the page under “uOS version”. The current version can also be seen on the footer of the page.

    If you are using a control system (Crestron, Control4, Savant, URC etc) then you’re complete at this stage. If you plan to use a HDA interface like uControl Remote or uControl app to control your system then continue to Step 3 below.

    3. You’re almost there! Prepare uOS for uControl app and uControl Remote.

    You need to make two small changes in uOS to make ensure that the new uControl app or uControl Remote will work when you are ready to configure them.

    Return back to the uOS “Setup” page and scroll down until you see the “Manage Zones” button, then select it.

    uOS Setup Page
    Figure 3: Go to uOS “Setup” page and scroll down the page until you see the “Manage Zones” option.

    A page will load with a table that lists all the Zones you have defined in uOS. Select the Zone that you wish to edit by tapping on the edit button (pencil icon)

    uOS Setup Page
    Figure 4: Tap on the Zone that you wish to update.

    You will now see all information pertaining to that particular zone, you will need to make two small changes for every zone in your system..

    uOS Setup Page
    Figure 5: The newly updated Manage Zones interface which summarises all zone information in one place.

    Change #1: Choose your video & audio source visibility.

    uOS 11 gives you the ability to show or hide any input that is connected to your HDA system. You can choose to show all inputs or filter them so that only AV inputs you select are visible in that zone. If you’re unsure or in a rush you can choose “Select All” and edit this option later.

    uOS Setup Page
    Figure 6:Choose to show all inputs in that zone or filter them so only the ones you want are visiable in uControl app and uControl Remote.

    If you select “Filter” a list of all inputs that your HDA system is controlling will appear with a green coloured switch, here you can choose to turn that input on or off inside that zone.

    uOS Setup Page
    Figure 7:If you have chosen to filter inputs in your desired zone then you can specify what inputs are available and what are not. This change will apply throughout the system.

    Change #2: Set the default volume for every zone.

    New to uOS 11 is a declaration of what device is controlling the volume. This is a new setting and will ensure that both uControl app and uControl Remote’s default volume keys are mapped to the device you choose here.

    uOS Setup Page
    Figure 8:Click on the “+” icon to select the device controlling the volume in your zone.
    uOS Setup Page
    Figure 9:uOS will display all available devices that are capable of controlling volume in your zone..

    IMPORTANT:
    You must repeat this step for every zone in your system if you wish to use the new uControl App or uControl Remote. If you fail to do this step uControl App will not work correctly and you may experience problems when configuring uControl Remote.

    Your HDA system is now ready to use!

    Congratulations, your HDA system is now updated and ready to work with the new uControl app and uControl Remote.